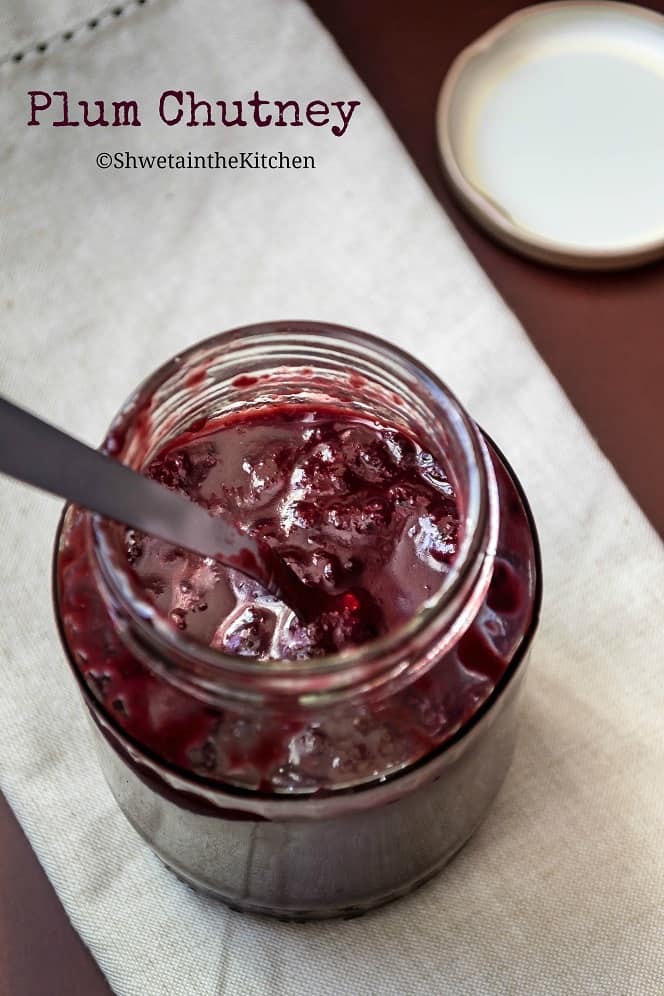
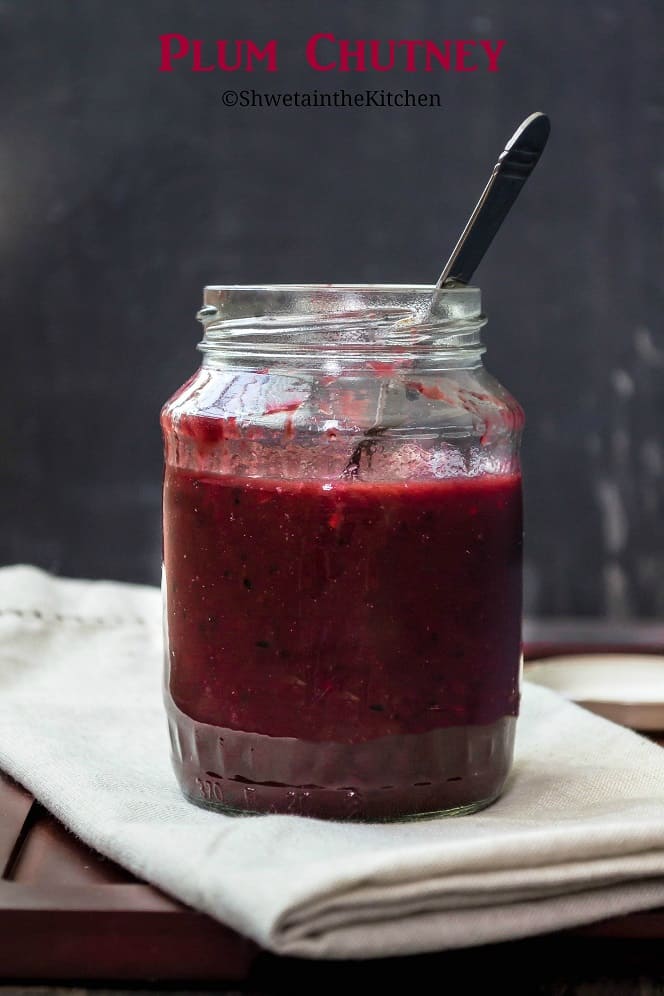
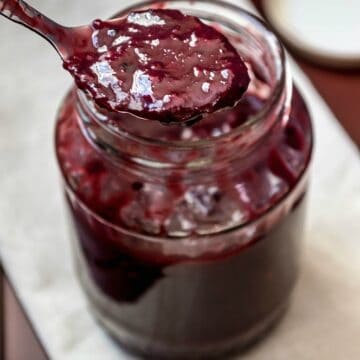
This Indian plum chutney is a spicy and tangy condiment made with fresh plums and few spices. Its absolutely easy to make, delicious, vegan, and gluten-free.
Want to save this recipe?
It was a couple of years back when I had first tried Plum chutney with an intention to use up the plums sitting on my kitchen counter.
I was looking for something savory and not sweet (like a jam or dessert) that's when I thought why not make a chutney since my Green Chutney stock was anyways over.
I used my Tomato Chutney Recipe as the base to make this plum chutney and it turned out so yummy that had to share it with you all.
This fresh Plum Chutney
- spicy, tangy with hints of sweet
- easy and quick to make
- on the stovetop or in Instant Pot
- requires no canning or preservatives
- very customizable
- a great alternative to regular chutneys
Plum is a summer fruit also known as Aloo Bukhara or Aalucha or even Ber in Hindi. It has thin, tart skin and sweet flesh and is available in few colors.
Plums are nutritious and linked to many health benefits to name a few rich source of vitamins, minerals, fiber, and antioxidants. They also known to aid digestion and improve the immune system.
Plum jam seems to be more popular than a chutney but honestly, I'm not a jam fan and would prefer my savory condiment any day.
Bet you would too after you give this plum chutney recipe or Aloo Bhukhara chutney a try!!
Recipe Ingredients
- Plums: Use black ripe plums that are naturally sweet which have tart dark skin with red sweet flesh inside.
- Oil: Use non-flavored oil like canola, vegetable, and sunflower oil for tadka.
- Red chilies: I use whole Kashmiri red chilies and some chili powder for a kick of heat. Either one can be used too. Chili powder can be replaced with paprika or cayenne too.
- Spices: Mustard seeds (optional), fenugreek seeds (methi dana), curry leaves, fennel seeds (saunf), nigella seeds (kalonji or black caraway), cumin seeds (jeera), freshly grated ginger, salt, and pepper. I know these may feel like a lot but if you don't have some of it, you can still make it.
- For sourness: incase the plums are less tart, add some tamarind pulp or lemon juice depending on how tangy you prefer your chutney.
- For Sweetness - to balance everything add sugar or jaggery. skip if plums are sweet.
Step by Step Instructions
To make plum chutney on the stovetop
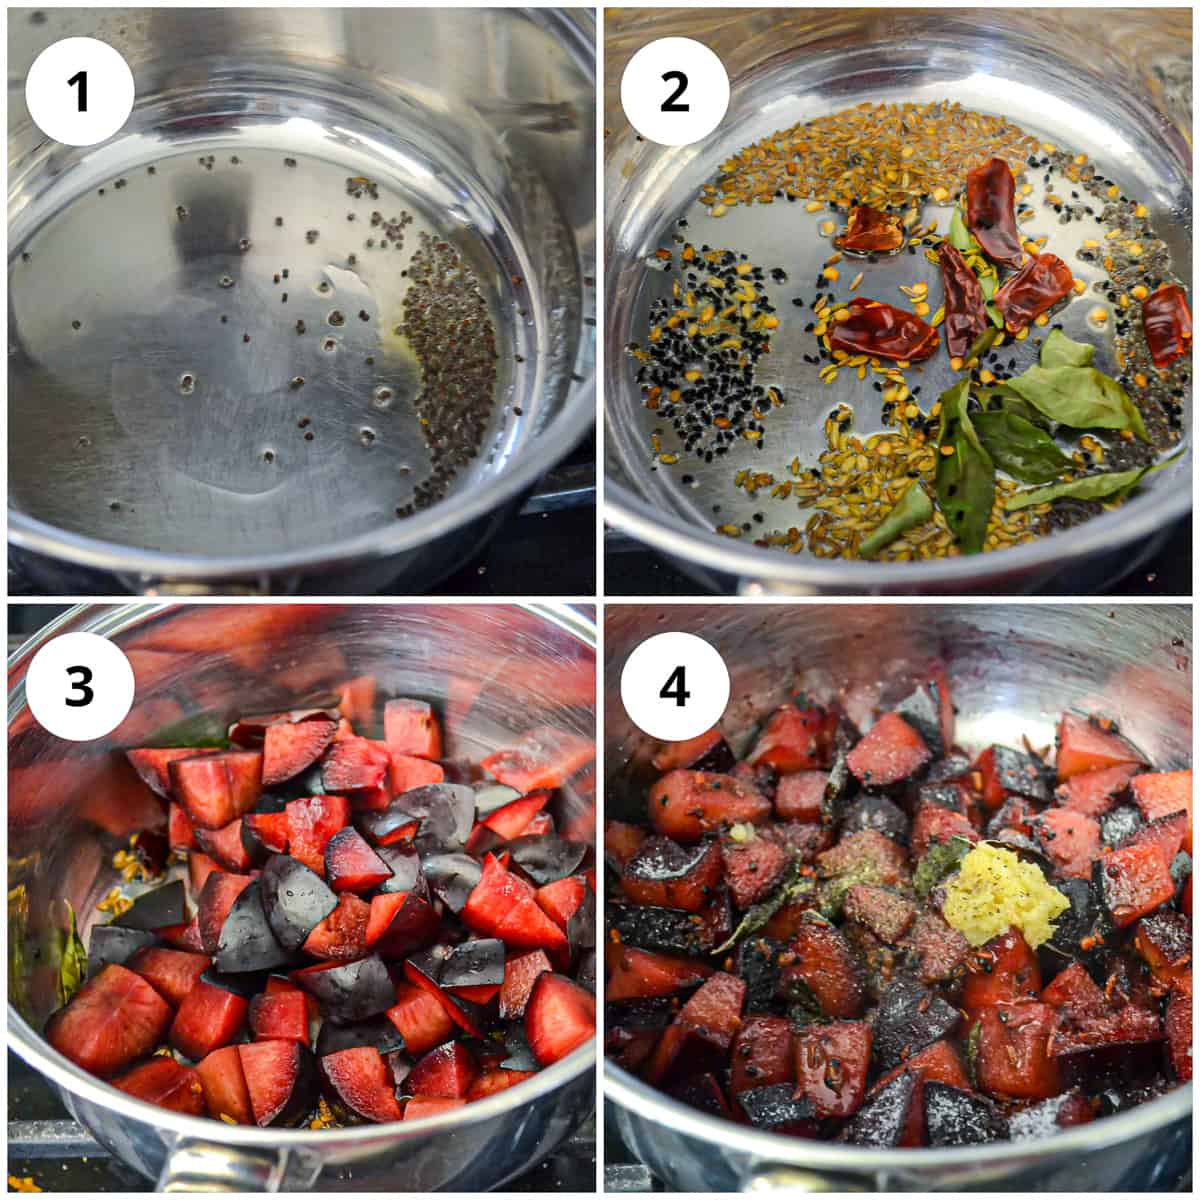
1 - In a pan heat oil and once hot add the mustard seeds.
2 - Once they begin to splutter add the cumin seeds, nigella seeds, fennel seeds, fenugreek seeds, dry red chillies and curry leaves.
3 - Give it a quick stir and then add the chopped plums. Cover and cook on medium heat till the plums start to get soft.
4 - Now add the salt, pepper and ginger and mix well. Add ¼ cup of water if you feel the mixture is sticking to the pan. Now cover and cook on medium low till plums get nice and soft.
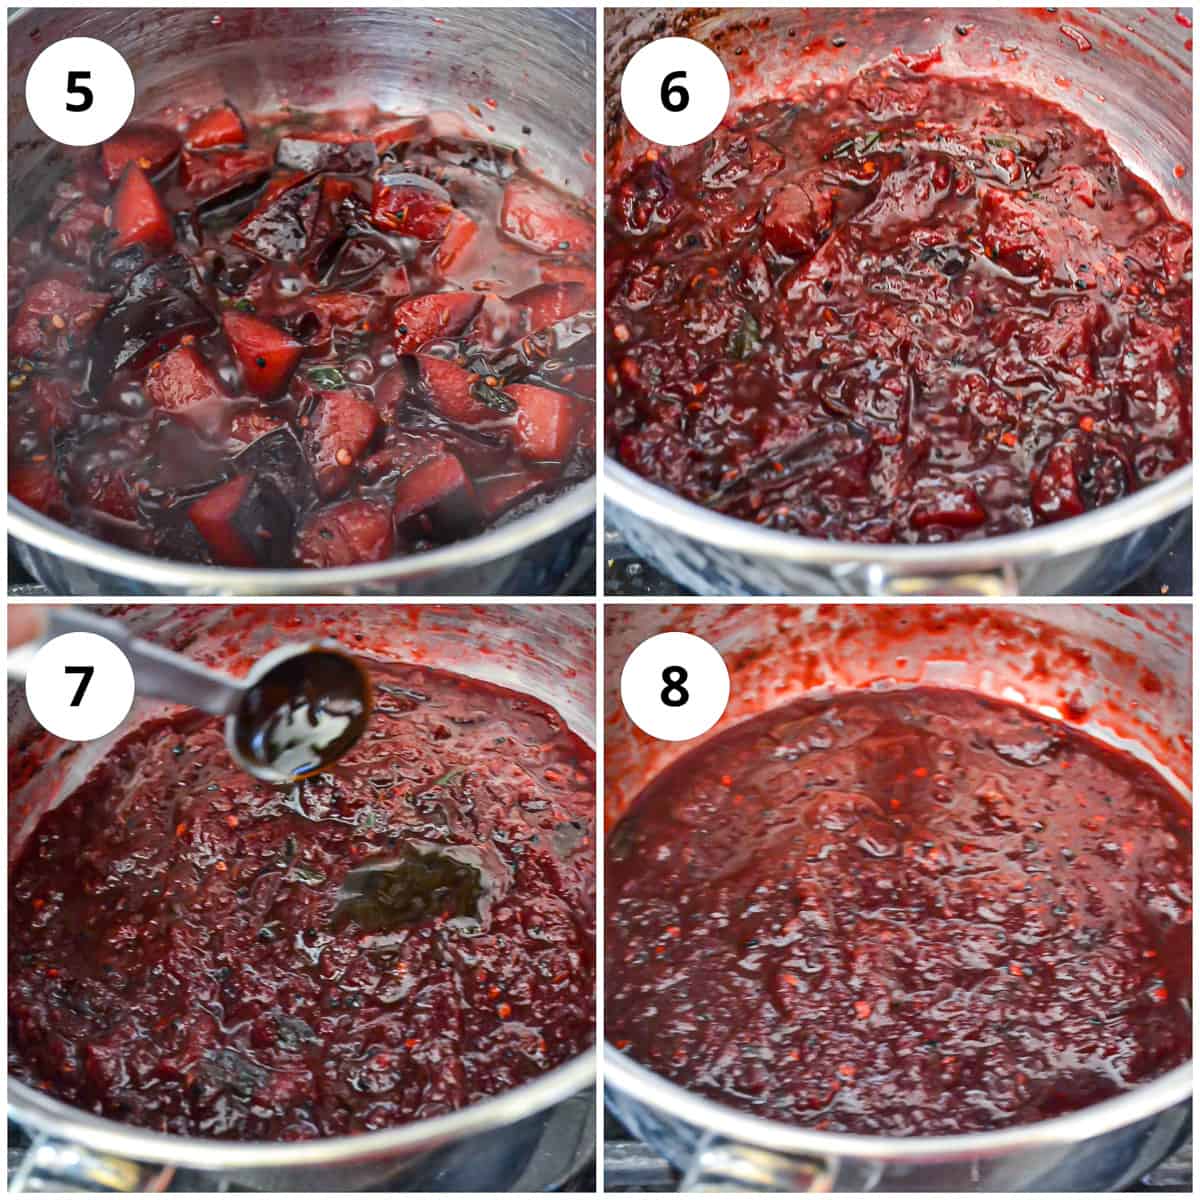
5 - Keep mixing intermittently and breaking/mashing the plums with the spoon to make the mixture more homogeneous.
6 - Add tablespoon by tablespoon water as required if you feel the mixture is sticking but avoid adding too much as it will make the chutney watery.
7 - Once the mixture looks reduced and almost done, do a quick taste check and add the tamarind pulp and jaggery based on how sweet or sour you like.
8 - Give it a quick stir and cook for about 1-2 mins and it done. For a smoother chutney, blend it in a blender or hand blender and strain. I usually blend but don't strain.
To make plum chutney in Instant Pot
Love the convenience Instant pot offers and you don't have to babysit the chutney while it's cooking. This has been my go-to method ever since I got it.
Start Instant pot on saute mode and add oil to it. Once hot, add in the spices and let them splutter. Add in the chopped plums with ⅛-1/4 cup of water. Plums will release some water of their own.
Close the lid with vent to sealing and cook on manual high for 2 mins followed by a release after 10 mins. The natural release works as well.
Open the lid, at this point, the plums will be soft enough to be mashed with a spoon or you can puree them using a hand blender or transfer to a blender.
This step is optional but if you prefer a smooth chutney, strain it and then add back to pot. I usually don't strain mine.
Start the instant pot back on saute mode, give it a taste and stir in the tamrind pulp or lemon juice and sugar or jaggery to adjust the tang and sweet flavors.
Cook the chutney for 5 mins stirring intermittently until desired thickness is reached. Siwtch off, the chuteny will thicken slightly after cooling.
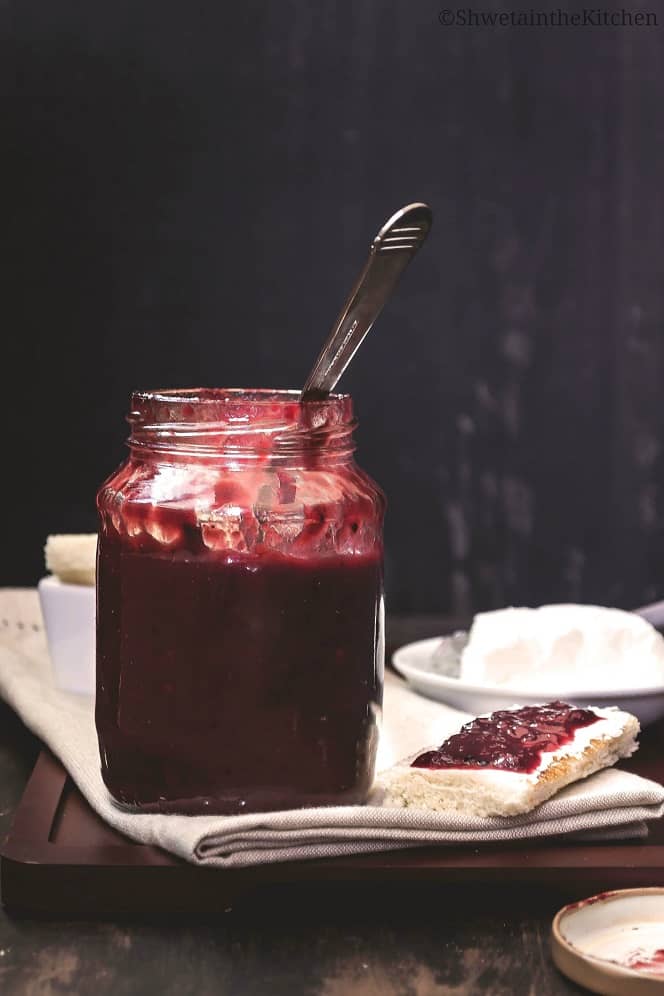
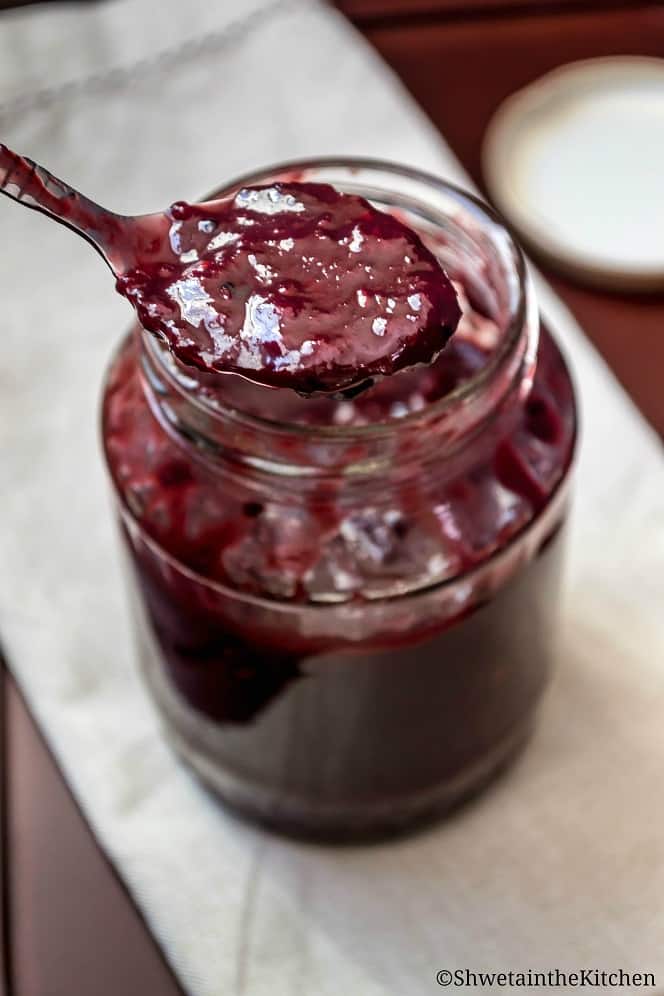
Our tangy and spicy Plum Chutney is ready. Use this condiment to spice up or add a new dimension to any meal. Enjoy!!
How to store chutney
Allow the chutney to cool completely before storing it in a clean dry airtight container.
Refrigerate and consume with 1-2 weeks. For longer use, you can either use the canning method or freeze them.
I prefer to freeze mine in 4 oz glass containers or ice cube trays. Once frozen, transfer ice-cubes to ziplock bags and put them back in the freezer. Thaw overnight in refrigerator and use.
Fun ways to use plum chutney
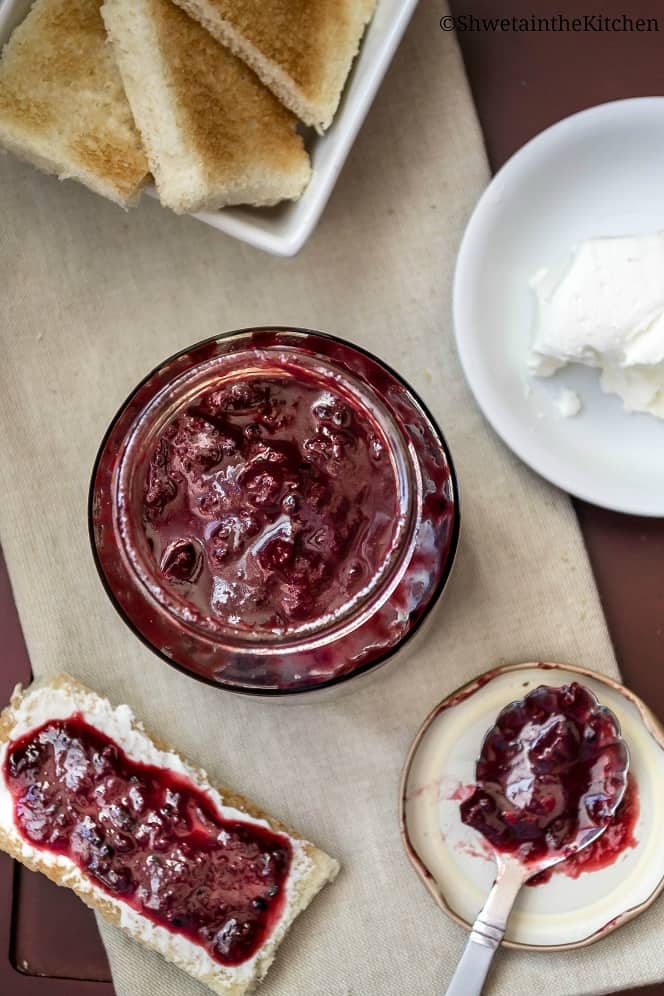
- As a spread with wraps, sandwiches, toasts, burgers, or simply with bread and cream cheese for breakfasts
- Excellent addition to the cheeseboards. Adds a great dimension.
- Use it as a dip with your chip just as is or mixed with cream cheese or sour cream.
- My favorite way to use it with simple Dal Rice, papad, and use this chutney in place of a pickle.

Recipe Notes and Tips
- Use ripe plums with darker skin, they are naturally sweet.
- Adjust the whole spice seeds to preference and availability. The chutney still comes out delicious!!
- Adjust sweet and sour taste to preference.
- Use a tall pot to avoid the mess with spluttering while the chutney boils.
- Store in a clean airtight jar in the refrigerator for 1-2 weeks or freeze for longer use (2-3 months).
Frequently Asked Questions
Yes, frozen plums can be used, just thaw them before using. The quantity may vary so adjust accordingly.
I would advise not to skin the plums as the tartness from the skin adds a great dimension to the chutney.
More Easy Condiments
Hope you enjoy this Plum Chutney Recipe!! If you give this recipe a try, please rate by clicking stars ⭐️ in the recipe card. Thank you ❤️ ! You can also follow me on Facebook | Instagram to see what's cooking in my kitchen!!
Recipe Card
Plum Chutney
Ingredients
- 4-5 plums cored and roughly chopped, approximately 2 cups
- 1 tablespoon oil canola or vegetable
- 2 dry red chillies broken in half each
- ¼ teaspoon fenugreek seeds methi dana
- 7-8 curry leaves optional
- ¼ teaspoon mustard seeds rai
- ½ teaspoon fennel seeds saunf
- ½ teaspoon cumin seeds zeera
- ¼ teaspoon nigella kalonji, black caraway seeds
- 1 teaspoon ginger minced
- ½ teaspoon red chilli powder optional, adjust to taste
- ⅛ teaspoon black pepper
- 1 teaspoon salt adjust to taste
- 1 teaspoon tamarind pulp or lemon juice, adjust to taste
- 1 teaspoon sugar or jaggery, adjust to taste
Want to save this recipe?
Instructions
Stove top Instructions
- In a pan heat oil and once hot add the mustard seeds. Once they begin to splutter add the cumin seeds, nigella seeds, fennel seeds, fenugreek seeds, dry red chillies and curry leaves. Give it a quick stir and then add the chopped plums.
- Cover and cook on medium heat till the plums start to get soft. Now add the salt, pepper and ginger paste and mix well. Add ¼ cup of water if you feel the mixture is sticking to the pan. Now cover and cook on medium low till plums get nice and soft.
- Keep mixing intermittently and breaking/mashing the plums with the spoon to make the mixture more homogeneous.
- Add tablespoon by tablespoon water as required if you feel the mixture is sticking but avoid adding too much as it will make the chutney watery.
- Once the mixture looks reduced and almost done add the tamarind pulp. Give it a quick stir and cook for about 1-2 mins and it done.
- Allow to cool completely before storing it in a airtight container in refrigerator. Notes:
Instant Pot Instructions
- Start Instant pot on saute mode (normal) and add oil to it. Once hot, add in the spices and let them splutter.
- Close the lid with vent to sealing and cook on manual high for 2 mins followed by a release after 10 mins. The natural release works as well.
- Open the lid, at this point, the plums will be soft enough to be mashed with a spoon or you can puree them using a hand blender or transfer to a blender.This step is optional but if you prefer a smooth chutney, strain it and then add back to pot. I usually don't strain mine.
- Start the instant pot back on saute mode, give it a taste and stir in the tamarind pulp and sugar o adjust the tang and sweetness.
- Cook the chutney for 5 mins stirring intermittently until the desired thickness is reached. Switch off, the chutney will thicken slightly after cooling.
- Our Indian spiced Plum Chutney is ready. Use this condiment to spice up or add a new dimension to any meal. Enjoy!!
Notes
- Use ripe plums with darker skin, they are naturally sweet.
- Adjust the whole spice seeds to preference and availability. The chutney still comes out delicious!!
- Adjust sweet and sour taste to preference.
- Use a tall pot to avoid the mess with spluttering while the chutney boils.
- Store in a clean airtight jar in the refrigerator for 1-2 weeks or freeze for longer use (2-3 months).

Angel says
Hello
Can I just use the powder option of these
spices and not the seed ?
Shweta Arora says
Hi, sure, you can use as available. Thanks!
c volpi says
great chutney, quick and easy, wish you had a print option for this menu given the amount of photos... old school here...
Shweta Arora says
hi, Thanks for the feedback. I've now added the print option. Hope this helps!
Gabriel says
This recipe was delicious! Thanks for sharing!
Shweta Arora says
Thank you Gabriel!! So glad you liked it!!
Rimmy says
Delicious served with roast pork. I would recommend adding pepper to taste.
Shweta Arora says
Thank you! So glad you liked it!! Pepper would be nice!
Dianne says
Lovely chutney had some today on fresh scones with cream cheese. So good!!
Shweta Arora says
Yum, that sounds lovely! Thanks for trying!!