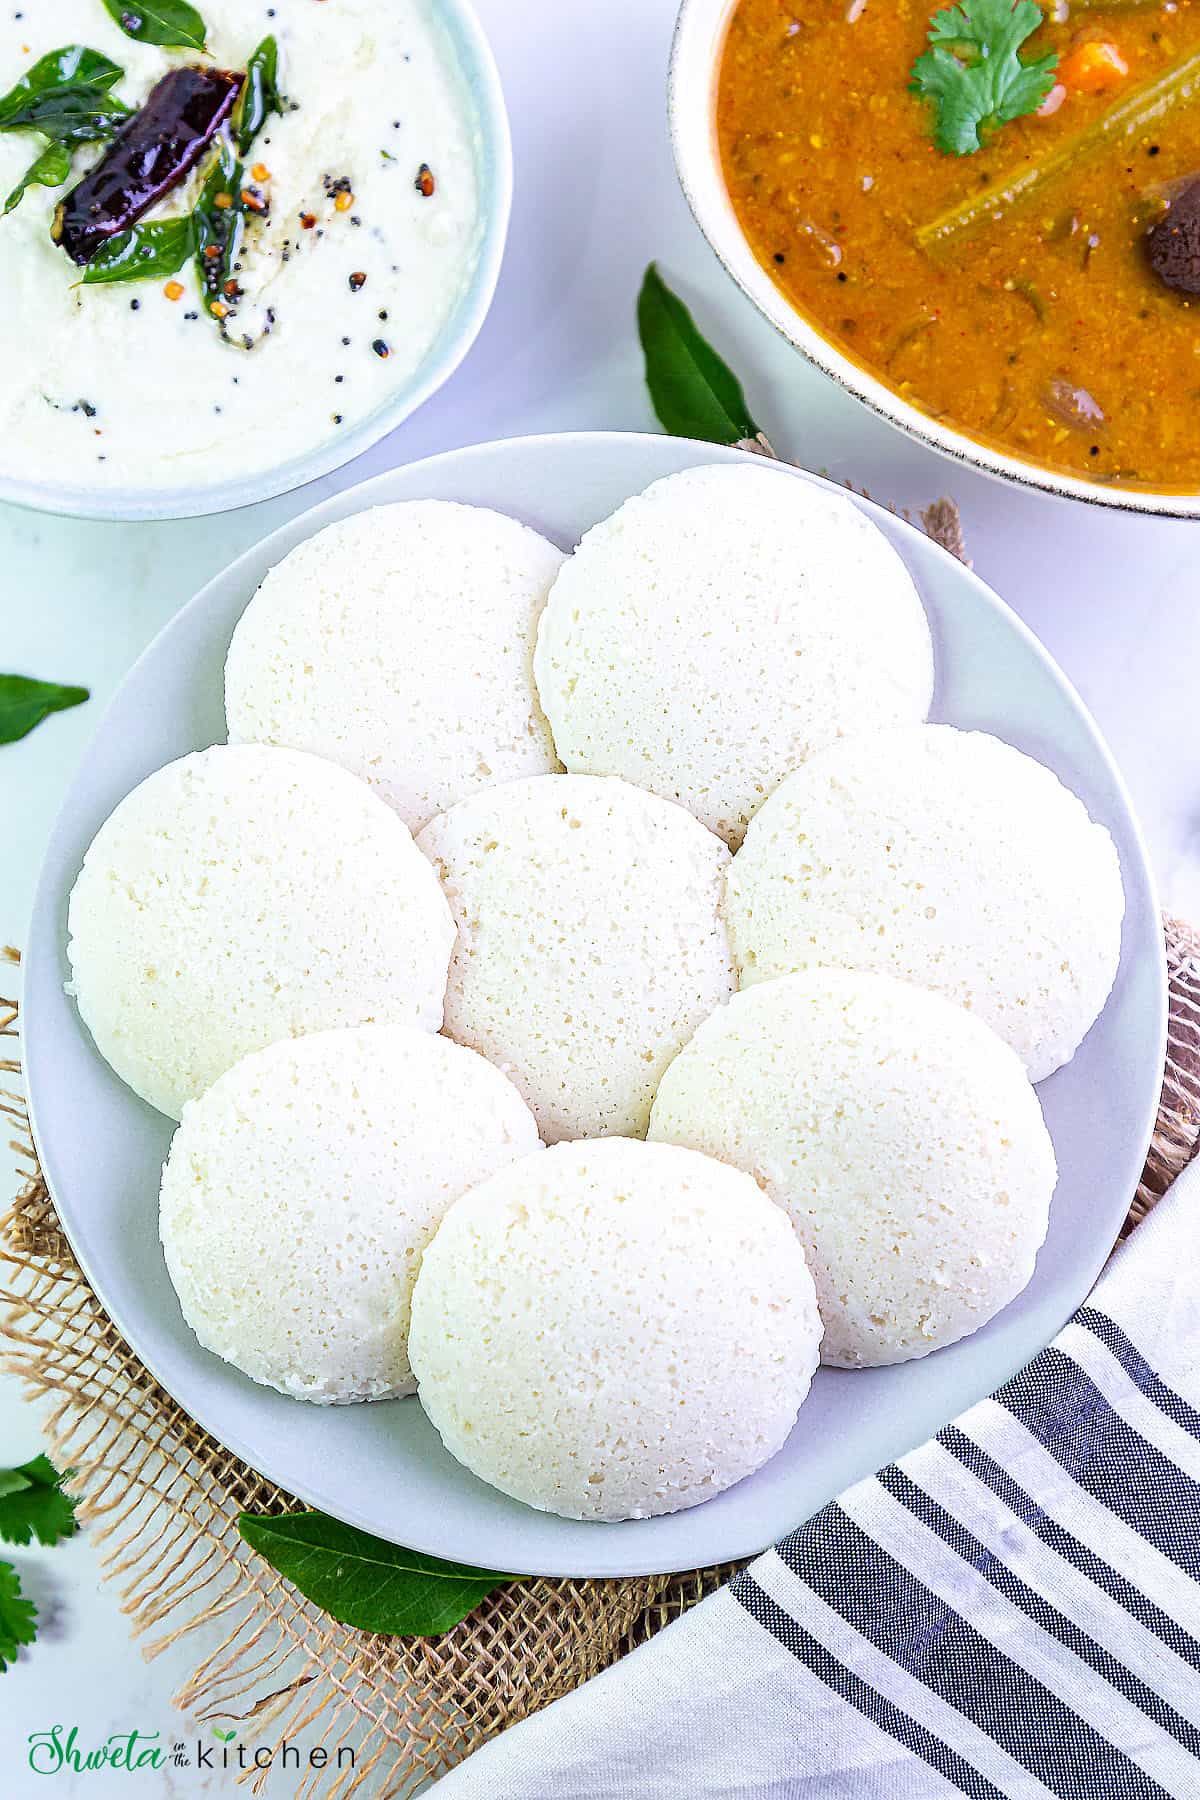
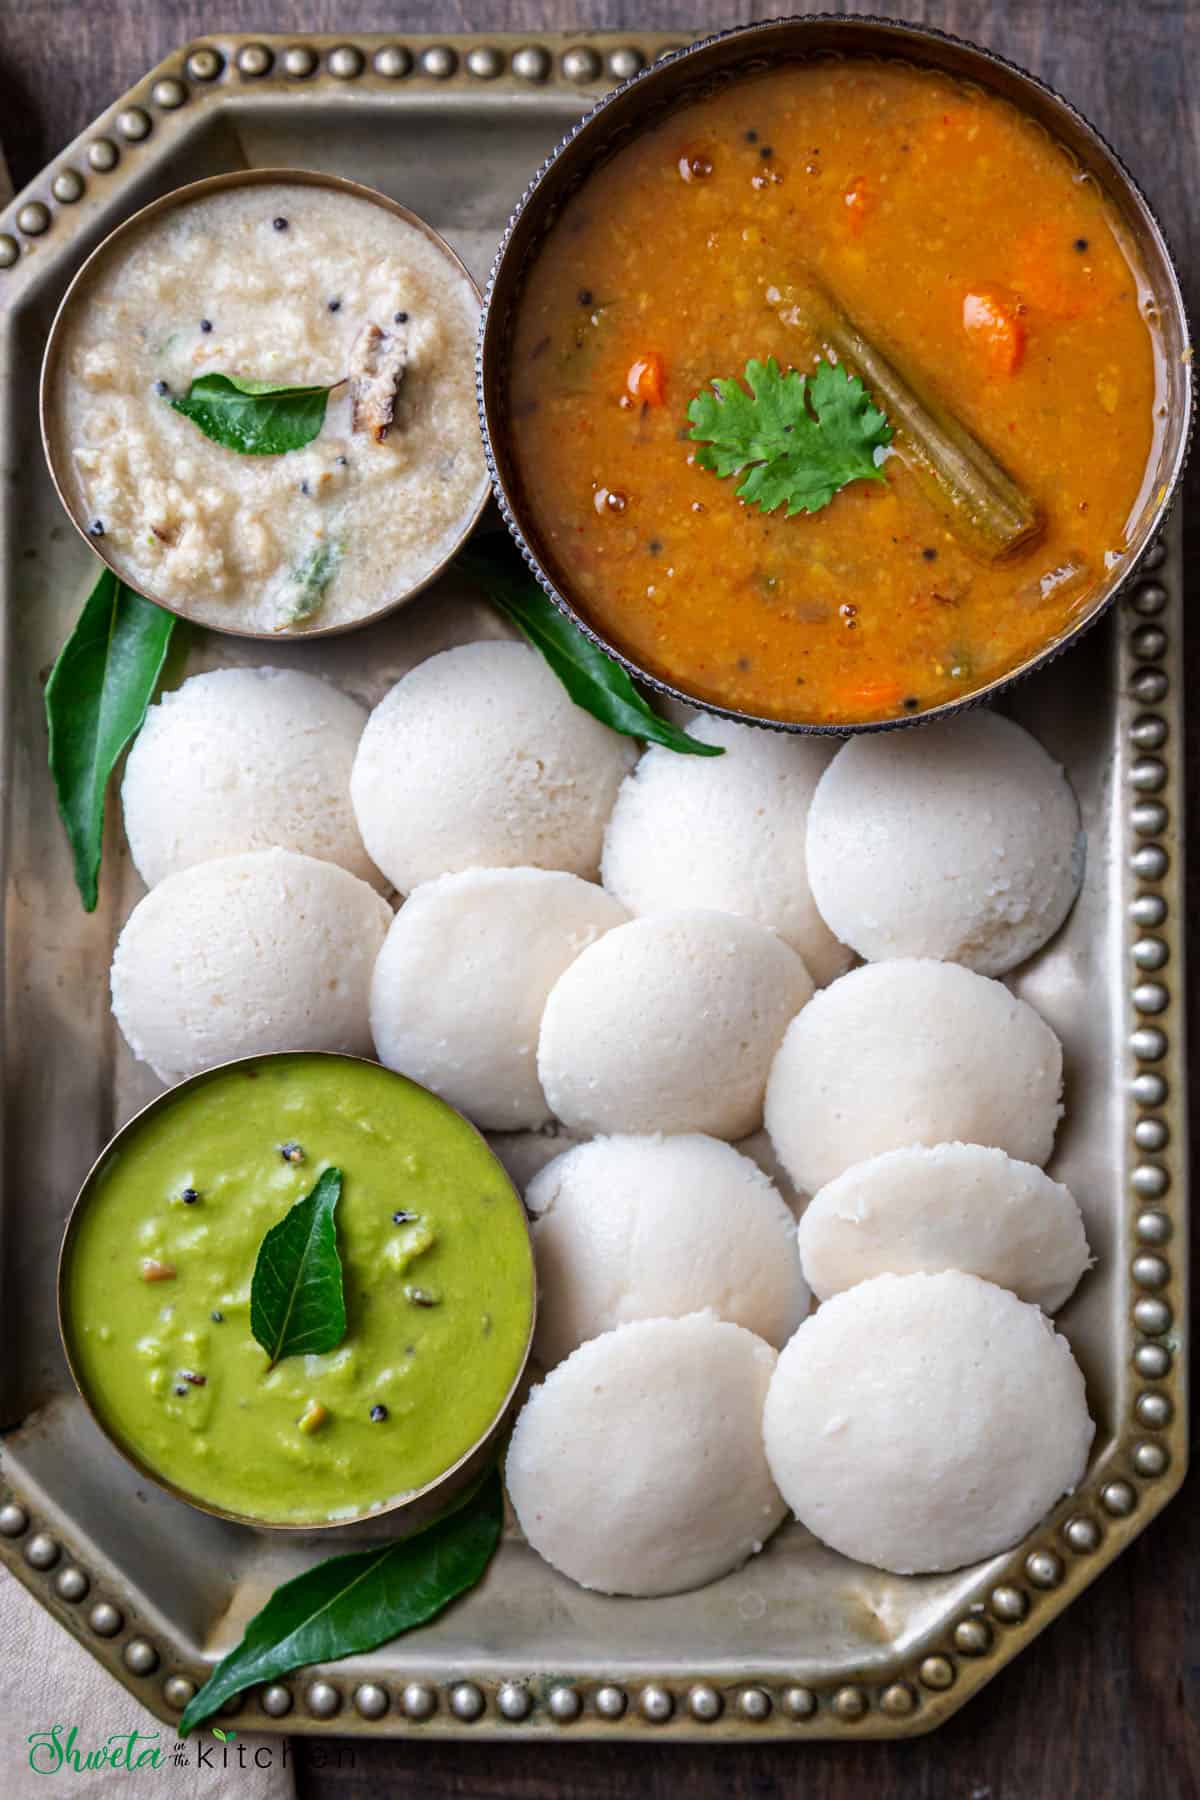
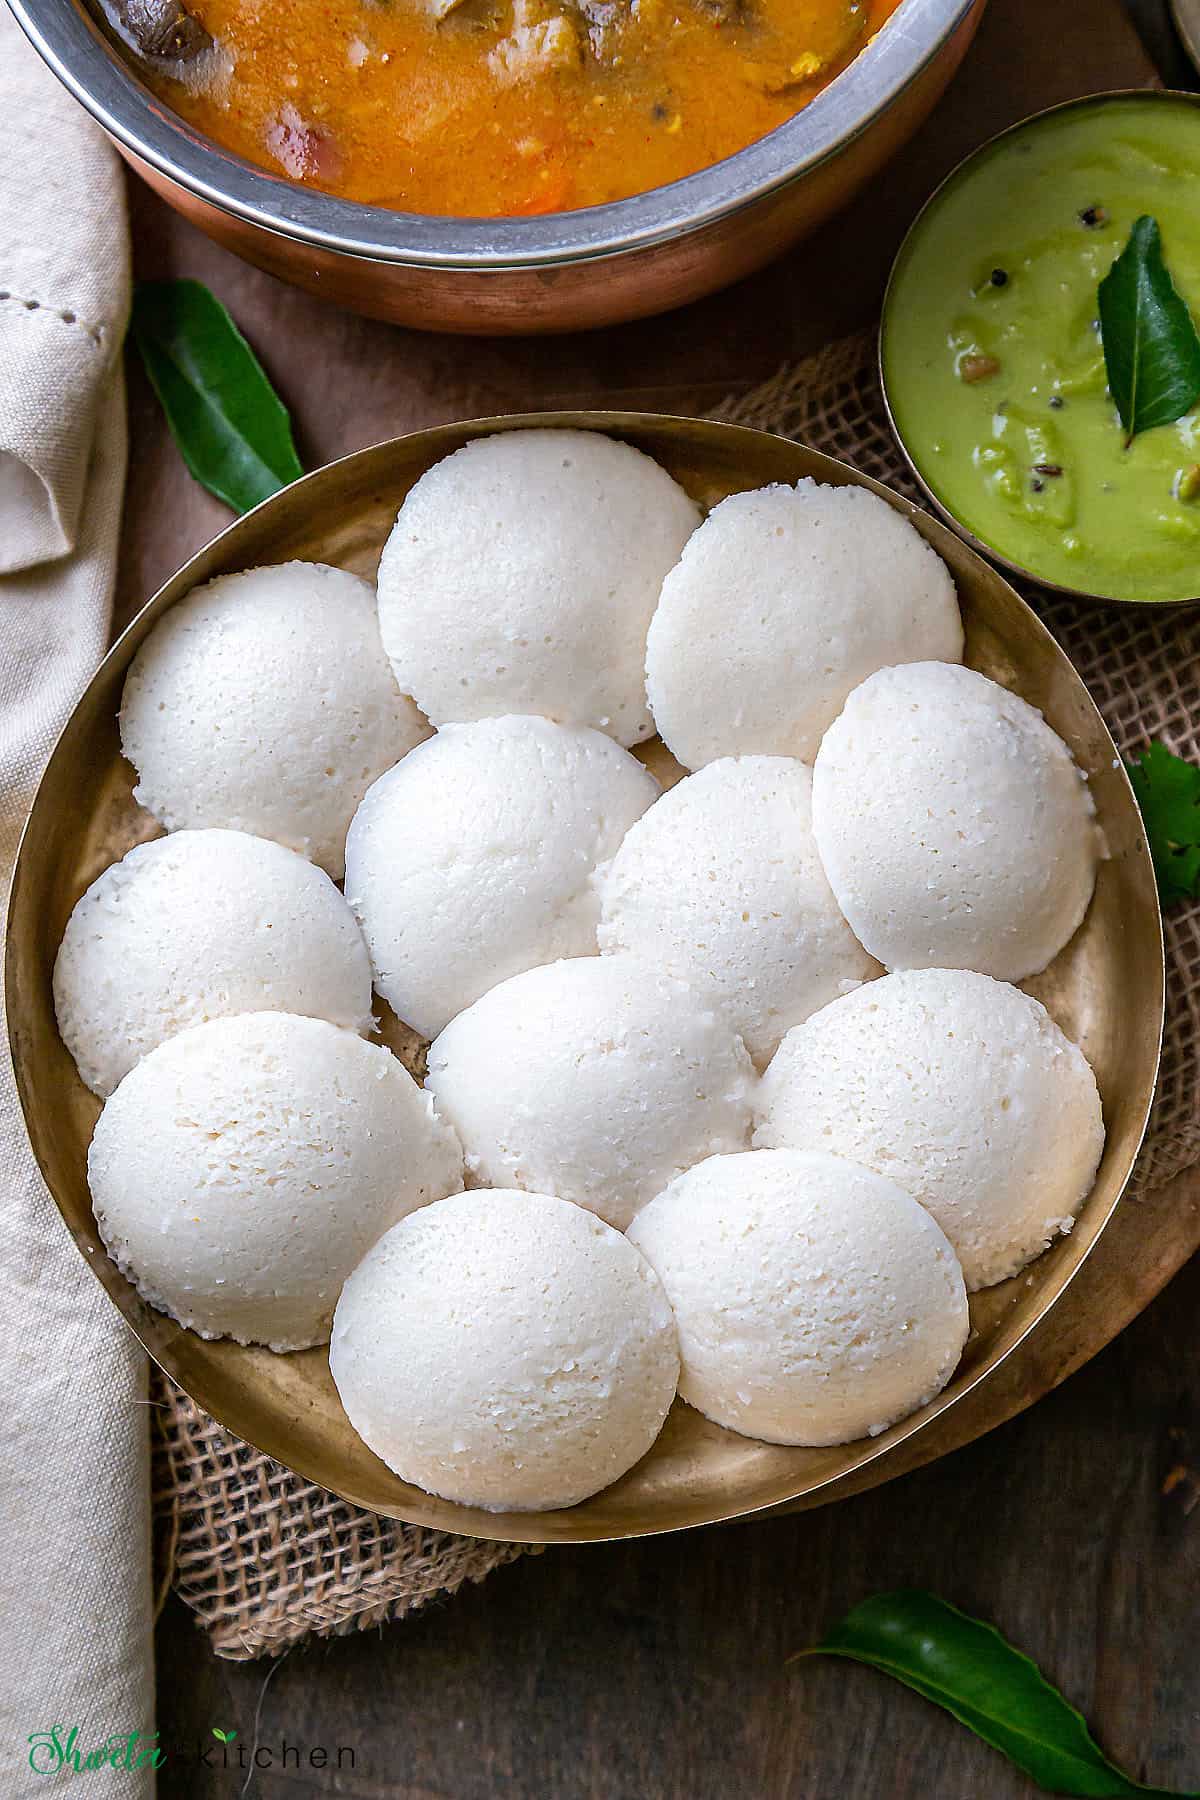
Idli is one of the most popular South Indian breakfast dishes made from ground and fermented rice lentil batter. This soft, fluffy, and steamed savory cake is often served with a combination of chutneys and sambar.
In this post, I am sharing a detailed full-proof recipe with step by steps photos, tips, and a video on how to make the perfectly fermented idli batter at home in two ways using idli rice or idli rava (rice rava) that will give the best, fluffy and soft idli. Bonus, you can also use this batter to make dosa and uttapam.
Want to save this recipe?
Idli was a staple breakfast growing up and Mom would whip up the batter from scratch. Her batter is always perfect consistency and ferments easily which is so important for making soft idli.
We as kids loved munching on those fresh hot pillowy soft idlis just on their own too and love seeing the same sight with my kids now.
Making soft fluffy idli is easy but it is an art that needs to be mastered. You need the right ingredients and their proportion, grinding technique, and batter consistency for the batter to ferment right thus resulting in soft idlis.
I am so thrilled to share a detailed full-proof recipe for making idli with you all today so you can make those soft fluffy idlis on your first attempt. Please read all the tips before you start.
Jump to:
What is Idli?
Idli or Idly is a soft and fluffy savory steamed cake made from fermented rice and lentil batter.
This savory rice cake is a popular and healthy South Indian food and a personal favorite too. It is popular not only in Indian households but in Indian restaurants worldwide.
The process of making idli involves 4 important steps - soaking the rice and lentils (urad dal/black gram), blending the batter, fermenting the batter which enhances its nutrient value, and then steaming the batter to make idli.
Due to this unique preparation method, Idli is considered one of the healthiest food.
Idli is naturally vegan, vegetarian, gluten-free and a healthy meal option for kids and adults.
It is commonly served with chutney and sambar and makes a delicious protein-packed meal.
In this post, I share two ways to make the perfectly fermented idli batter and soft fluffy idli at home from scratch.
Recipe Ingredients
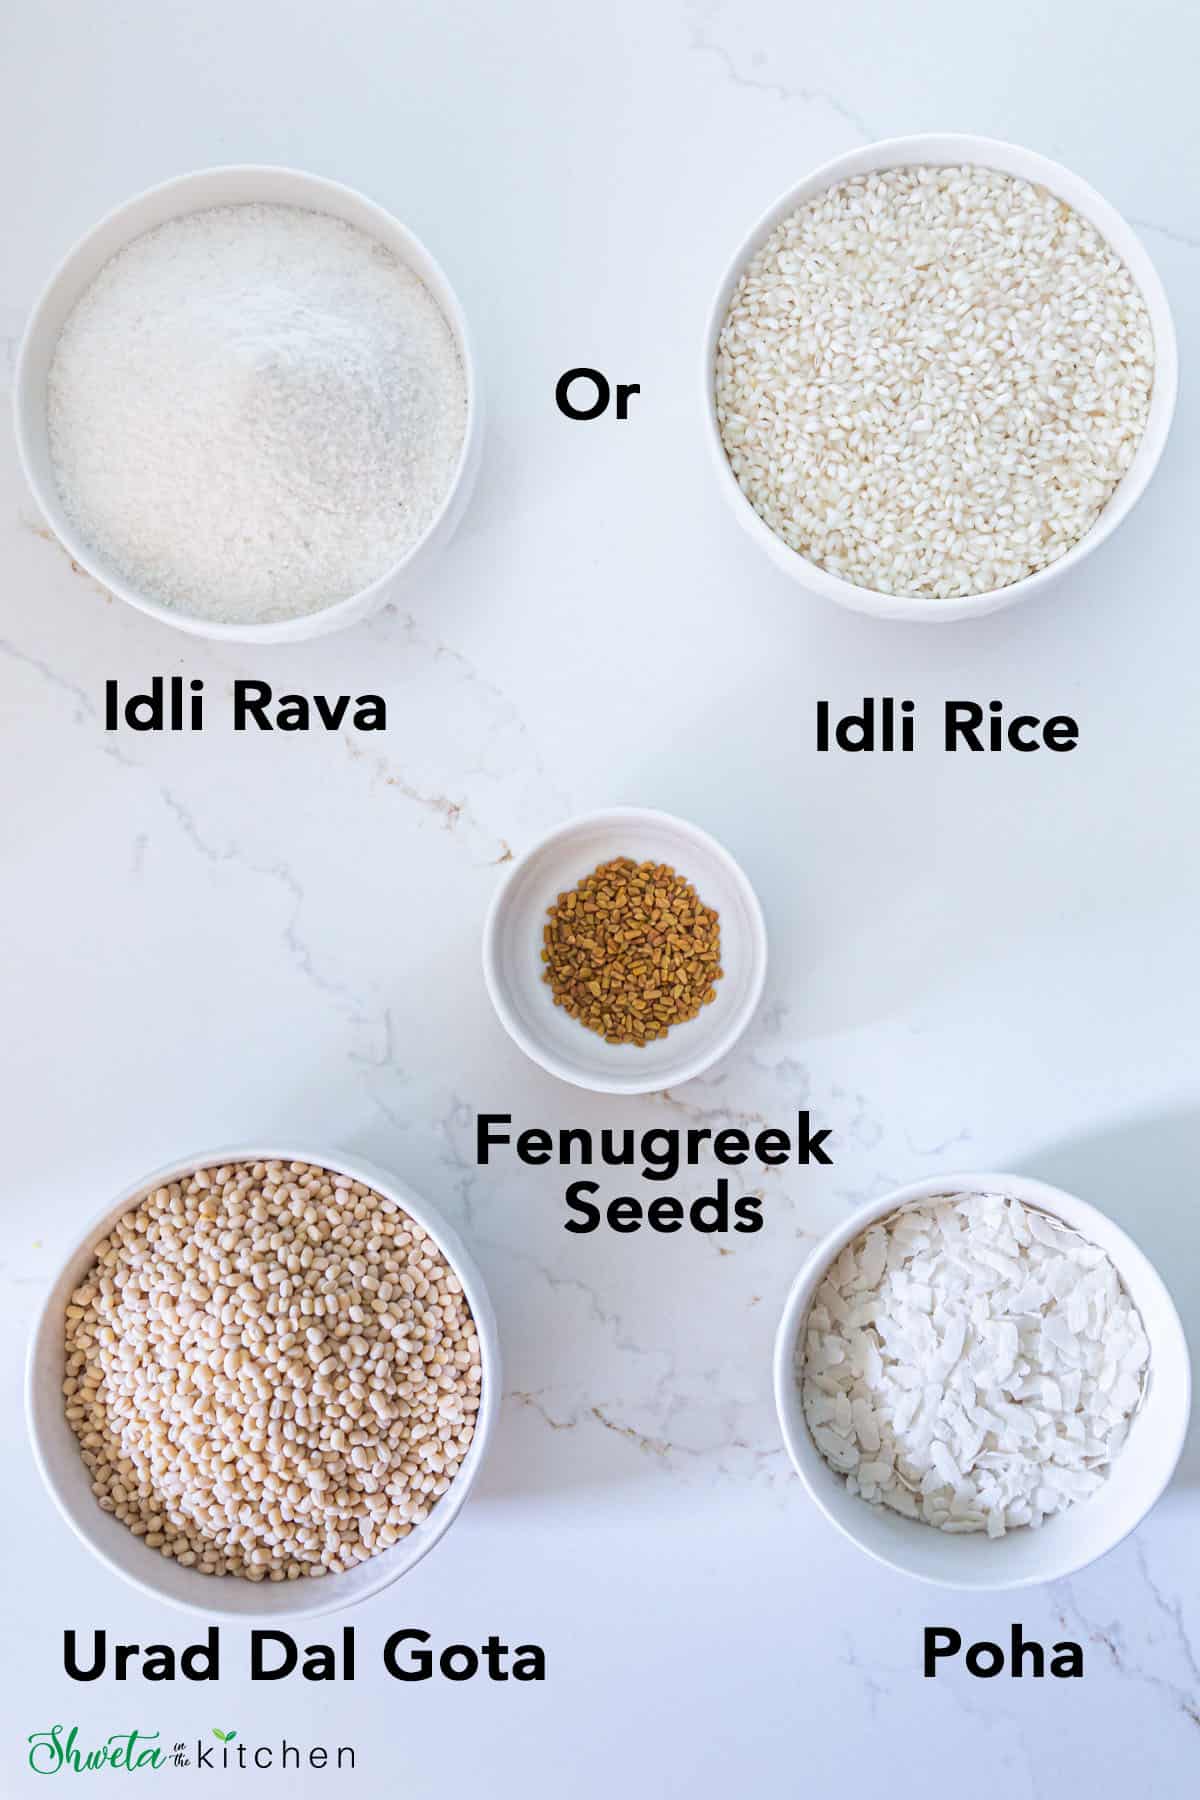
Rice - You can make idli batter using either Idli rice or Idli rava. Both are easily available in Indian grocery stores or online.
- Idli Rice - Idli rice is parboiled rice also known as ukda chawal. It is short grain rice and is used specifically for making idli and dosa. This is the best rice variety for making idli. You can substitute with any short or medium grain rice like sona masoori if idli rice is not available. Long grain rice like basmati is not recommended for making idlis as they are not as fluffy and soft.
- Idli Rava - Idli rava is coarsely ground parboiled rice and also known as cream of rice or rice rava or rice sooji. Note that it is different than regular rava, sooji, or semolina which is made from wheat.
Lentil - I prefer using skinned whole white urad dal (black gram), also known as Whole Urad Gota. It is also labeled as whole Matpe beans without husk. It is white in color, without husk or skin, and round. You can also use split urad dal (white).
Poha - Poha or flattened rice is optional but highly recommend adding it since it gives idli a lighter texture and aids fermentation. You can skip it if you don't have it. Alternately sabudana can be used too.
Fenugreek seeds - Fenugreek seeds, methi seeds, or methi dana in Hindi help with the fermentation process, enhance the nutritional value and lend a beautiful aroma to the idlis. Although, too much methi will make the batter bitter so stick to the proportion mentioned.
Salt - Use non-iodized salt like sea salt, rock salt only. Table salt or Iodized salt has iodine and anticaking agents that interfere with the fermentation processes.
Please refer to the recipe card for exact measurements of ingredients.
How To Make Idli Batter
There are two ways to make idli batter. The first method is using Idli rice and the second is with idli rava. The use of urad dal is common in both these methods it is just the rice variety that varies.
- Using Idli rice - This is a traditional method for making idli using Idli rice or parboiled rice. For this method, you soak and grind both rice and urad dal before fermenting.
- Using Idli Rava - Idli rava is coarsely ground rice and this is a quicker method for making idlis. Here you can just soak, drain and add the idli rava to the urad dal batter for fermenting.
You will get pillowy soft idlis using both batters. Also, you can use both for making idli, dosa, and uttapam. However, there is a texture difference in both.
Idli rava batter is more coarse while Idli rice batter is smoother since the rice is ground. Also the batter color and idli color with Idli rice are much whiter than that of idli rava.
If I plan to make just idli and uttapam I prefer using Idli rava since I like the texture it gives.
If I plan to use the idli batter to make dosa the next day, I prefer going with idli rice. Having said that I have also made dosa using the Idly rava batter and they come out crispy too.
In short, it's totally your preference whether you want to use Idly rice or Idli rava.
Dal to Rice Ratio
The ratio of dal to rice is very important for the perfectly soft idly. So whether you make it using idly rice or idly rava stick to the ratio of 1:3 for dal rice.
I know many prefer a ratio of 1:4 including restaurants but I follow my mom's recipe and she uses a 1:3 ratio.
That means for every 1 cup of urad dal use 3 cups of rice or idli rava.
Grinding Idli batter
Another important step for making soft idli batter is the ground batter's consistency. It should be light and fluffy.
Traditionally, a wet grinder is used to make a fluffy batter. Nowadays most people including me prefer making the batter in a blender since it's easy and convenient.
I have been using Hamilton Beach Professional Juicer Mixer Grinder and love it. It reminds me of the mixer my mom uses to grind her batter and is so nostalgic.
This Mixer Grinder was sent to me by Hamilton Beach but after using it extensively I can say it's now my go-to blender for Indian cooking and for making idli dosa batter.
What I love is that it comes with three leakproof stainless steel jars with square sides which is such a unique design. It is a powerful 1400W rated motor that effortlessly mixes and grinds the toughest ingredients, both wet and dry.
I use the biggest jar (1.5 Liters) for grinding idli batter and use the Preset functions to get the soft fluffy idli batter. You can also do it manually too but the preset works like a charm and gives consistent results every single time.
Step By Step Method
Soaking and grinding urad dal
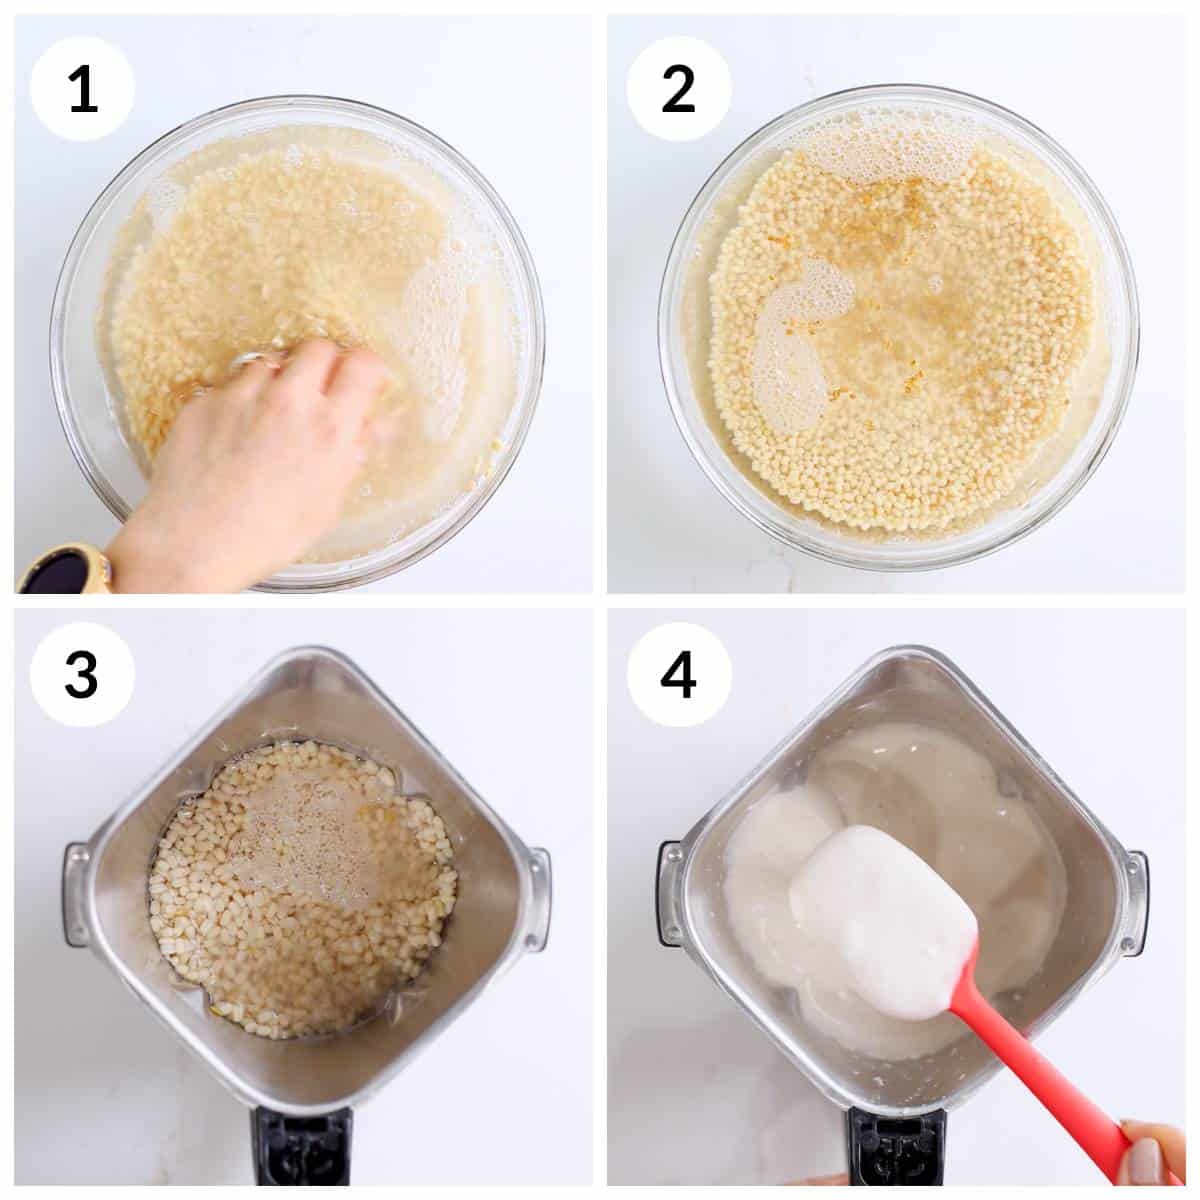
1 - In a bowl, take urad dal and rinse 3-4 times or until the water runs clear. Then drain the water completely.
2 - add fenugreek seeds to the rinsed urad dal along with enough water (3 cups), and soak in water for 6-8 hours or overnight.
3 - After soaking, drain the water completely and transfer dal to a grinder along with ice-cold water (1.25 cups).
4 - Grind the urad dal to the light fluffy batter. I use my Hamilton Beach mixer grinder (preset - wet hard and fine consistency) to achieve this.
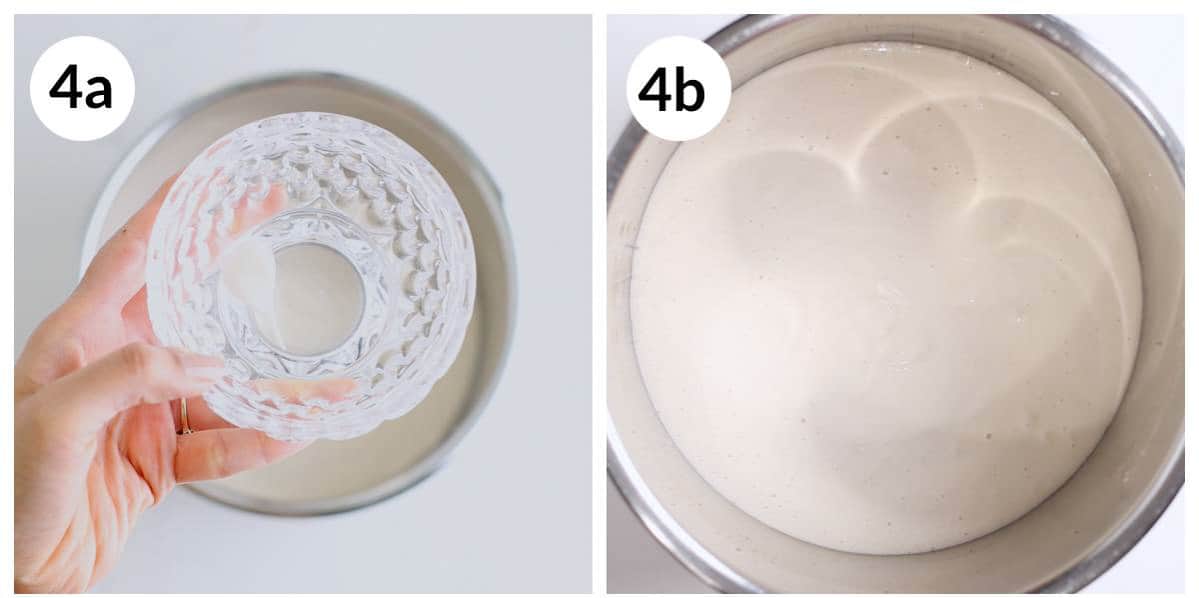
4a - Test by adding a drop of the urad batter to a bowl of water. It should float. This indicates the right batter consistency.
4b - Transfer the ground dal to a large pot/bowl or Instant Pot steel pot. Make sure the bowl/pot has enough room for the batter to rise.
Now make the rest of the idli batter using either Idli rice or Idly rava.
Idli batter using Idli rice
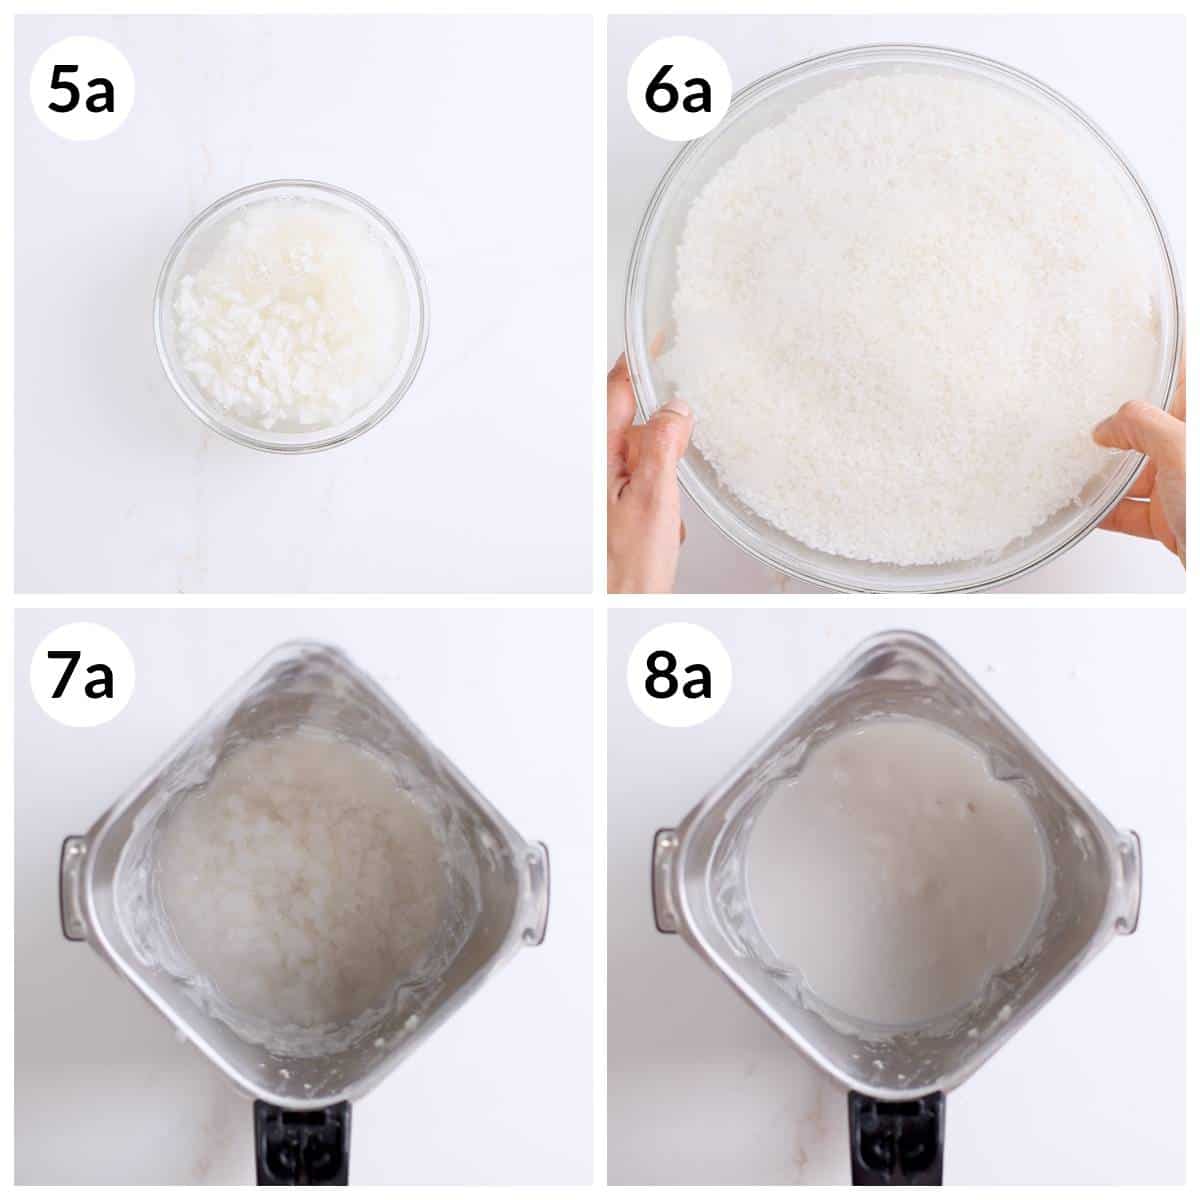
5a - Soak poha for 5-10 mins before grinding. You can either grind poha with urad dal or rice. Either way is ok.
6a - In a large bowl, take idli rice and rinse 3-4 times or until the water runs clear. Then drain the water completely. Soak in enough water (4-5 cups) for 6-8 hours or overnight.
7a - After soaking, drain the water completely and transfer the rice to the blender (or grinder) along with poha.
8a - Add ice-cold water (total of 1.5 cups) to the blender and grind to rice smooth or coarse paste based on your preference.
I grind rice in two batches using my Hamilton mixer grinder and use a preset, wet hard, and medium consistency.
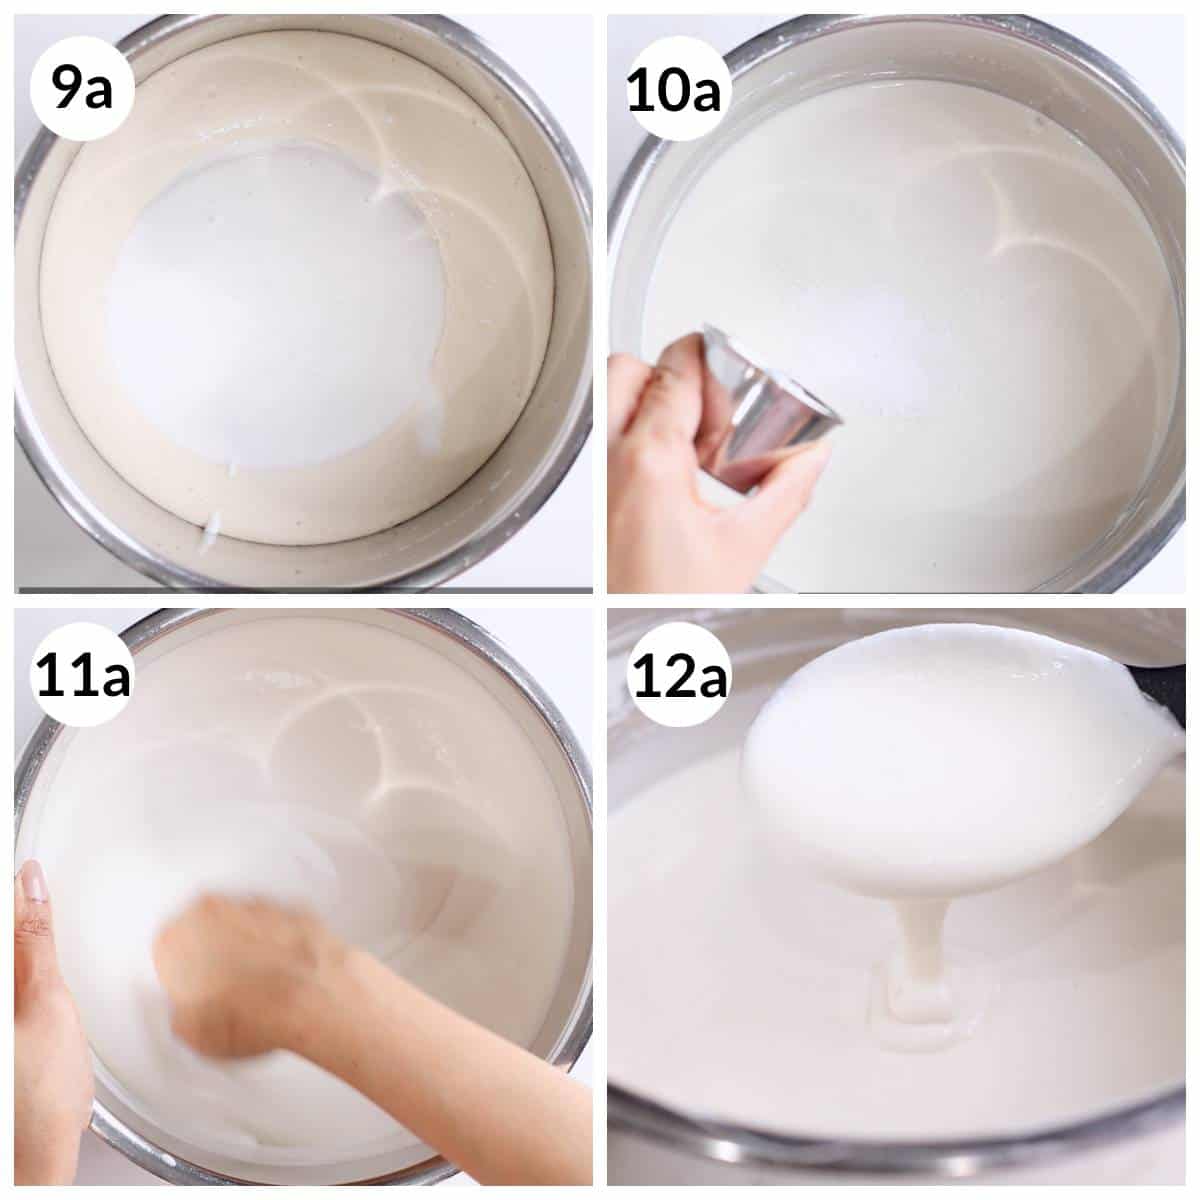
9a - Transfer the ground rice to the pot with urad dal batter
10a - Add non-iodized salt. I used sea salt.
11a - Mix well using a spatula or preferably by hand to incorporate air and help fermentation. Mix for 1-2 minutes or until both batters are well combined.
12a - Batter consistency is very important. It should neither be too thick nor too thin. It should be free-flowing and fall in ribbons that dissolve in a few seconds into the batter. The idli batter with idli rice is now ready for fermentation.
Idli batter with Idli Rava
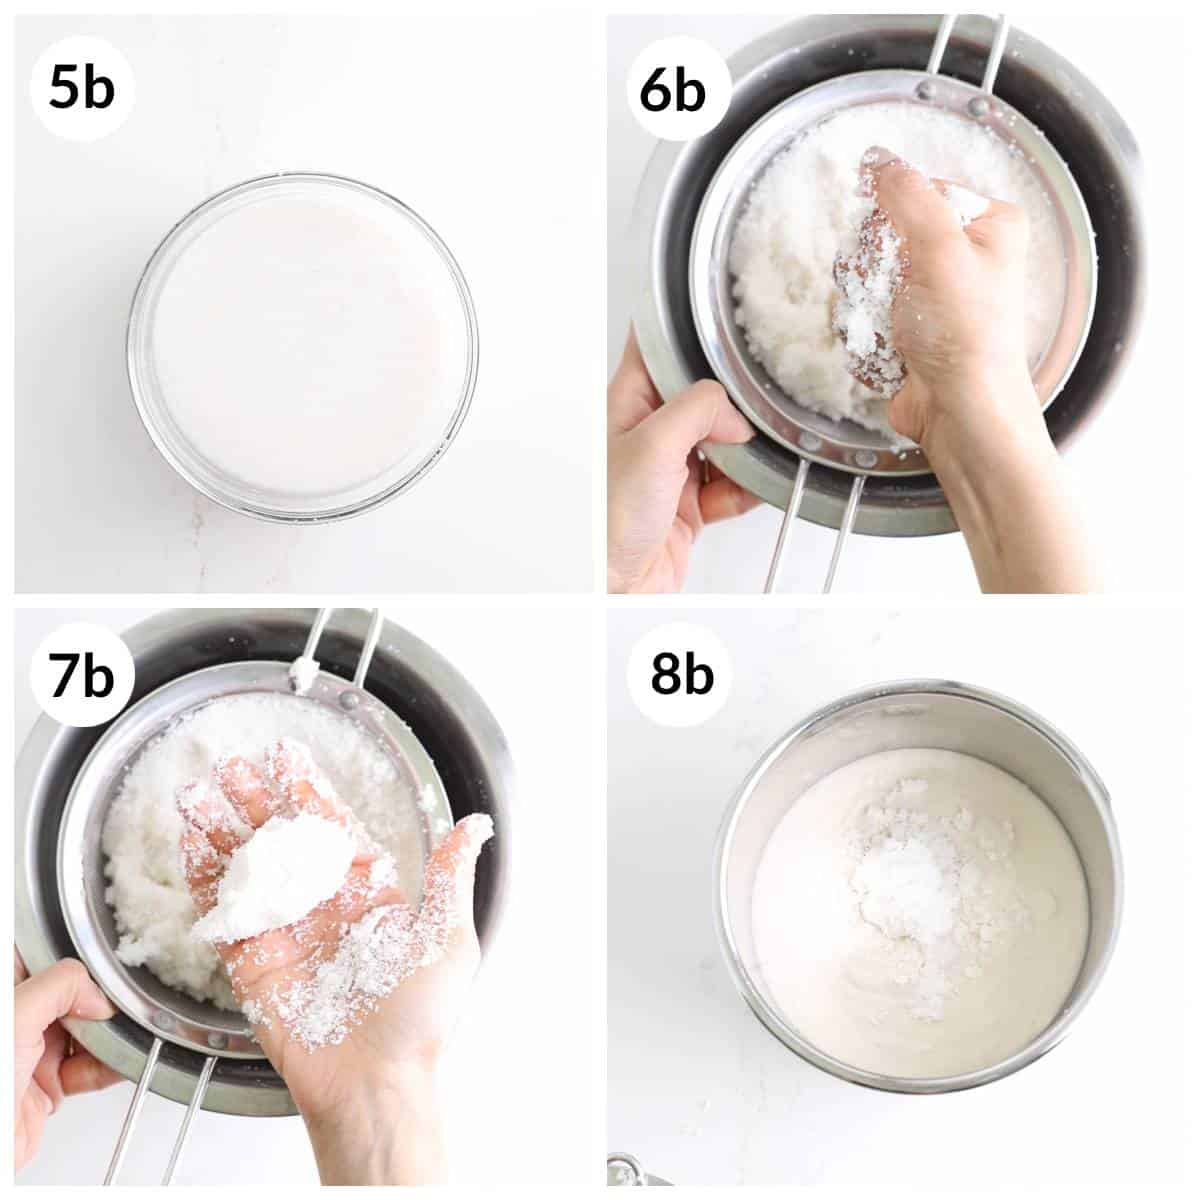
5b - In a bowl, take idli rava and rinse with water a few times, until the water runs clear. Drain the water completely. Soak in enough water for 3-4 hours. Soak, drain and grind poha with Urad dal or on its own since we will not be grinding the rava.
6b and 7b - Squeeze out all the excess water by pressing the idli rava between your palms. Apply pressure to drain maximum water. If there is water left it will make the batter runny.
8b - Add this squeezed idli rava to urad dal batter.
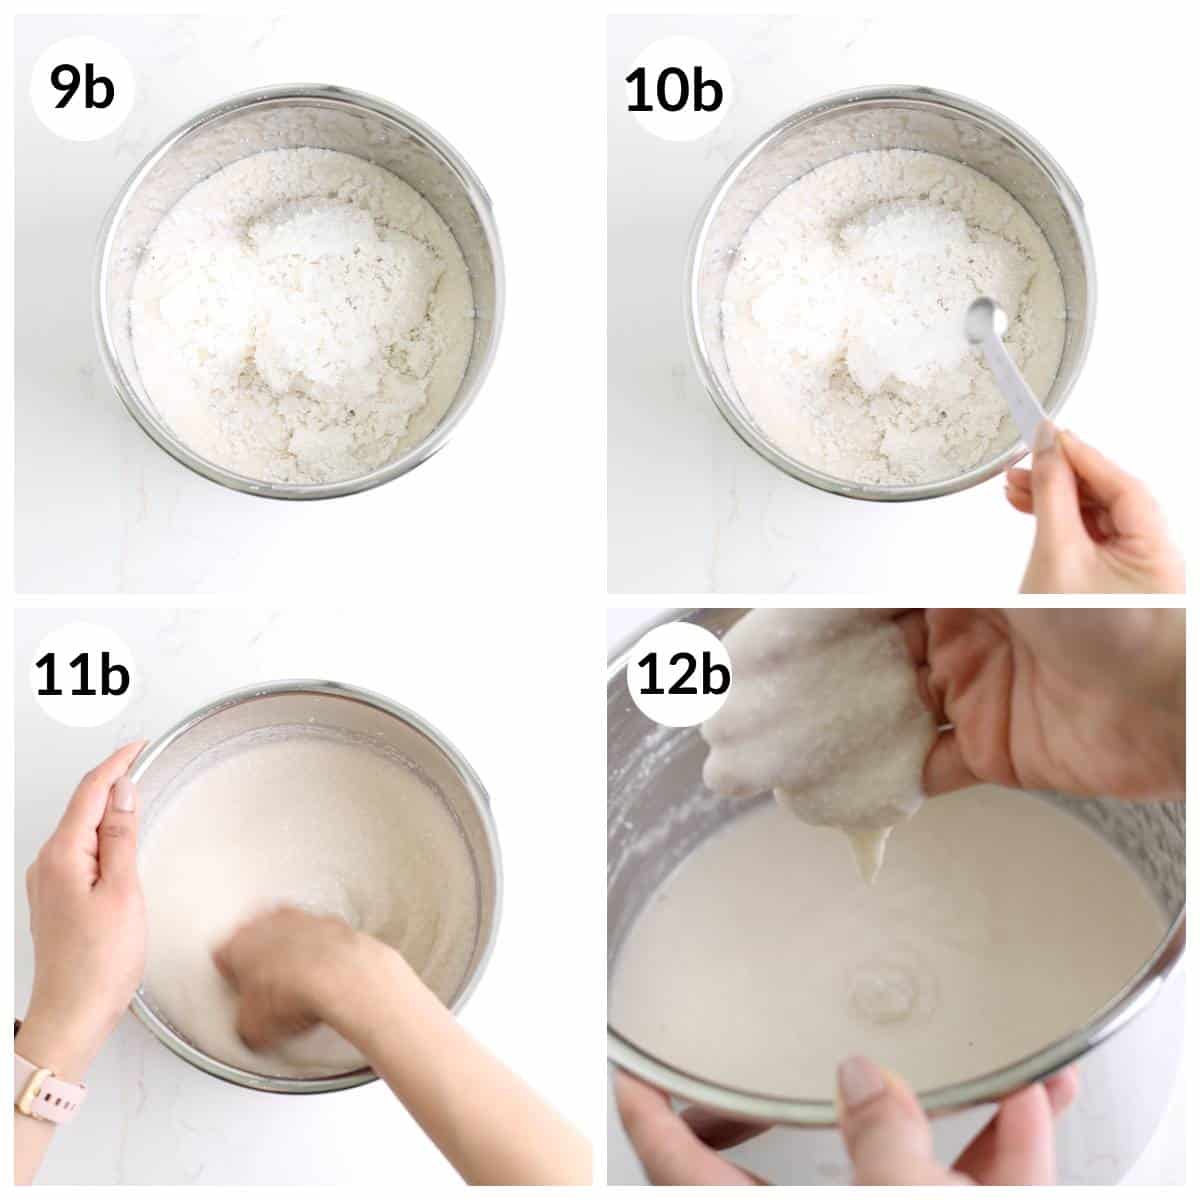
9b - Squeeze out all the idli rava in the same manner and add to urad batter. Ideally, you don't need to grind idli rava but if you don't prefer the coarse texture, grind it too before adding.
10b - Add non-iodized salt. I used sea salt.
11b - Mix well using a spatula or preferably hands to incorporate air and help fermentation. Mix for 1-2 minutes or until both batters are well combined.
12b - Batter consistency is very important. It should neither be too thick nor too thin. Idli rava batter consistency should be drop consistency and fall in ribbons in v shape that dissolve in a few seconds into the batter.
Idli batter with idli rava is now ready for fermentation. You can check the Idli recipe with the Idli rava video here.
Fermenting Idli Batter
The fermentation process is the same whether you made Idli batter using idli rava or idli rice.
You can ferment idli batter the traditional way or in the oven or use Instant Pot. I love using Instant Pot since it provides consistent temperature and results every single time.
Instant Pot Fermentation Method - Place the Instant Pot steel pot inside the Instant Pot and cover it with a glass lid. Do not use the Instant pot lid as if the batter overflows it can lock the lid. So always use a glass see-through lid.
Set the Instant pot on yogurt mode and adjust the time for 12 hours. Depending on where you live it can take anywhere from 8-15 hours.
Traditional Method - If you live in a warmer climate, you can place the pot with the batter on the counter. Cover it with a lid (not air-tight) and ferment overnight or for 8-12 hours.
Oven Method - For colder climates, keep it in a warm place like oven (turned off). Keep the oven light on as it helps provide the warmth needed.
Additionally, you can preheat the oven to 160°F and then turn it off. Wait 5 mins and then place the pot with batter in this oven. This is how I fermented batter prior to Instant Pot.
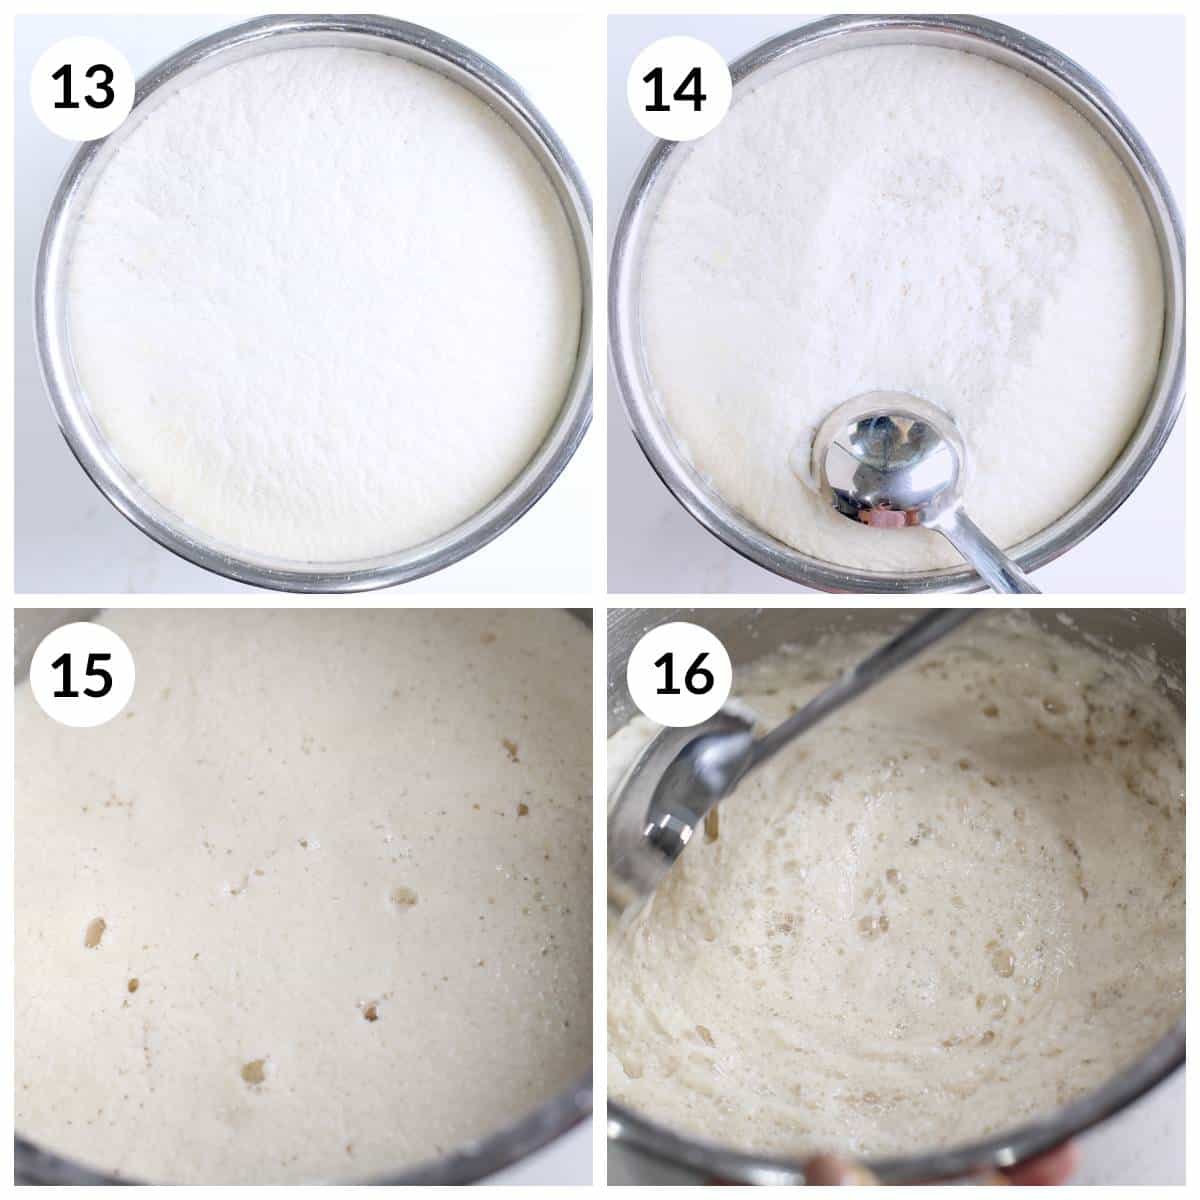
Pics shown in 13 and 14 are for Idli batter made with idli rice and 15, 16 are for a batter with idli rava.
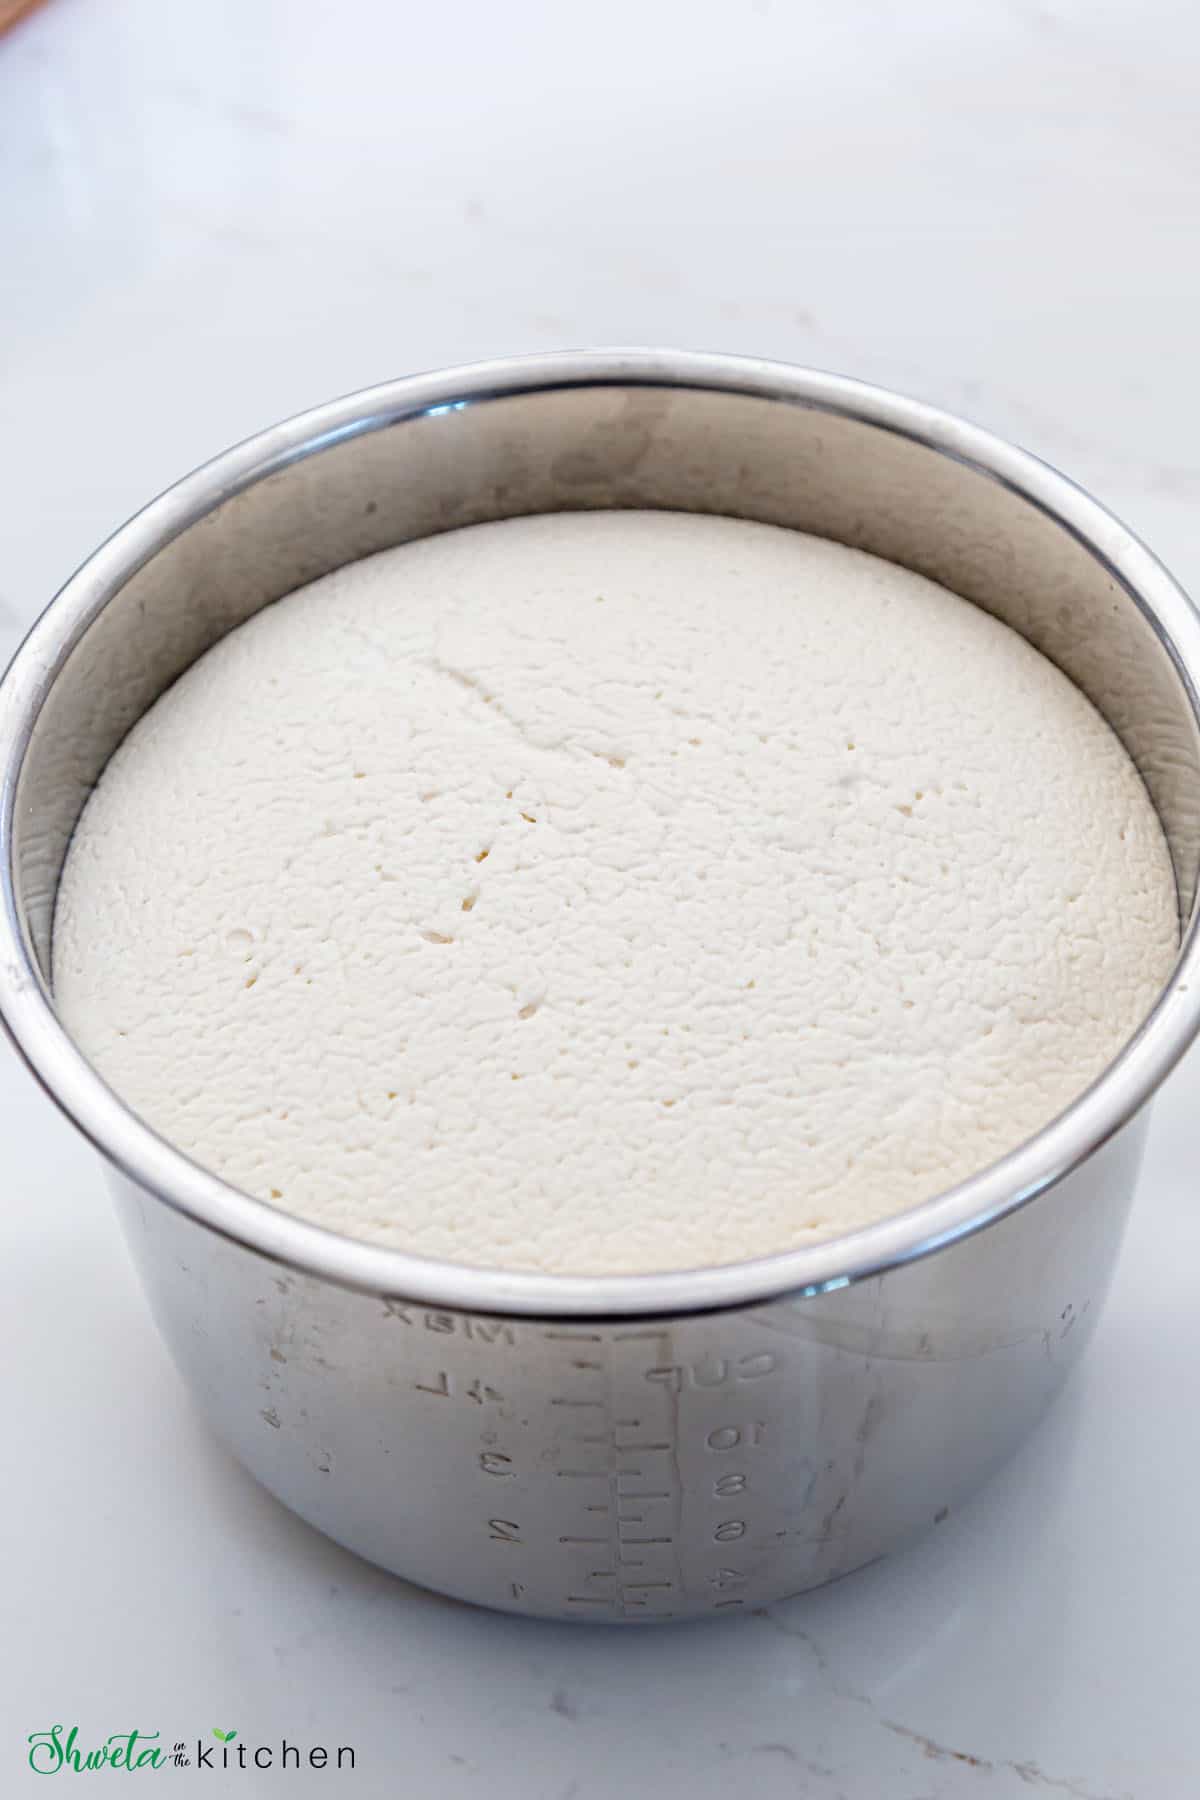
13 and 15 - After fermentation, the batter will double, rise and turn light, fluffy and bubbly. It will also have a slightly sour aroma.
14 and 16 - Gently mix the batter 1-2 times to even it out. This will deflate the batter a bit. Do not over mix as that will cause the idli to rise and go flat after steaming.
How To Make Soft Idli (stepwise)
The steaming process remains the same for Idli batter with idli rava and idli rice.
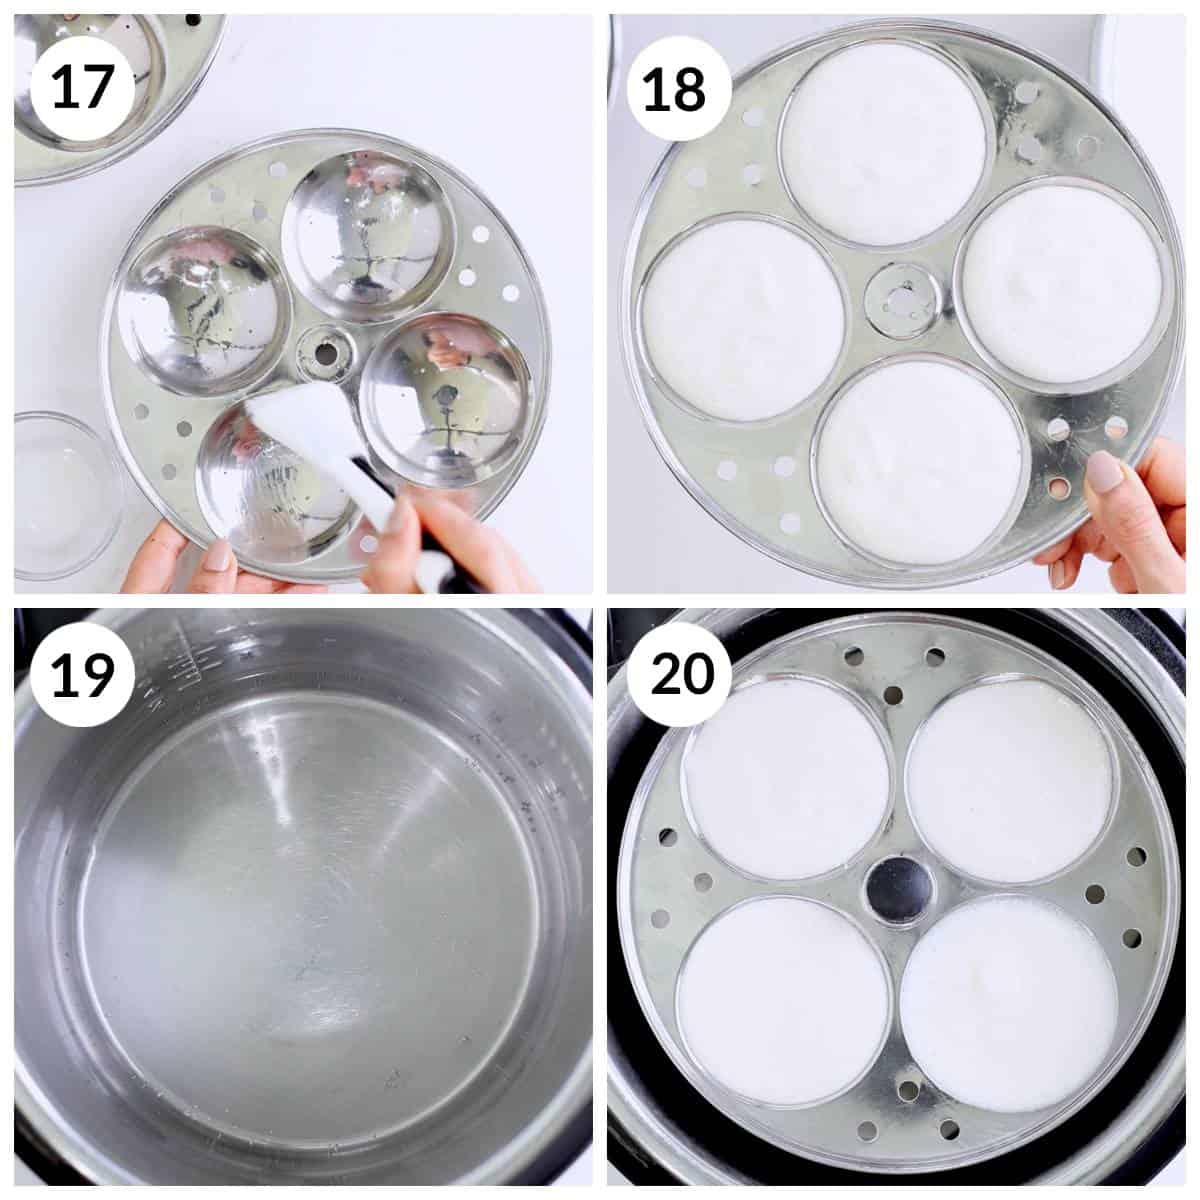
17 - Grease idli plates lightly with oil or ghee.
18 - Mix the batter once and fill the idli mold with batter. Don't fill it all the way up leave some room to avoid spilling over.
Tip: Stack the idli plates on the stand such that the bottom curve of the upper mold is in between the molds of the lower plate. This will give space for the idli to expand and will not stick to the upper mold.
19 and 20 - You can steam idli using an idly steamer, pressure cooker, regular pot with lid, or using an Instant pot (my preferred method).
Steaming idli in a pressure cooker or regular pot - Bring 2 cups of water to a boil and place the idli stand inside. Cover with the lid or pressure cooker lid without the weight (whistle) and steam for 10-12 mins (with external timer) on high heat.
Steaming idli using Instant Pot - add 1.5 cups of water to instant pot steel pot and start on sauté. Once the water comes to a boil, place the idli stand in the pot and press cancel. Close the lid and position the pressure value in the venting position. Press the Steam button and put an external timer for 12 mins.
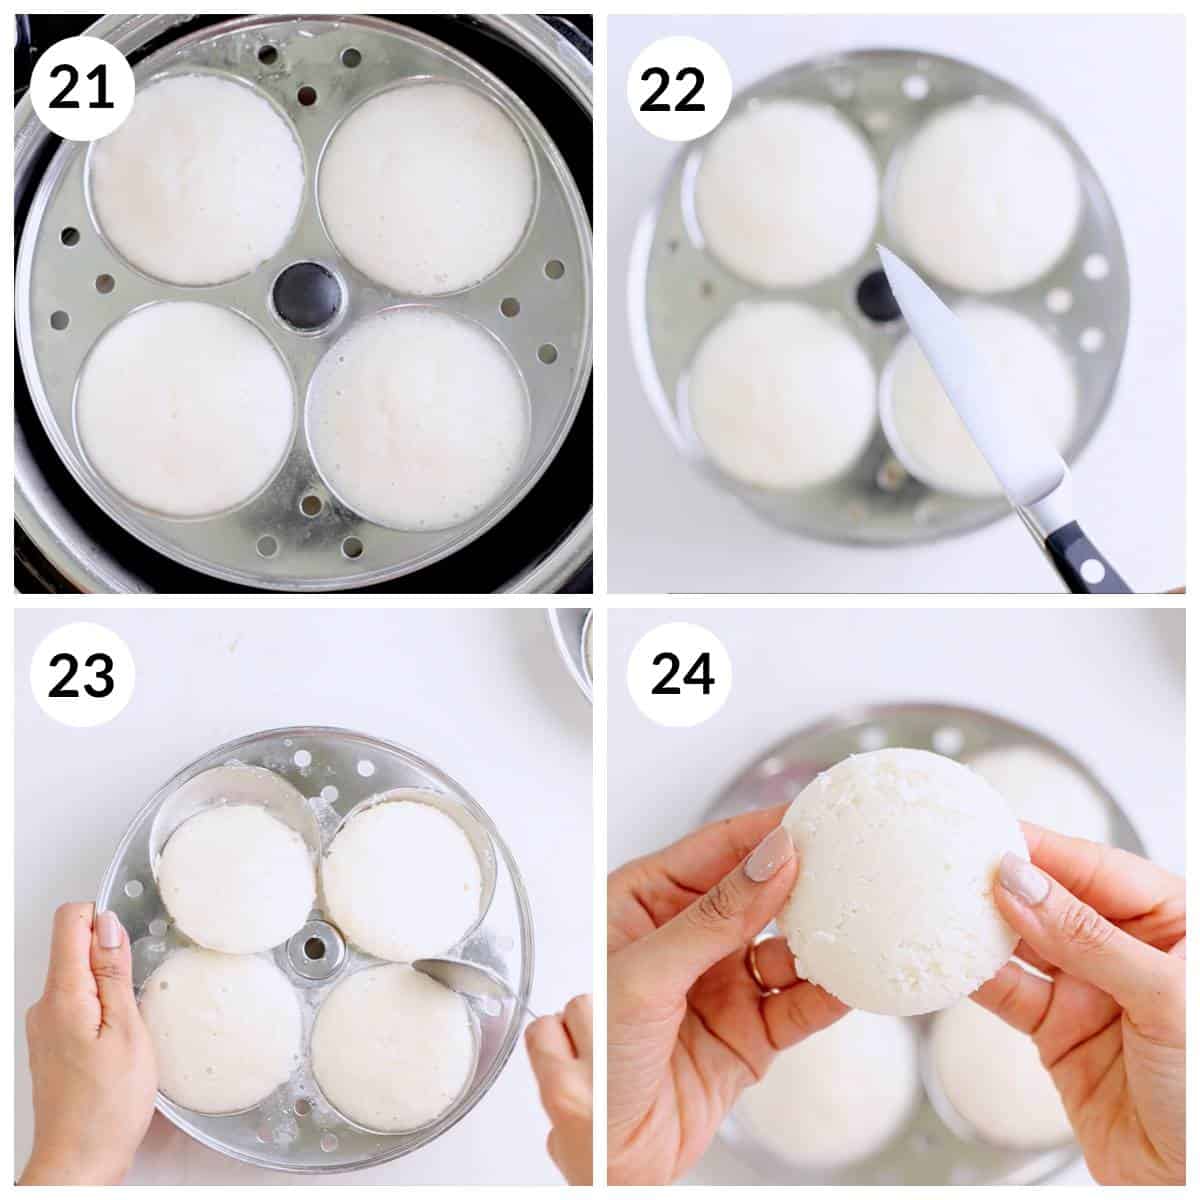
21 - When the external timer rings, press cancel. Wait for 5 mins before opening the lid.
22 - Remove the idly stand out, cool for 2-3 mins. Insert a knife in the center of the idli, it should come out clean without any batter stuck to it. This indicates idli is done!
23 - Using a wet spoon, remove the idli.
24 - Soft spongy idli is ready!! Serve idli fresh and hot with chutney and sambar. Enjoy!!
Mini Idli
You can also use the same batter to make mini (small idli). There is a separate mini idli stand that is available and it usually requires 2-3 teaspoons to a tablespoon of the batter for filling each mold.
Steam mini idli just for 7-8 mins, allow it to stand for 5 mins, and then open the lid.
Storage Instructions
The fermented batter can be refrigerated for up to a week. Use glass containers to store the batter as steel tends to make the batter sour. I don't recommend plastic containers for storing Idli batter.
Alternately you can divide the ground batter into 2 containers and ferment separately.
Use one for making idli and refrigerate the other container as is without stirring. Just make sure the container has enough room for the batter to grow as I had instances when the batter kept rising even in the fridge. Keep a plate below the container to prevent spills in such instances.
Get the refrigerated batter to room temperature before making idli. I usually keep it out for a couple of hours.
Idli tastes best when made with freshly fermented batter so I usually make idli the first day and then use the remaining batter for dosa or uttapam on subsequent days.
You can also freeze the batter for a month. Just thaw in the fridge and then bring to room temperature before use.
Serving Suggestions
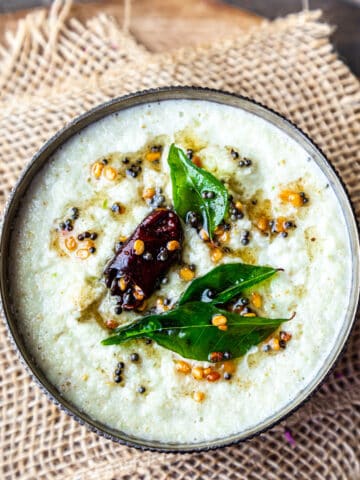
Idli is served with chutney and/or sambar. There are many variations of chutney that pair well with idli but my two favorites are coconut chutney and Cilantro coconut chutney.
It is famous for breakfast but it can be served for brunch, lunch, and even dinner.
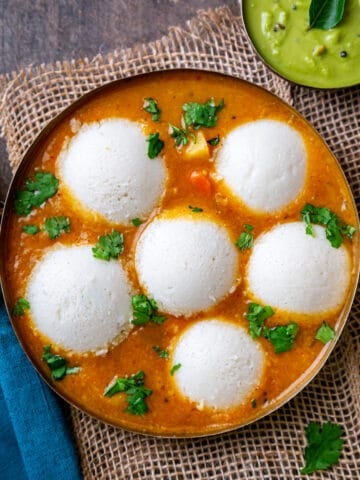
You can either serve idli chutney sambar separately or serve idli dunked in a bowl of sambar with chutney on the side. This is my favorite way of eating idli. It absorbs all the sambar flavor, and tastes even more delicious!!
Recipe Tips For Soft Fluffy Idli
Quality and type of dal and rice - Use good quality and freshly stocked whole white urad dal Gota and idli rice or idli rava. Check urad dal is white in color vs pale yellow which indicates the aging process. Parboiled rice has a tendency to go rancid so check before using.
Salt - Use non-iodized salt like sea salt only. Don't use iodized salt as that interferes with fermentation. It is ok to add non-iodized salt before fermentation.
Soaking - soaking is another important step so don't skip it. Soak dal and rice separately. Soaking them together may not be appropriate since both rice and dal need different water quantities and grinding times to turn soft and fluffy.
Water - Use ice-cold water for grinding especially when using a mixer grinder or blender. The batter tends to get warm during blending and the cold water prevents that. Use correct proportion (as mentioned) and add little water at a time to prevent the batter from getting runny.
Batter consistency - It should not be too thick or runny. Thin batter will not rise, although it might still ferment resulting in flat idli. The thick batter does not ferment well as there is not enough moisture and will result in hard idlis. The right consistency of the batter should be thick pouring consistency that falls with ribbons.
Temperature - For fermentation warm temperature is required and it generally takes anywhere from 8-15 hours for the batter to ferment. You can ferment either in the oven (turned off) or Instant Pot. Make sure not to over ferment the batter as it will turn too sour. Move the batter to the fridge once it's fermented.
Steaming - Over steaming idli can make them hard and dry so steam just for 10-12 mins.
Frequently Asked Questions
The main reason idlis turn our hard is if the batter is too thick, not well fermented, or risen. Over steaming the idlis is another reason why the idlis turn out hard.
Here are a few options to fix runny batter
Add more soaked and drained idli rava or poha.
Alternately grind leftover boiled rice and add to the batter or add rice flour.
Last but not least, use the runny batter to make dosa, you can even add grated veggies to it. Making idli with runny batter is not recommended since idli will turn out flat.
There are multiple factors that might be responsible for idli batter not fermenting. Few are as below:
1. Use of old stocked Urad dal.
2. Runny or thick batter - If the batter is not at the right consistency, too thick or too thin, the batter will not ferment or rise.
3. Use of iodized salt can hinder fermentation so always use non-iodized salt.
4. Not enough salt can be another reason. Typically ½ to 1 teaspoon of salt per 1 cup of dry ingredients is recommended but adjust to your taste.
4. Batter got warm while grinding. Add ice-cold water while grinding to prevent this from happening.
5. Temperature wasn't warm enough to ferment. Place the batter in a warm place for fermentation.
If the batter has not fermented even after 18-24 hours (traditional away) and 14-16 hours in Instant pot, I would recommend not making idli with this batter. Instead, make dosa or Uttapam. You can try making idli batter again after reading all the tips shared in this recipe.
Yes, you can still ferment the batter by creating warm temperatures using a table lamp, a portable room heater, and a warm blanket. Keep the batter someplace warm and cover it with a warm blanket. Keep the heater and lamp running near the idli batter vessel to keep it warm.
Yes, usually when the batter is fermented for more than 12 hours in colder climates, it might turn pale yellow but it's still good to consume.
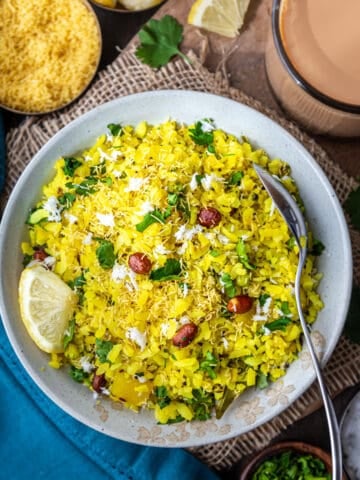
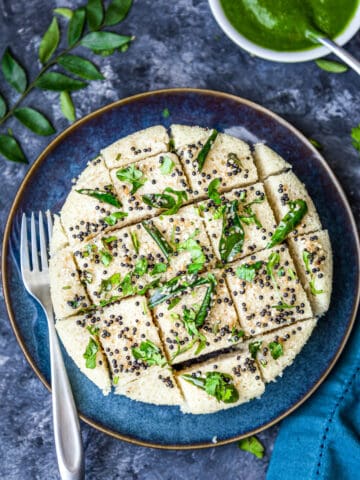
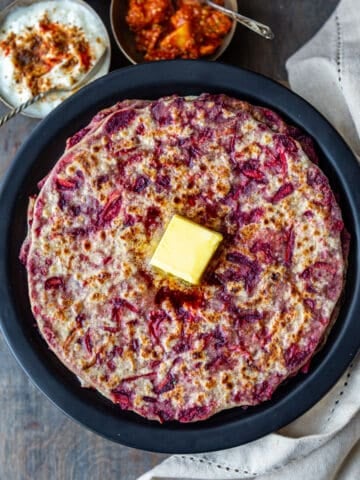
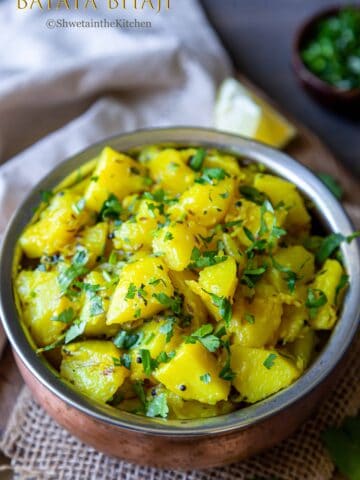
More Indian Breakfast Recipes

Hope you enjoy this Idli Recipe !! If you give this recipe a try, please rate by clicking stars ⭐️ on the recipe card. Thank you ❤️! You can also follow me on Facebook | Instagram to see what's cooking in my kitchen!!
Recipe Card

Idli Recipe | How to make Soft Idli Batter
Equipment
Ingredients
- 1 cup urad dal using urad dal gota, or use split white urad dal
- 3 cups idli rice or idli rava
- 1 teaspoon fenugreek seeds
- ¼ cup poha
- 2 teaspoons sea salt or non idolized salt
- 2¾ cups ice-cold water approximately for grinding the batter
Want to save this recipe?
Instructions
Prep Work:
- Rinse urad dal 3-4 times or until the water runs clear. Add fenugreek seeds along with 3 cups water and soak for 6-8 hours or overnight.
- Rinse Idli rice (or idli rava) 3-4 times or until the water runs clear. Soak seperately in 4-5 cups of water for 6-8 hours or overnight.
- Rinse and soak poha 5-10 mins before blending.
To make idli batter
- Drain the water completely and transfer urad dal, fenugreek seeds and poha to a grinder or blender along with 1¼ cups of ice-cold water. Grind the urad dal to the light fluffy batter. Test by adding a drop of the urad batter to a bowl of water. It should float. This indicates the right batter consistency.
- Transfer the urad dal batter to a large pot/bowl or Instant Pot steel pot. Make sure the bowl/pot has enough room for the batter to rise.
- Makes rest of the batter using either idli rice or idli rava
- A-Using Idli rice: Drain the water completely and transfer the rice to the blender (or grinder). Add 1½ cups ice-cold water and grind rice to a slightly coarse batter. Transfer the rice batter with the urad dal batter. Add salt and mix well using a spatula or preferably by hand until well combined. The batter must be pouring consistency (not runny).
- B-Using Idli rava: Drain the water completely. Squeeze out all the excess water by pressing the idli rava between your palms. Apply pressure to drain maximum water. If there is water left it will make the batter runny. Add to the urad dal batter. Add salt and mix well using a spatula or preferably by hand until well combined.
Fermenting Idli batter
- You can ferment idli batter the traditional way, in oven or use Instant Pot. Depending on where you live it can take anywhere from 8-15 hours.
- Instant Pot Method: - Place the Instant Pot steel pot inside the Instant Pot and cover it with a glass lid. Do not use the Instant pot lid as if the batter overflows it can lock the lid. So always use a glass see-through lid. Set the Instant pot on yogurt mode and adjust the time for 12 hours. In some cases, it can take 14 hours too.
- Traditional Method: - For warm climate, place the pot with the batter on the counter. Cover it with a lid (not air-tight) and ferment overnight or for 8-12 hours.
- Oven Method: For colder climates, keep it in a warm place like oven (turned off). Keep the oven light on as it helps provide the warmth needed. Additionally, you can preheat the oven to 160°F and then turn it off. Wait 5 mins and then place the pot with batter in this oven.
- After fermentation, the batter will double, rise and turn light, fluffy and bubbly. It will also have a slightly sour aroma.
- Gently mix the batter 1-2 times to even it out. Do not over mix as that will cause the idli to rise and go flat after steaming.
- This recipe makes about 8 cups of batter and depending on Idli mold size can give 32-36 idlis.
How to make Idli
- Grease idli plates lightly with oil or ghee. Mix the batter once and fill the idli mold with batter.
- Steaming idli in a pressure cooker or regular pot: - Bring 2 cups of water to a boil and place the idli stand inside. Cover with the lid or pressure cooker lid without the weight (whistle) and steam for 10-12 mins (with external timer) on high heat.
- Steaming idli using Instant Pot: - add 1.5 cups of water to instant pot steel pot and start on sauté. Once the water comes to a boil, place the idli stand in the pot and press cancel. Close the lid and position the pressure value in the venting position. Press the Steam button and put an external timer for 12 mins.
- When the external timer rings, press cancel. Wait for 5 mins before opening the lid.
- Remove the idly stand out, cool for 2-3 mins. Insert a knife in the center of the idli, it should come out clean without any batter stuck to it. This indicates idli is done! Using a wet spoon, remove the idli.
- Soft spongy idli is ready!! Serve idli immediately with chutney and sambar. Enjoy!!
Dattatray Nidavanche says
Perfect recepie...Thanks for sharing this with us
Shweta Arora says
Thank you! Glad you like it!
D.M.Dudhe says
Freeze the batter means to freeze in refrigerator or in freezer where we make ice, please clarify this.
Shweta Arora says
In the freezer
Sunitha Mahadeva says
Thank you for sharing recipe, after trying Ti make the batter twice and failing terribly then I stumbled upon your recipe and it was hit. We enjoyed soft and delicious steamed idli’s.
Saving your recipe for life.
Thanks a million times once again.
Shweta Arora says
Thank you so much, Sunitha! Makes me so happy to know that!
Priti Kshettry says
Thank you for sharing the proportions of each ingredient and specially the quantity of water. It turned out so good. God Bless You
Shweta Arora says
Thank you! Glad to know you liked it!