Rasmalai cake is a fun fusion dessert to celebrate festivities or any special occasion. It combines flavors of the Indian dessert Rasmalai in the form of cake making it totally irresistible! Egg-free, easy to make, and delicious!
Want to save this recipe?
Rasmalai cake is our new favorite sweet to celebrate special occasions. From festivals to birthdays, anniversary and now on popular demand it was part of new year's celebration too!
I had made Rasmalai for Diwali and had some leftover ras (milk) or syrup.
The kids wanted a cake so I thought let's give rasmalai cake a try as I have been hearing so much about it.
I wasn't in the mood for anything fancy so just made a simple whipped cream frosting flavored it with ras and garnished with some nuts and rose petals. Voilà! It was an instant hit!!
This rasmalai cake is
- eggless
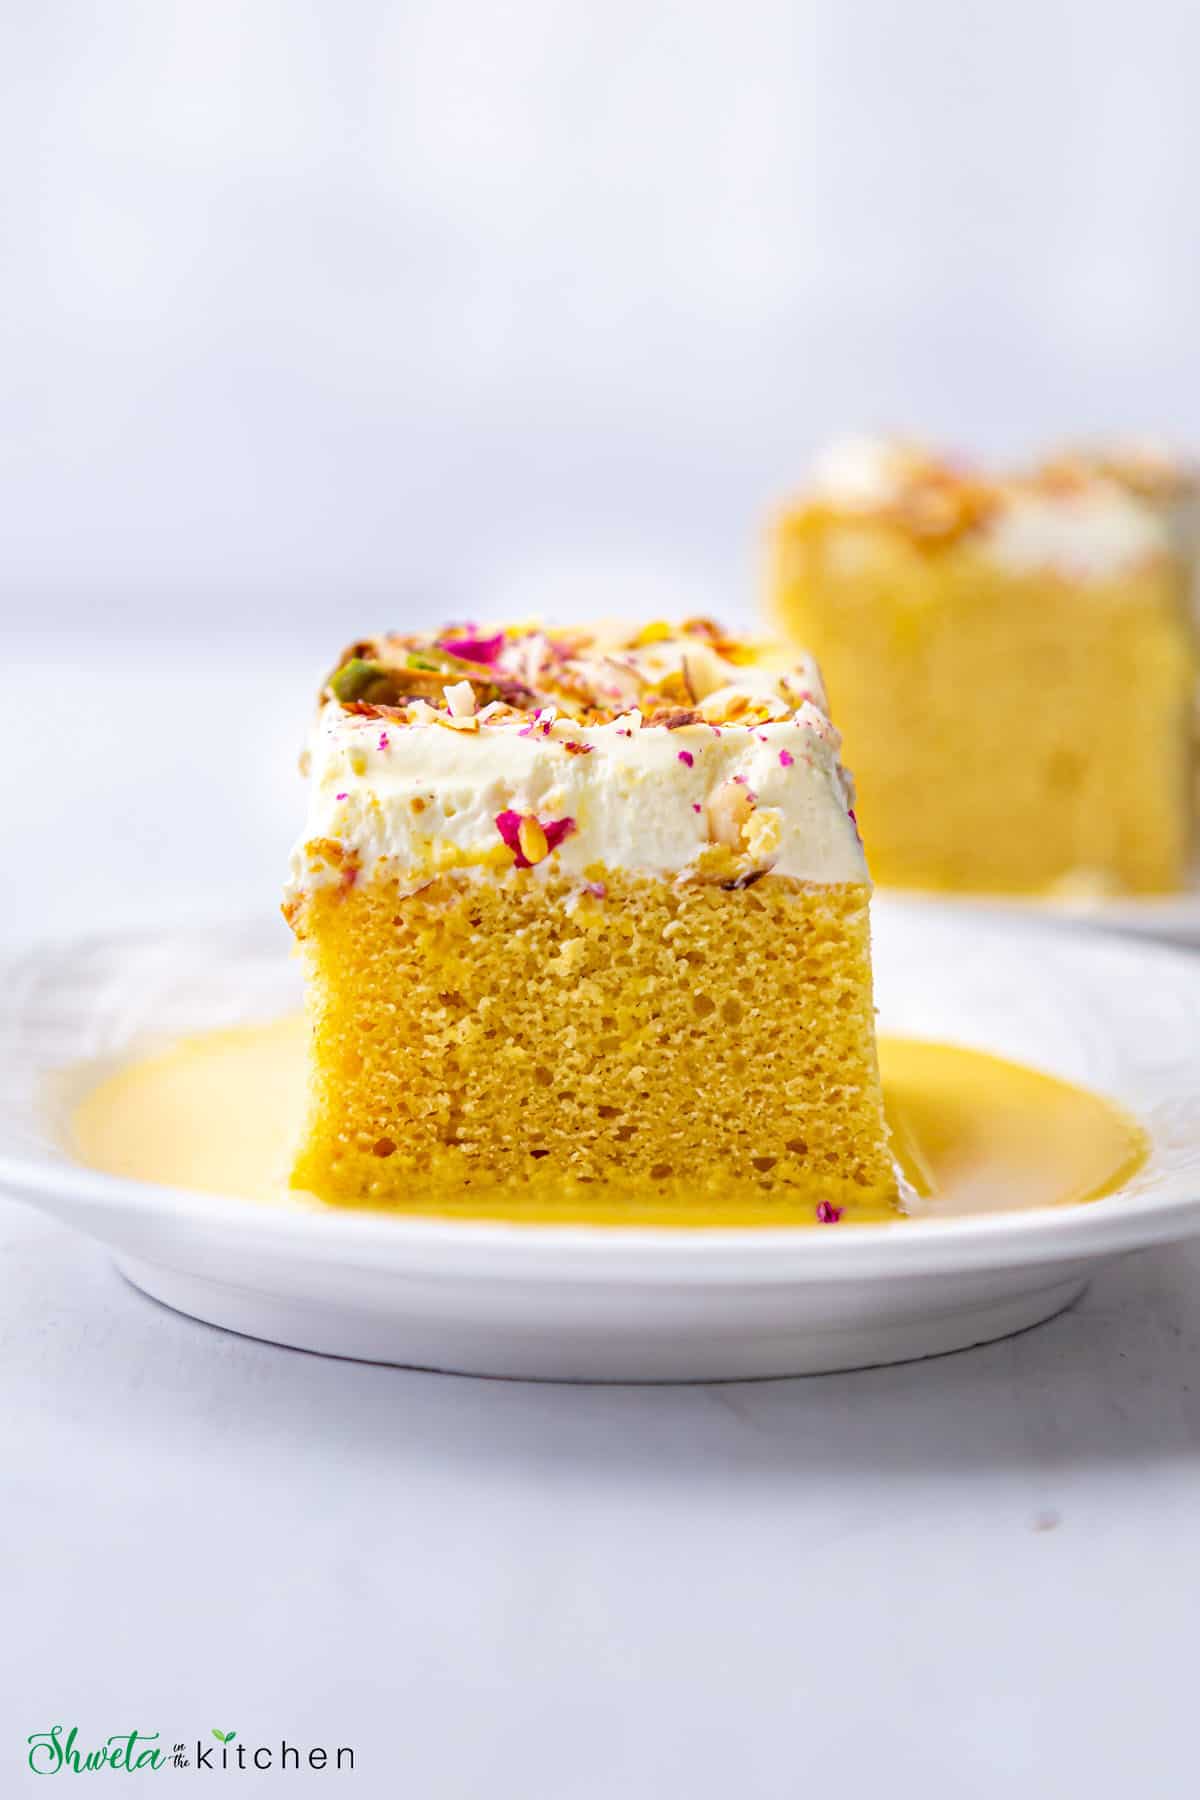
- soft and moist
- tastes just like traditional rasmalai
- easy to make
- can be made ahead of time
- perfect for festivals and celebrations.
Rasmalai is a popular Indian dessert made from soft melt in mouth flattened paneer balls soaked in a thickened sweetened milk flavored with cardamom, saffron, and garnished with nuts.
Rasmalai cake recipe is a fusion version of this popular dessert.
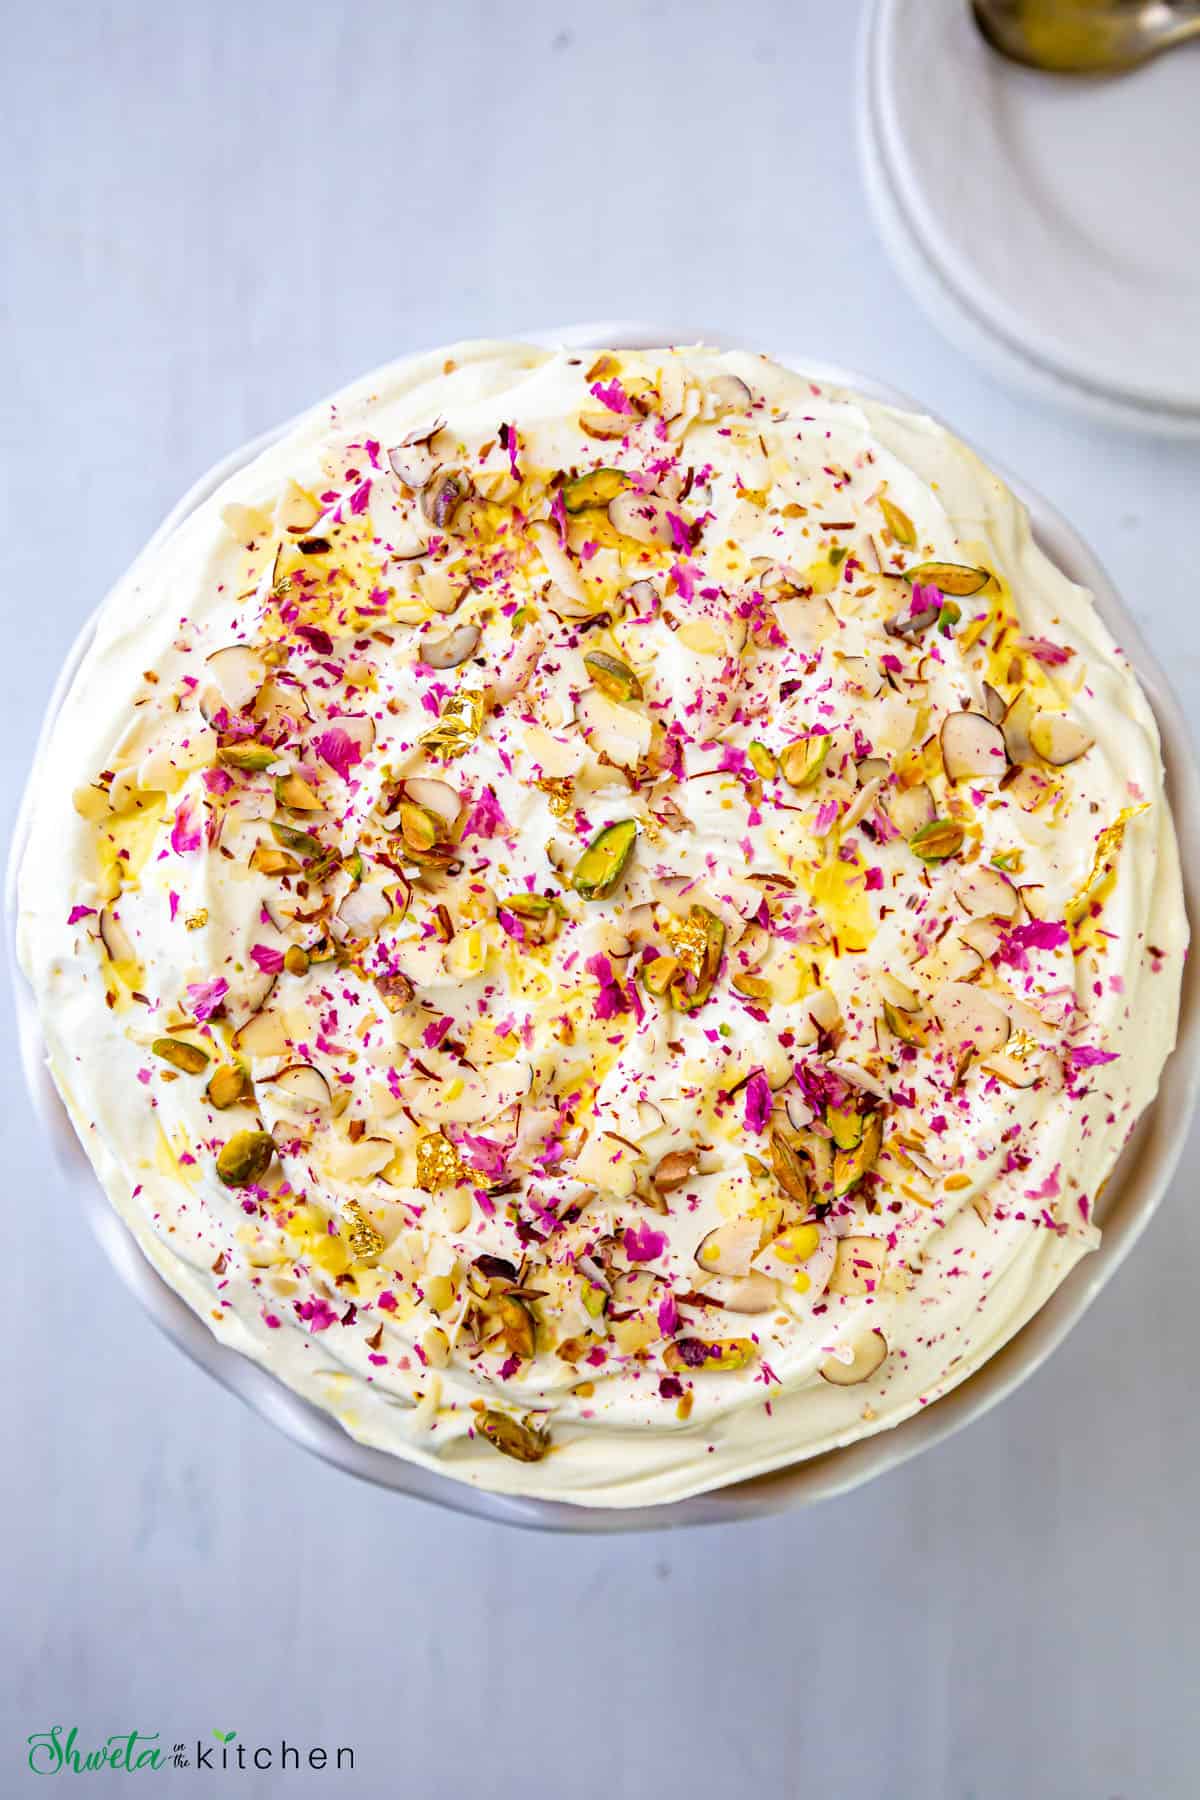
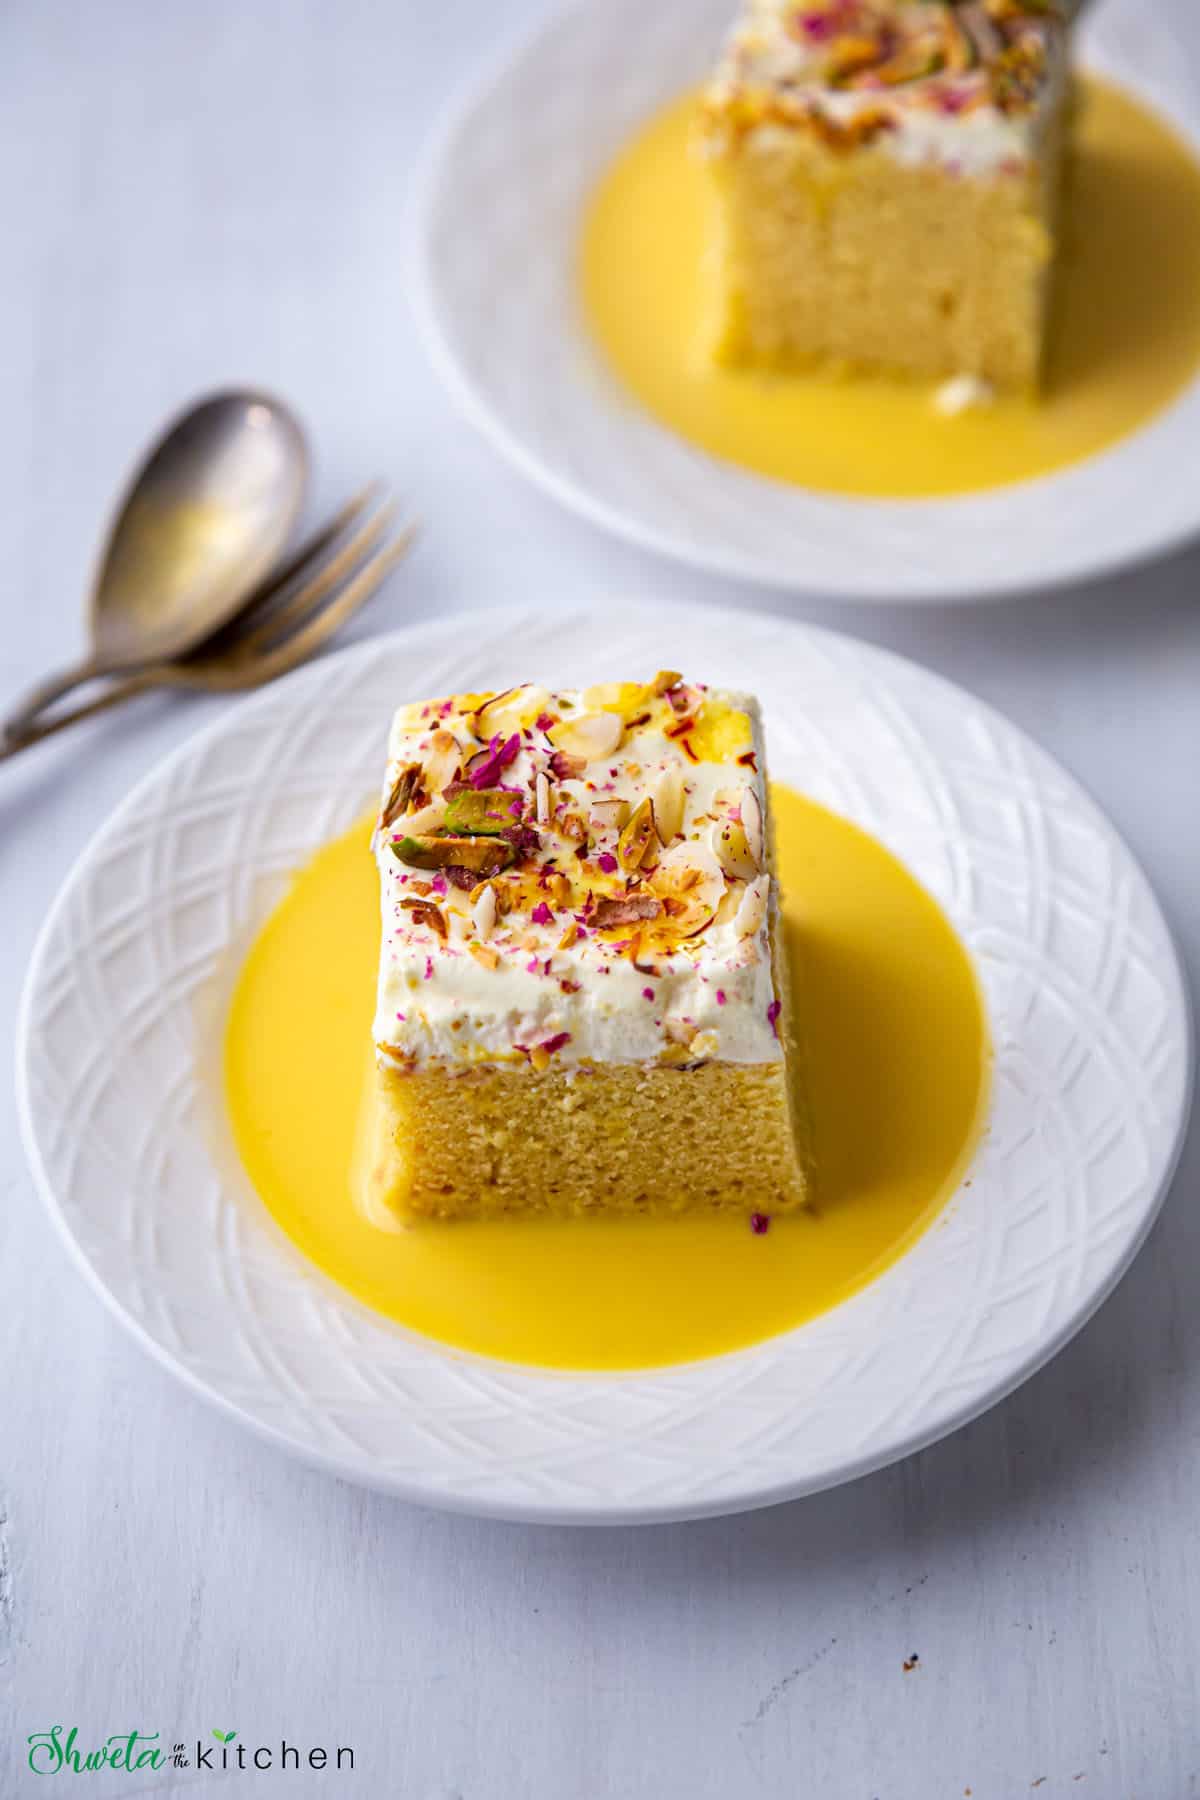
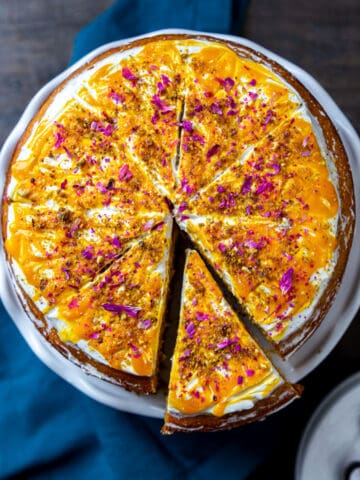
It is an eggless sponge cake soaked with the rasmalai milk (ras or syrup) topped with rasmalai flavored whipped cream and garnished with nuts and rose petals.
Basically, this cake is the best of both worlds - cake and rasmalai together, and it's always a hit!!
This rasmalai flavor cake is made of three components
Ras - Also referred to as Rasmalai milk or syrup. It is the thickened saffron and cardamom flavored milk that is used to flavor the cake and also the whipped frosting. Depending on the quality of your saffron, ras can be pale to dark yellow color.
I've used evaporated milk and Instant pot to make rasmalai milk as it's quick and easy. You can also make this in a pot on the stovetop and replace evaporated milk with whole milk but the consistency will be slightly thinner.
The sponge cake - This is a light, airy, soft, eggless, and butter-free sponge cake. To keep it egg-free I've used yogurt and flavored it with cardamom powder and Rasmalai milk which imparts it a light yellow color.
Whipped frosting - To keep up with the light and airy theme, I prefer using whipped cream frosting to bring this cake together. It's flavored with vanilla extract and rasmalai milk which also gives it a tinge of yellow color.
So now let's see how to make this eggless rasmalai cake.
Recipe Ingredients
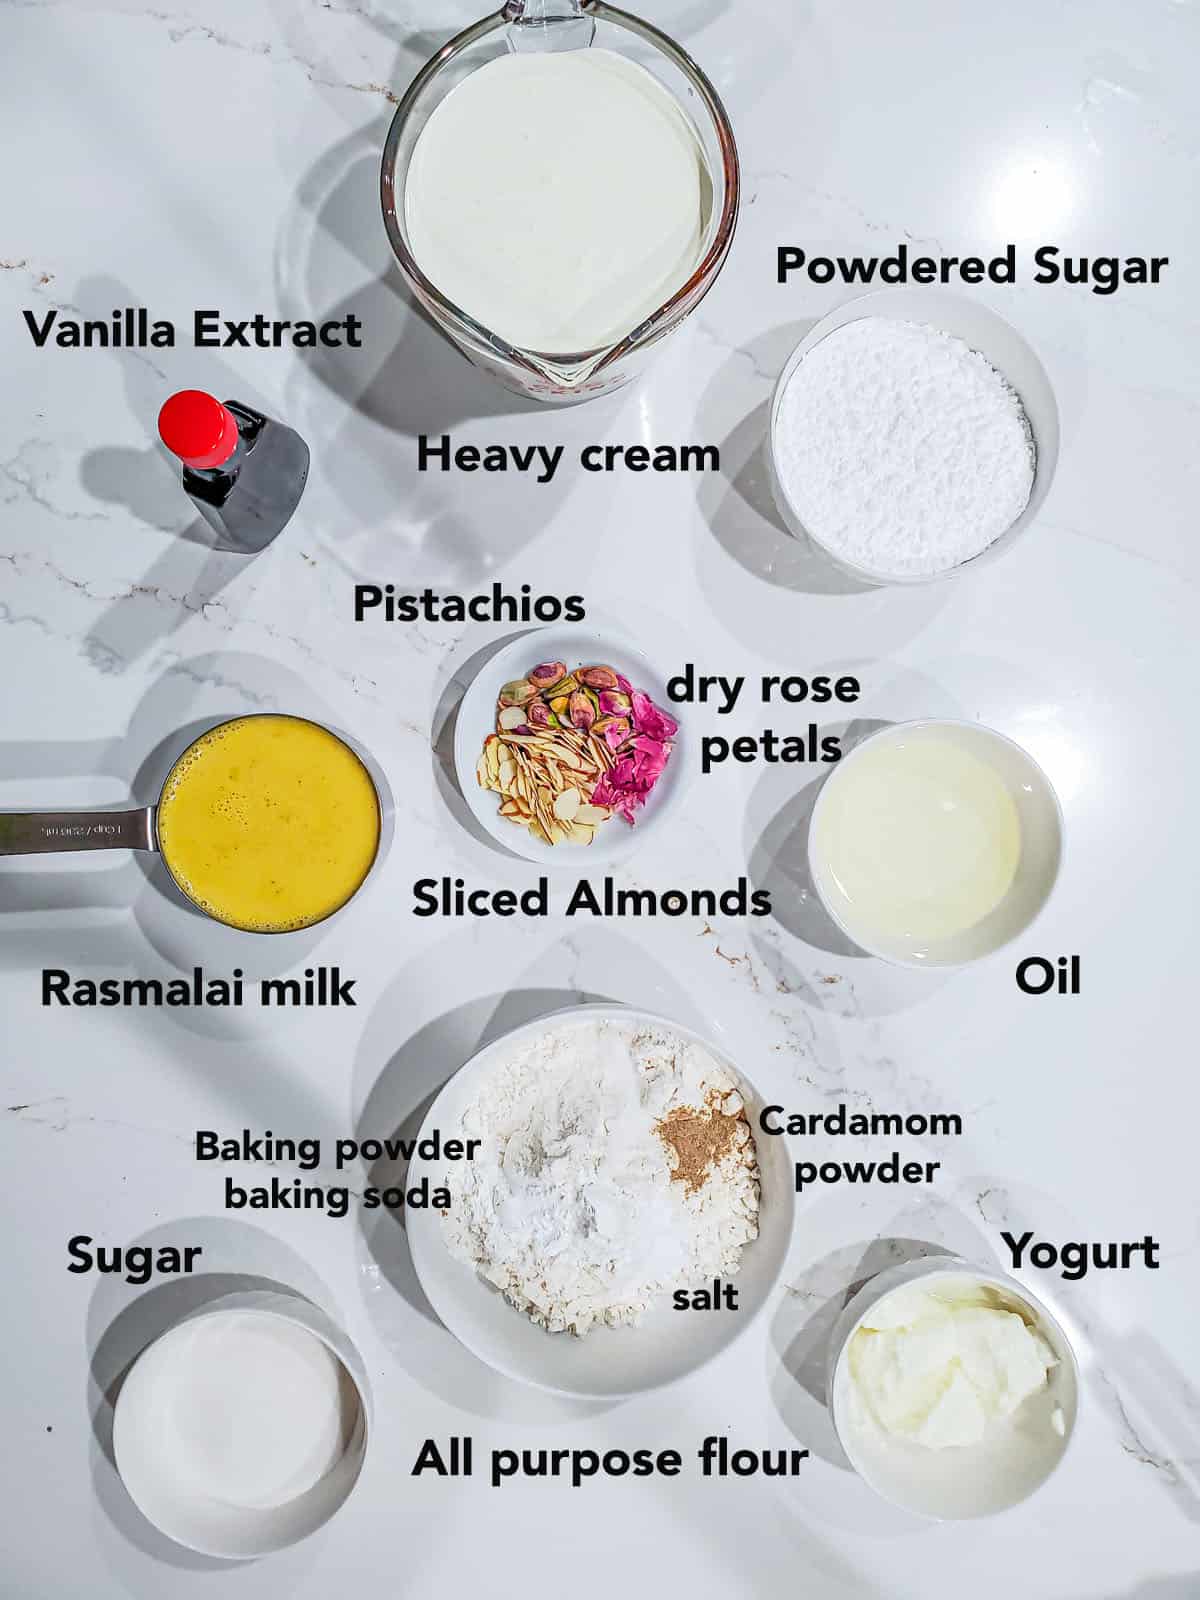
Rasmalai milk - evaporated milk, whole milk cardamom powder, pinch saffron, sugar, and condensed milk.
Sponge Rasmalai cake - all-purpose flour, baking powder, baking soda, salt, sugar, yogurt, flavorless oil (canola or vegetable oil), and rasmalai milk.
Whipped cream frosting - heavy whipping cream,vanilla extract, rasmalai milk, and powdered sugar (confectioners sugar)
For garnishing - nuts (sliced almonds and pistachios) and dry rose petals. Optional - saffron threads and edible gold leaf
Step by Step Method
Make rasmalai milk
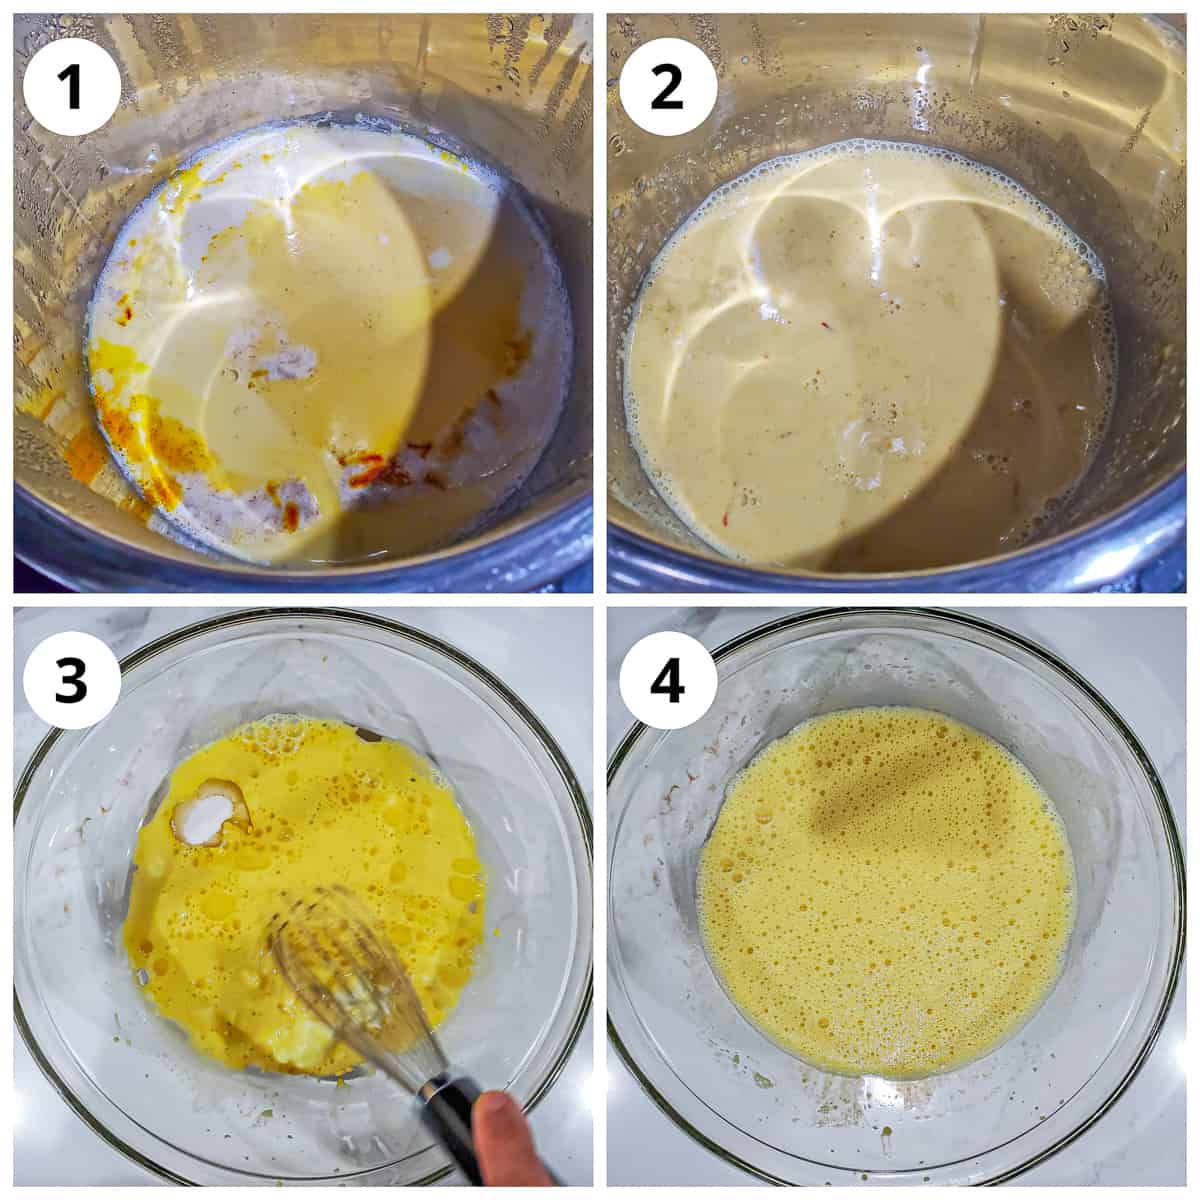
1 - While the instant pot is switched off, add all the ingredients water, evaporated milk, whole milk, cardamom powder, a pinch of saffron, sugar, and condensed milk in this order to the stainless steel insert of the Instant Pot.
Mix well until combined. Close the lid with vent to sealing and cook on manual high for 1 minute followed by natural release. Quick-release is not recommended as the milk will splatter all around.
Step 2 - Open the lid and mix well. Leave the lid open to cool. The milk layer (malai) will form as the milk cools, mix it in for that delicious thick milk. Rasmalai milk (ras) is ready.
You can make this ahead of time and keep refrigerated for 3-4 days. It will thicken slightly as it cools.
Make the rasmalai cake
Preheat the oven to 350°F. Line an 8 inch round baking pan or 8X8 square pan with parchment. Spray oil (lightly) on the pan and on the parchment paper. Keep aside.
Step 3 - In a large mixing bowl (or stand mixer bowl) add all the wet ingredients like yogurt, rasmalai milk, oil, and sugar.
Step 4 - Whisk until sugar is completely dissolved and the mixture is smooth.
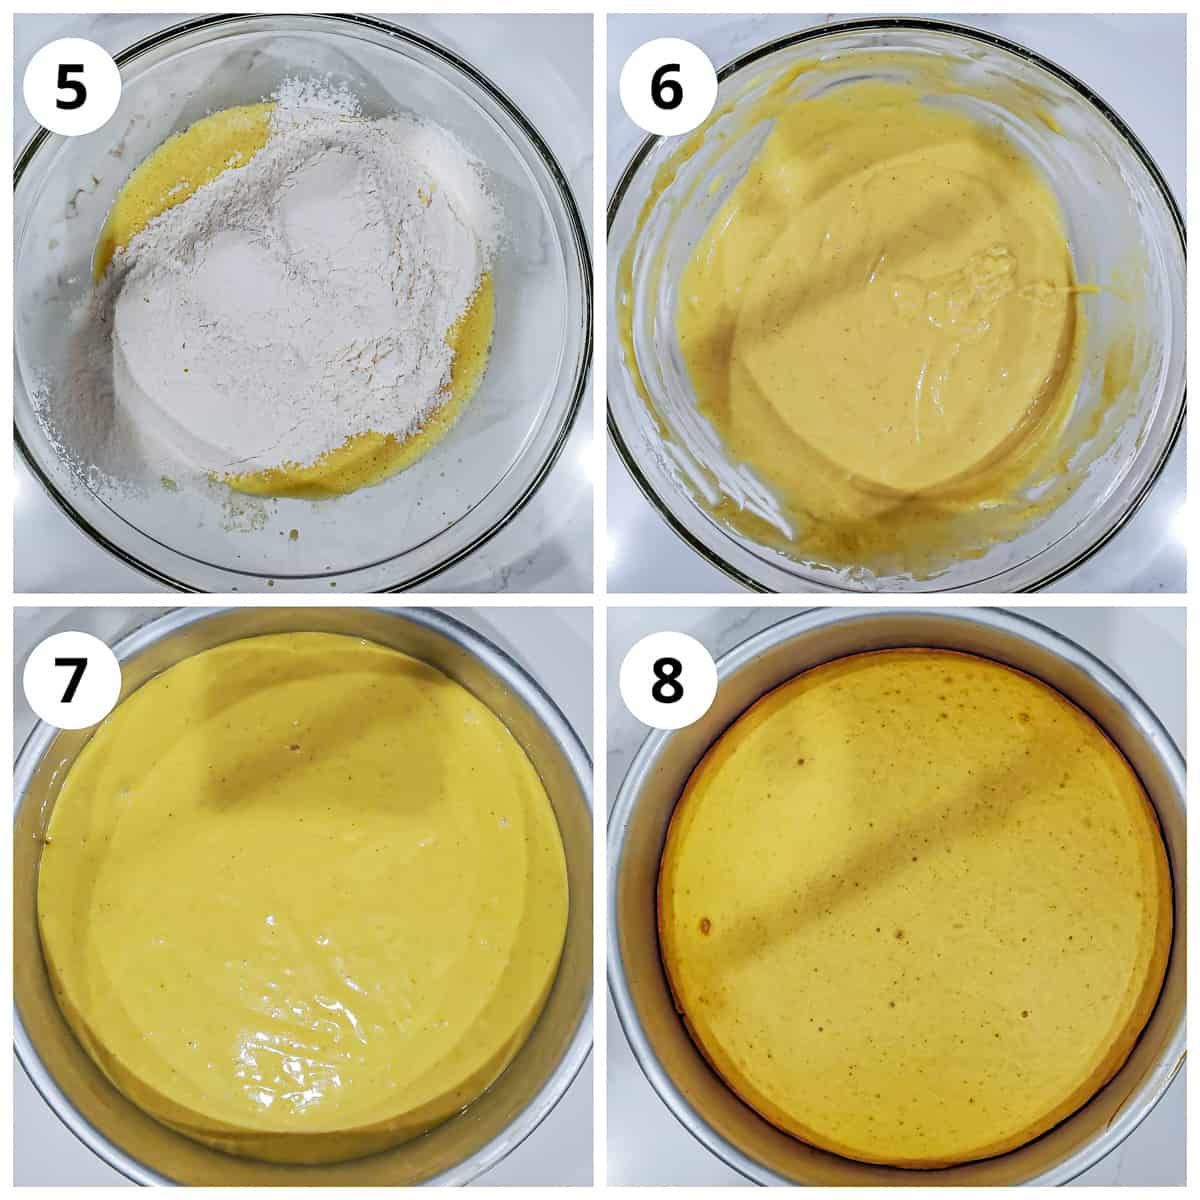
5 - Sift the dry ingredients, all-purpose flour, baking powder, baking soda, salt, and cardamom powder into the wet mixture.
6 - Gently fold the dry mixture into the wet until everything is well combined and smooth (do not over-mix).
7 - Pour the batter into the lined baking pan.
8 - Bake at 350°F for 20-25 mins or until a toothpick inserted at the center of the cake comes out clean.
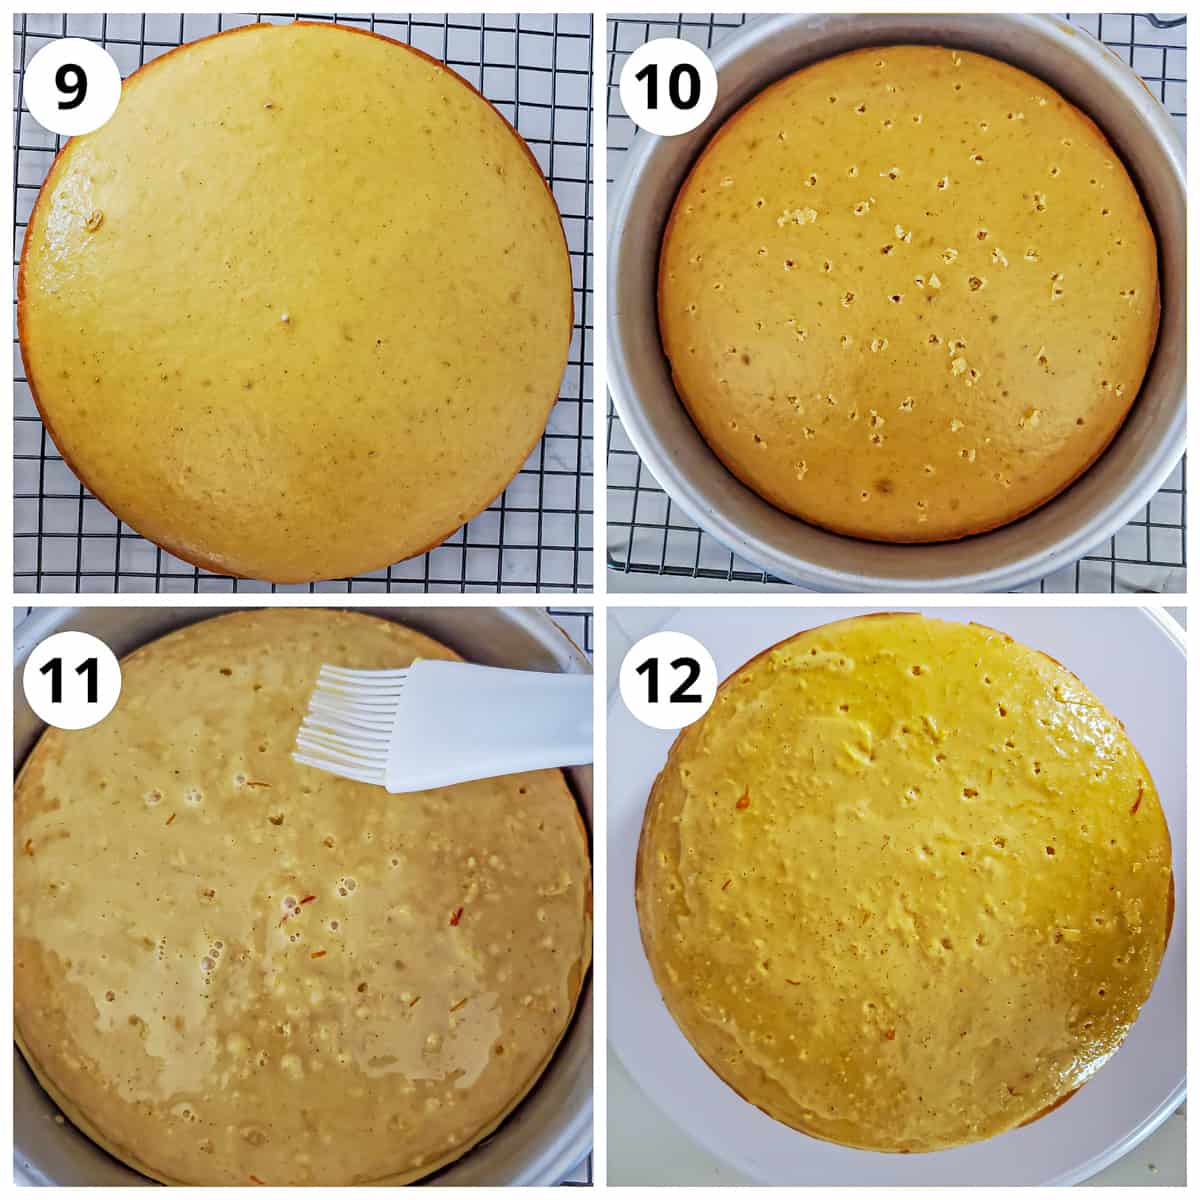
9 - Remove from oven and let it stand in the pan for 5-10 mins after which transfer it onto a wire rack to cool completely.
10 - Transfer the cake back to the baking pan. Using a toothpick or skewers, poke holes all over the cake.
11 - Pour half a cup of the rasmalai milk over the cake. Spread with a brush or spoon to make sure it spreads evenly all over the cake.
12 - Cover the cake with cling wrap and refrigerate for 1-2 hours or overnight so the cake can soak up all the milk.
Make the frosting
I use my kitchen aid stand mixer with a wire hook attachment to make the frosting. You can also use a hand mixer.
Keep the wire hook attachment and the stand mixer bowl in freezer for 15 minutes just before you make the frosting and chill the whipped cream in the refrigerator.
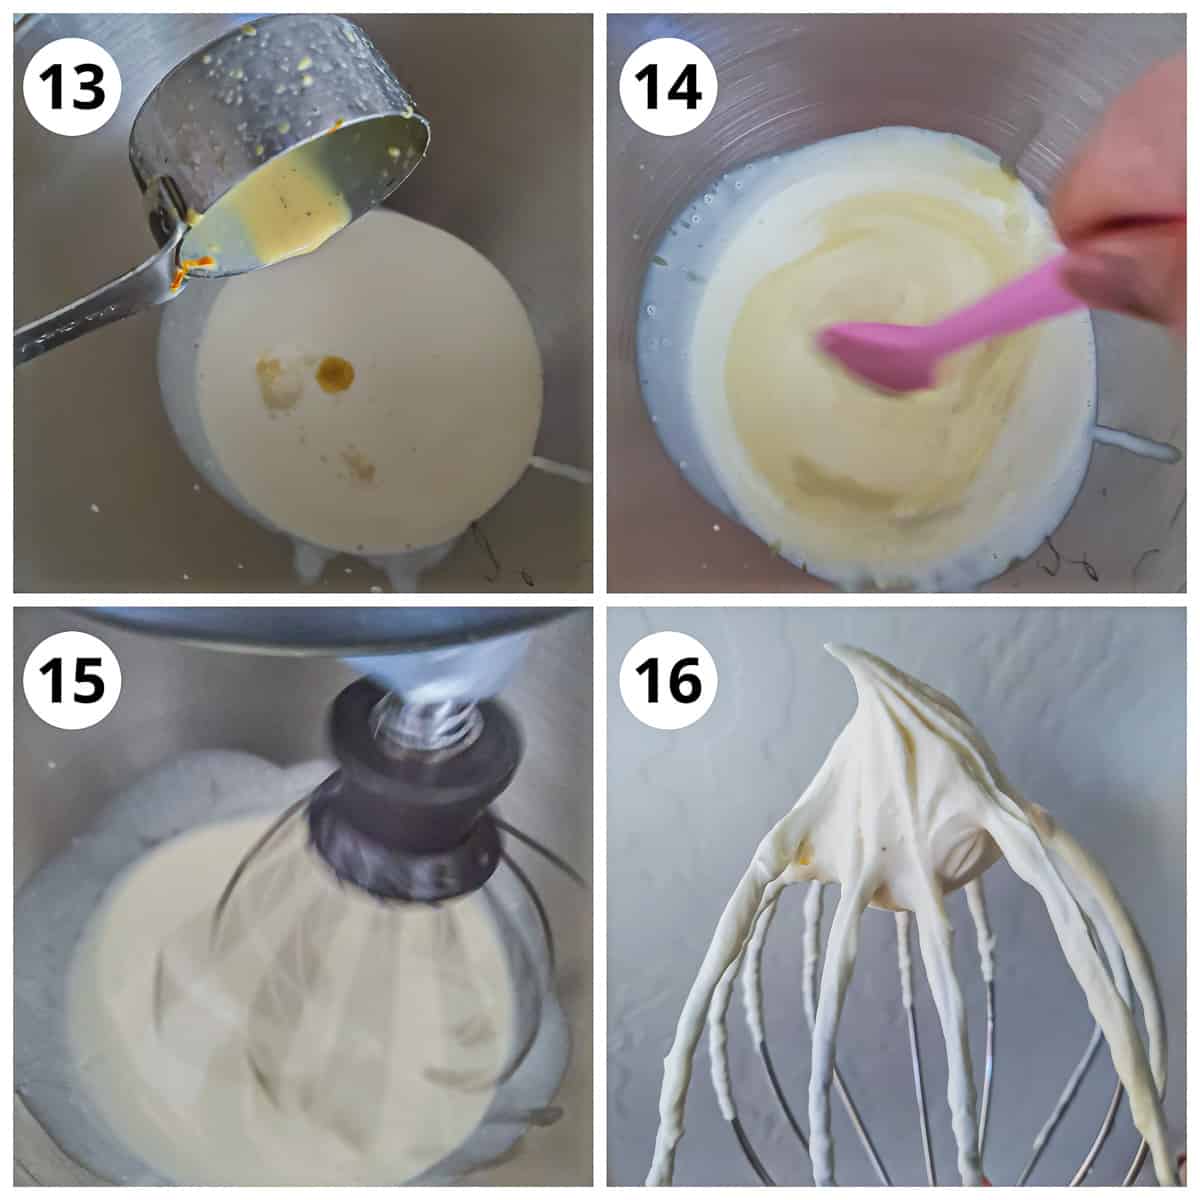
13 and 14 - After 15 mins, remove the bowl and whisk from the freezer. Add cream and rasmalai milk to the chilled bowl.
14 - Using a spatula, mix well to combine.
15 - Starting low slowly increase the stand mixer speed to medium-high (6-8). Beat for about 2-4 mins or until you see the cream thickening.
At this point add the powdered sugar and vanilla extract (begin with ½ cup and increase as needed). I added about ¾ cup.
16 - Start at low speed again to prevent the powdered sugar from flying all over your kitchen. Slowly increase the speed to medium-high (6-8).
Beat for another 2-3 minutes or until you see the cream has thickened and is keeping its shape (or forming stiff peaks).
Assembling the cake
I have kept it simple and just applied the frosting on top. I did not divide the cake into layers but you can slice it in half and frost it like this mango cake too. Either way its delicious!
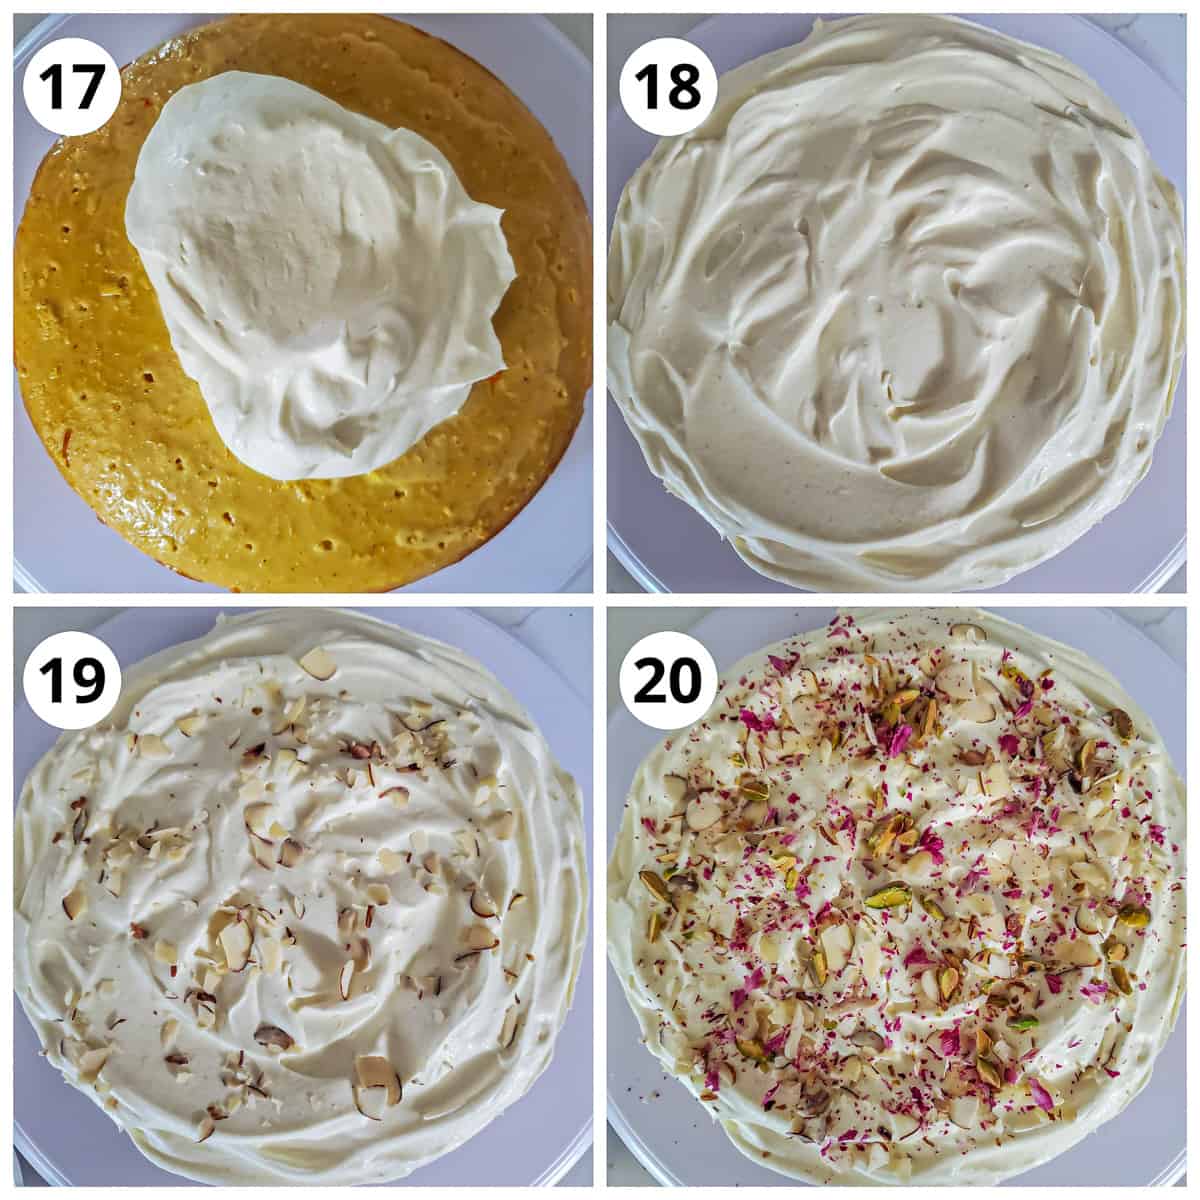
17 - Remove the chilled soaked cake and place it on the cake stand or the serving plate, add a tablespoon of the frosting at the center of the cake stand. This will act as glue to hold the cake in place
18 - Add a generous amount of frosting to the cake and using a spatula spread it out evenly on the top part only as much as possible. It doesn't need to be perfect.
19 - Sprinkle some dry fruits like sliced almonds and chopped pistachios over the frosting.
20 - Finally finish it with some dry rose petals and light drizzle of rasmalai milk.
Optional - You can also add some saffron threads and edible gold leaf for a more festive look.
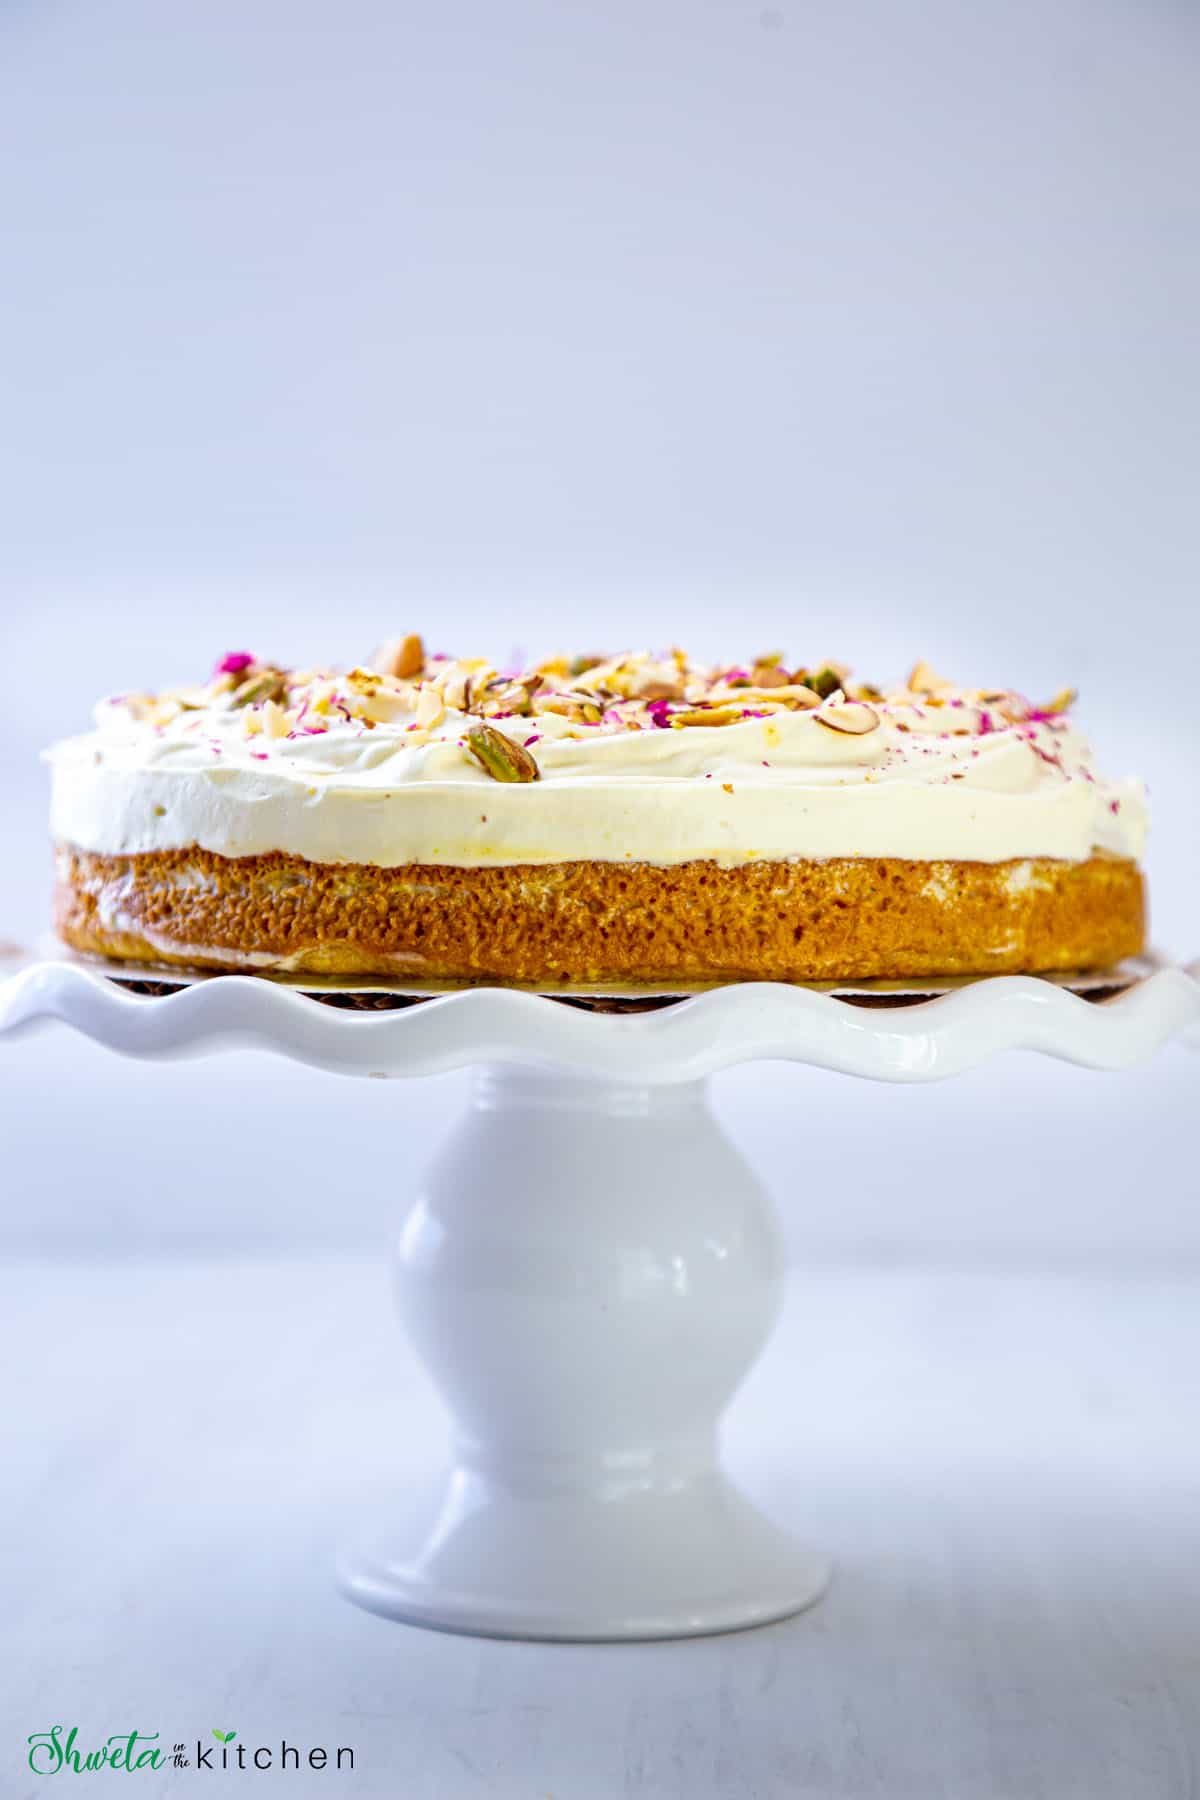
Soft, moist and delicious Rasmalai cake is ready!
Serving suggestions
This cake can be served just as is topped with whipped frosting but since it's a rasmalai cake, I like to add a bit of the rasmalai milk on the serving plate and place the cake piece on it.
Variations
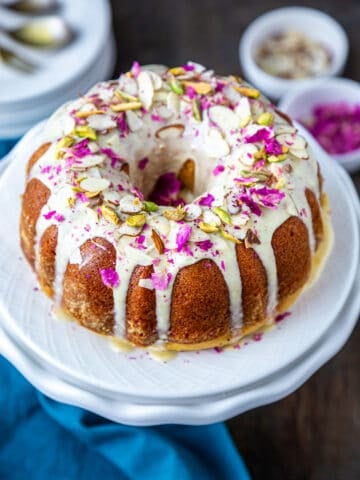
Rasmalai Tres Leches - A tres leches cake is a sponge cake soaked in three kinds of milk: evaporated milk, condensed milk, and heavy cream. So to make a Rasmalai Tres Leches just replace the whole milk while making ras with heavy cream, the rest of the steps and recipe remains the same. Easy right!
Rasmalai cupcakes - You can also bake this cake batter into 12 cupcakes and bake for 15-18 minutes or till a toothpick inserted in the center comes out clean. Cool, poke, add saffron milk, chill and then frost and decorate.
Recipe Tips and Notes
- To make rasmalai milk on the stovetop, add all the ingredients to a heavy-bottomed pot and bring it to a boil, stir intermittently. Lower the heat and simmer for 5-10 mins. Turn off the heat and allow it to cool.
- Do not overmix the batter once you add the dry ingredients. That will result in a denser and hard cake.
- Cake on its own is less sweet since when assembled in combination with the whipped cream and ras it tastes just right. You can increase the sugar to ½ cup for a cake if you prefer it sweeter.
- Hacks or shortcuts - use a store-bought cake mix and bake as per package instructions or use cool whip (ready-made whipped cream) and flavor it with rasmalai milk.
- The frosting quantity is sufficient to frost a two-layer cake. There will be extra frosting if you frost just a single layer. Extra frosting can be served with cake. The same is true for Ras too.
FAQ's
The unfrosted cake can be stored at room temperature for 2 days and refrigerated for a week. Store frosted cake covered in the refrigerator for 3-4 days.
Unfrosted cake can be frozen. Allow to cool completely, cover in a cling wrap and seal airtight before storing in freezer. When ready to use, thaw at room temperature and then frost.
More eggless cake recipes
Hope you enjoy this Eggless Rasmalai Cake!! If you give this recipe a try, please rate by clicking stars ⭐️ in the recipe card. Thank you ❤️ ! You can also follow me on Facebook | Instagram to see what's cooking in my kitchen!!
Recipe Card
Rasmalai Cake (Eggless)
Equipment
Ingredients
For Rasmalai milk
- 2 tablespoon water
- 12 oz can evaporated milk or replace with whole milk
- ½ cup whole milk
- ¼ teaspoon cardamom powder
- pinch saffron
- 2 tablespoon sugar
- 2 tablespoon condensed milk or replace with sugar
For the sponge cake
- 1¼ cup All purpose flour
- 1 teaspoon baking powder
- ½ teaspoon baking soda
- ¼ teaspoon salt
- ¼ teaspoon cardamom powder
- ¼ cup sugar since we have adde ¼ cup sugar in rasmalai milk
- ½ cup yogurt
- 1 cup rasmalai milk recipe included
- ½ cup oil canola or vegetable oil
For soaking/brushing the cake after baking
- ½ cup rasmalai milk
For the whipped cream frosting
- 1 cup heavy whipping cream
- ½ to 1 cup powdered sugar depending on the sweetness you like, I use ¾ cup
- ¼ cup rasmalai milk recipe included
- ½ teaspoon vanilla extract
For garnishing
- 6-7 almonds sliced
- 6-7 pistachios sliced
- Few strands saffron optional
- 1-2 tablespoon rasmalai milk recipe included
- dry rose petals as needed
Want to save this recipe?
Instructions
To make rasmalai milk
- Add all the ingredients water, evaporated milk, whole milk, cardamom powder, a pinch of saffron, sugar, and condensed milk in this order to the stainless steel insert of the Instant Pot. Mix well until combined.
- Close the lid with vent to sealing and cook on manual high for 1 minute followed by natural release. Don't do the quick release as the milk will splatter all around.
- Once the pin drops, open the lid and mix well.
- Leave the lid open to cool. The milk layer (malai) will form as the milk cools, mix it in for that delicious thick milk. Rasmalai milk (ras) is ready. You can make this ahead of time and keep refrigerated for 3-4 days. It will thicken slightly as it cools.
To make rasmalai cake
- Preheat the oven to 350°F. Line an 8 inch round baking pan with parchment. Spray oil (lightly) on the pan and on the parchment paper. Keep aside.
- In a large mixing bowl (or stand mixer bowl) add all the wet ingredients like yogurt, rasmalai milk, oil, and sugar and whisk until sugar is completely dissolved and the mixture is smooth.
- Sift the dry ingredients, all-purpose flour, baking powder, baking soda, salt, and cardamom powder into the wet mixture.
- Gently fold the dry mixture into the wet until everything is well combined and smooth (do not over-mix).
- Pour the batter into the lined baking pan. Bake at 350°F for 20-25 mins or until a toothpick inserted at the center of the cake comes out clean.
- Remove from oven and let it stand in the pan for 5-10 mins after which transfer it onto a wire rack to cool completely.
- Transfer the cooled cake back to the baking pan. Using a toothpick or skewer, poke holes all over the cake.
- Pour half cup of the rasmalai milk over the cake. Spread with a brush or spoon to make sure it spreads evenly all over the cake.
- Cover the cake with cling wrap and refrigerate for 1-2 hours or overnight so the cake can soak up all the milk.
To make the frosting
- Keep the wire hook attachment and the stand mixer bowl in the freezer for 15 minutes just before you make the frosting and chill the whipped cream in the refrigerator.
- After 15 mins, remove the bowl and whisk from the freezer. Add cream, and rasmalai milk to the chilled bowl. Mix well to combine.
- Starting low, slowly increases the stand mixer speed to medium-high (6-8). Beat for about 2-4 mins or until you see the cream thickening.
- At this point add the vanilla extract and powdered sugar (begin with ½ cup and increase as needed). I added about ¾ cup.
- Start at low speed again to prevent the powdered sugar from flying all over your kitchen. Slowly increase the speed to medium-high (6-8).
- Beat for another 2-3 minutes or until you see the cream has thickened and is keeping its shape (or forming stiff peaks).
To assemble the cake
- Remove the chilled soaked cake and place it on the cake stand or the serving plate, add a tablespoon of the frosting at the center of the cake stand. This will act as glue to hold the cake in place
- Add a generous amount of frosting to the cake and using a spatula spread it out evenly on the top part only as much as possible. It doesn't need to be perfect.
- Sprinkle some dry fruits like sliced almonds and chopped pistachios evenly over the frosting.
- Finally, finish it with some dry rose petals and light drizzle of rasmalai milk.
- Optional - You can also add some saffron threads and edible gold leaf for a more festive look.
- Soft, moist, and delicious Rasmalai cake is ready! Slice and serve or keep refrigerated.
Notes
- To make rasmalai milk on the stovetop, add all the ingredients to a heavy-bottomed pot and bring it to a boil, stir intermittently. Lower the heat and simmer for 5-10 mins. Turn off the heat and allow it to cool.
- Do not overmix the batter once you add the dry ingredients. That will result in a dense and hard cake.
- Cake on its own is less sweet since when assembled in combination with the whipped cream and ras it tastes just right. You can increase the sugar to ½ cup for a cake if you prefer it sweeter.
- The unfrosted cake can be stored at room temperature for 2 days and refrigerated for a week. Store frosted cake covered in the refrigerator for 3-4 days.
- Hacks or shortcuts - use cool whip (ready-made whipped cream) and flavor it with rasmalai milk to make the whipped cream frosting.
- The frosting quantity is sufficient to frost a two-layer cake. There will be extra frosting if you frost just a single layer. Extra frosting can be served with cake. The same is true for Ras too.

Rupa S says
Hi there. For the Ras do I do it for 2 min on high pressure or leave it at 1 mins if I’m trying to double or quadruple the recipe?
I’m trying to make (2) 9x13 size sheets cake so I was just wondering if I can make the ras in one big batch in the instant pot.
Thank you!
Shweta Arora says
Hi Rupa, the time remains the same even if you double the recipe.Just don’t fill past the max line and stir well after opening. Hope that helps!
Geetika says
Hi! Going to try and make this cake, but don't have an instant pot. How do you recommend making the ras on a stovetop?
Shweta Arora says
Hi Geetika, yes you can make ras on stovetop. please check the recipe tips and notes section for details.
Josh says
Hi there Shweta!
I used gluten free flour and I found my batter very lumpy. I whisked it until smooth. I had the temperature and time right and my cake was looking good, I toothpicked but it was coming out clear. I wrapped my cake in tinfoil and raised the temp a bit. After an extra 20m on a higher temperature, I pulled it out and let it cool but it deflated. Not sure what I did wrong.
Any ideas?
Thanks
Joshua
Shweta Arora says
Hi, Thanks for trying the recipe! I haven't tested this cake recipe with gluten free flour so cant provide exact reason. Sorry.
Aditi says
Made this cake and it was so delicious. Thank you so much for sharing!!
Shweta Arora says
Thank you Aditi! Happy to know you loved it!!