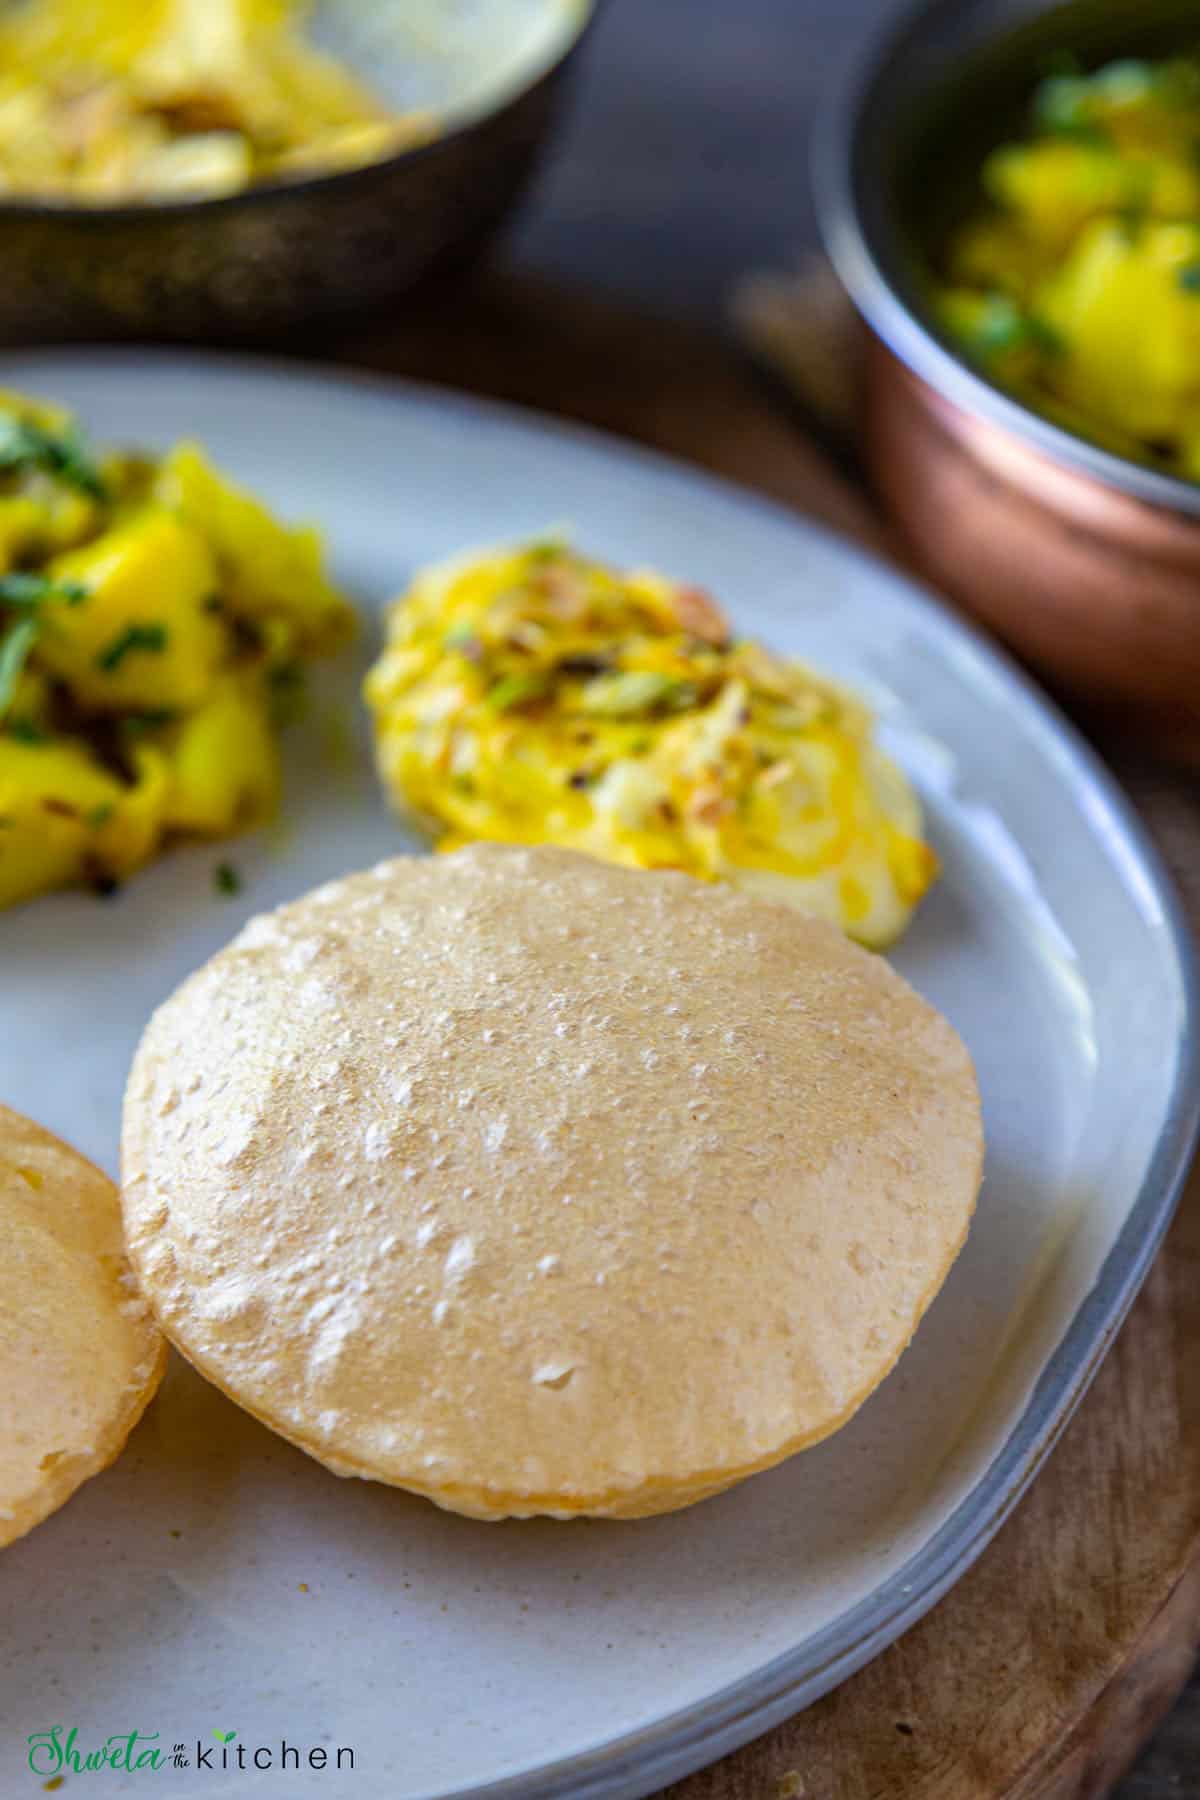
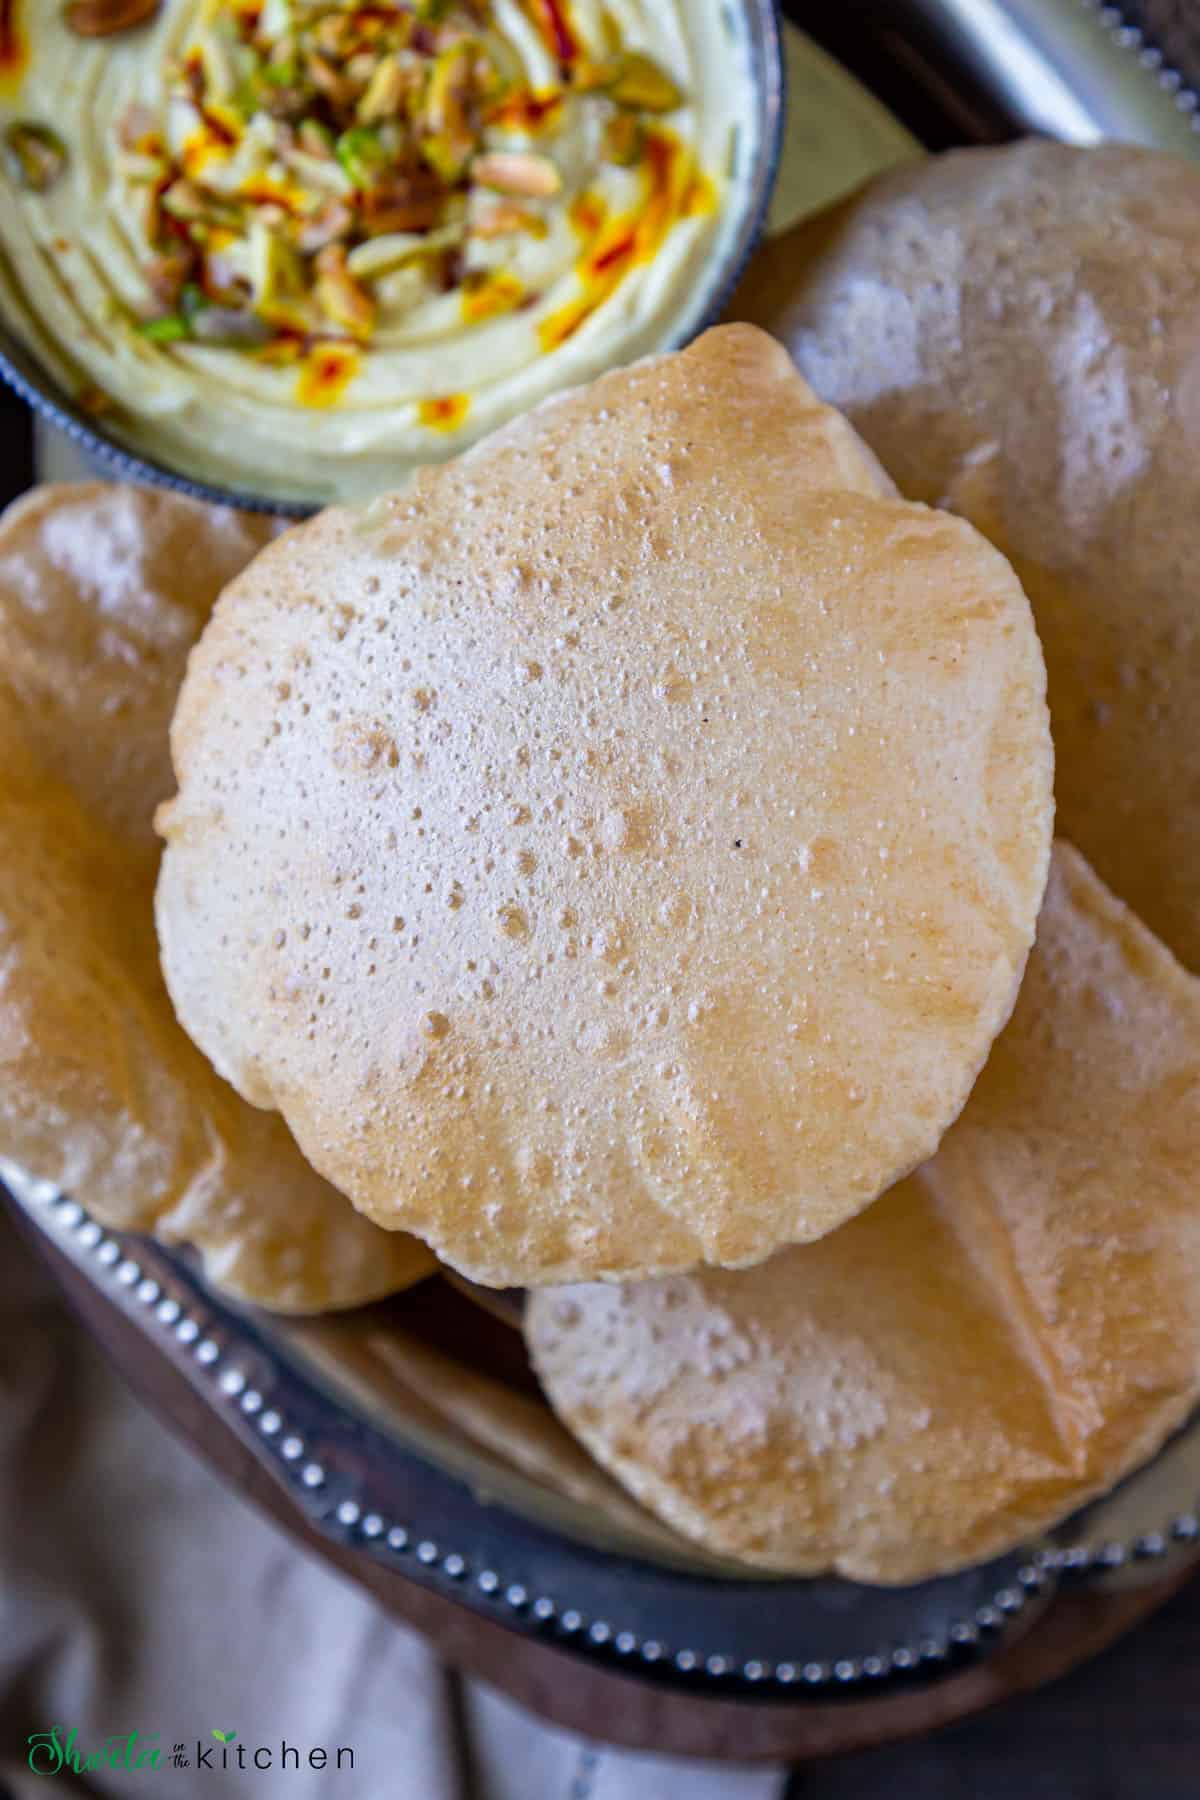
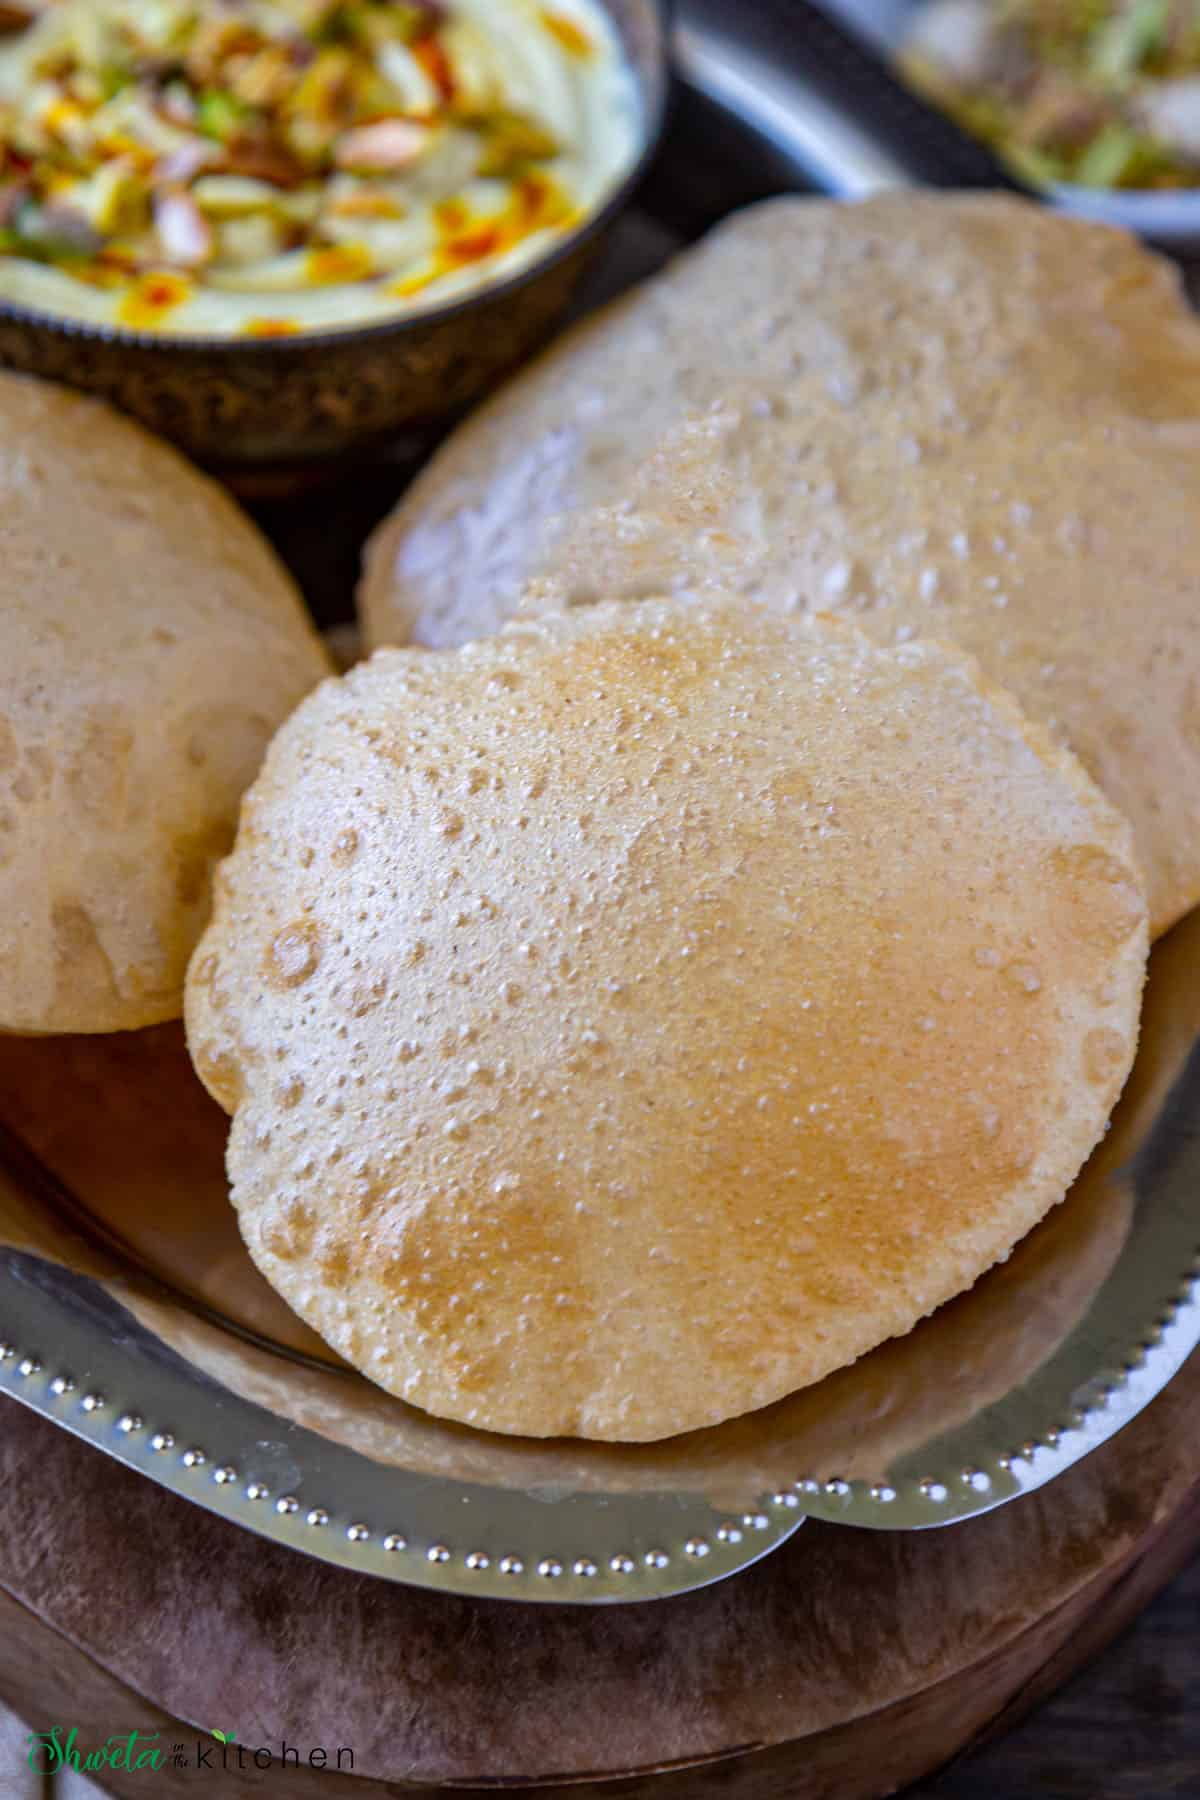
Poori or Puri is a round, golden, puffed, fried Indian bread made from whole wheat flour. This soft and slightly crispy bread pairs perfect with Indian curries as well as some sweet dishes.
In this post, sharing how to make poori that is perfectly soft, fluffy, and oil free. Also sharing hacks to make those perfect round ones!!
Want to save this recipe?
Poori is our favorite bread of all Indian bread and I'm not exaggerating.
My kids love them so much that they can start eating right as I make them. Don't blame them, those warm puffy pooris are just too irresistible.
There is something magical about that crispy yet soft poori which makes you fall in love with them instantly.
Having said that, even though we love it, I tend to make it only for special occasions, festivals or weekends since its fried food after all.
What is Puri
Puri, also spelled as Poori is an Indian fried bread made with three basic ingredients whole wheat flour (atta), salt, and water for kneading.
Sugar and rava (semolina or sooji) are alsoo added at times.
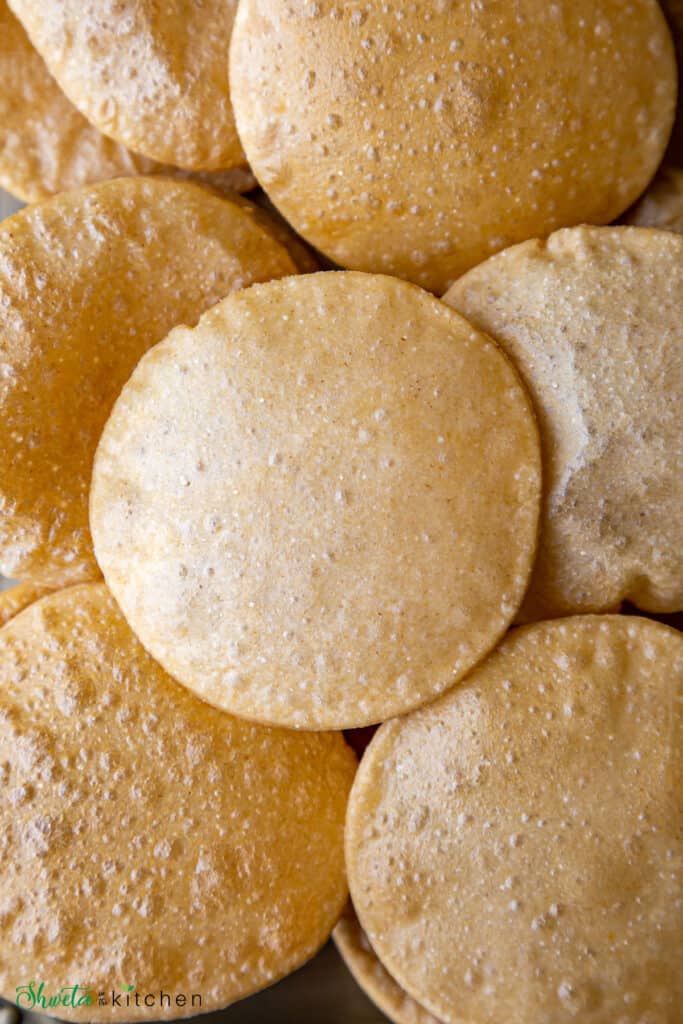
The poori dough is unleavened, so you can make them instantly. Just divide into small rounds, roll into slightly thick disks (rounds) and fry until puffy and golden.
There you have golden, fluffy, and slightly crispy, soft puris ready to eat.
Making puris might sound simple but getting that perfectly round and puffed puri is an art.
If not done right, you may land up with pooris that flat, don't puff while frying, turn out oily, and hard.
The good news is that art of making poori can be easily mastered with all the tips, tricks, and hacks I'm sharing today.
And if you are struggling to get that round shape, don't worry I've got you covered. Use a round cookie cutter or big Katori to get the perfect round poori (my mom's hack). Voila!!
Recipe Ingredients
- Flour - we will be using whole wheat flour also known as atta as the main ingredient for making poori.
- Salt - little goes a long way.
- Oil - for kneading and frying. Prefer using canola oil for kneading and peanut oil for frying.
- water - for kneading the dough.
- Sugar - optional ingredient but is normally added as it gives a nice golden color to the poori.
- Rava - also known as sooji or semolina. Another optional ingredient that may be added as it helps make poori crisper and hold shape longer.
Step By Step Instructions
To make the dough
You can make the dough in a standing mixer (like me) or by hand.
The process is pretty much the same for both, just that the stand mixer makes it easy by doing the kneading part for you which otherwise you do with your hand, makes a great arm workout.
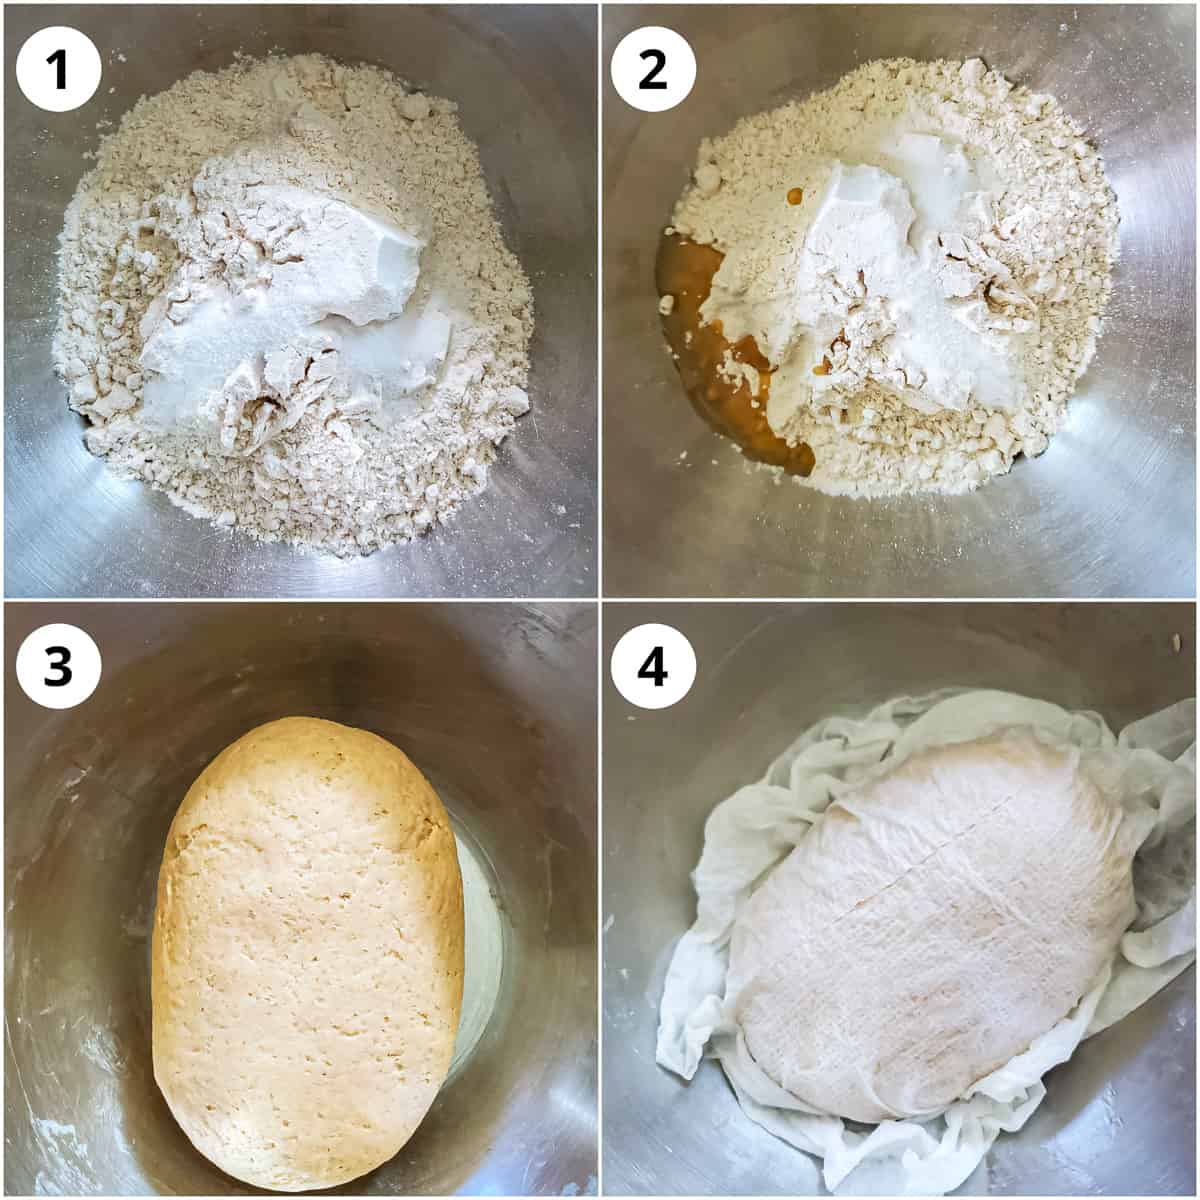
1 and 2 - In a stand mixer bowl or regular mixing bowl, add the ingredients - whole wheat flour, sugar, salt, and 1 tablespoon of oil.
Attach the dough hook of the stand mixer and start on low speed to mix well and form a crumbly dough.
3 - Increase the speed to 4 and using ¼ cup water at a time (total of about ½ to little less than ¾ cup, may vary depending on the atta brand) knead into a stiff dough.
Add 1 tablespoon oil, increase the speed to 6 and knead it for 2-3 mins.
Do not knead into a soft one since it absorbs more oil and makes poor greasy. This dough has to be stiffer than regular chapati dough.
4 - Cover with a wet cloth and let the dough rest for 10 mins before making puri.
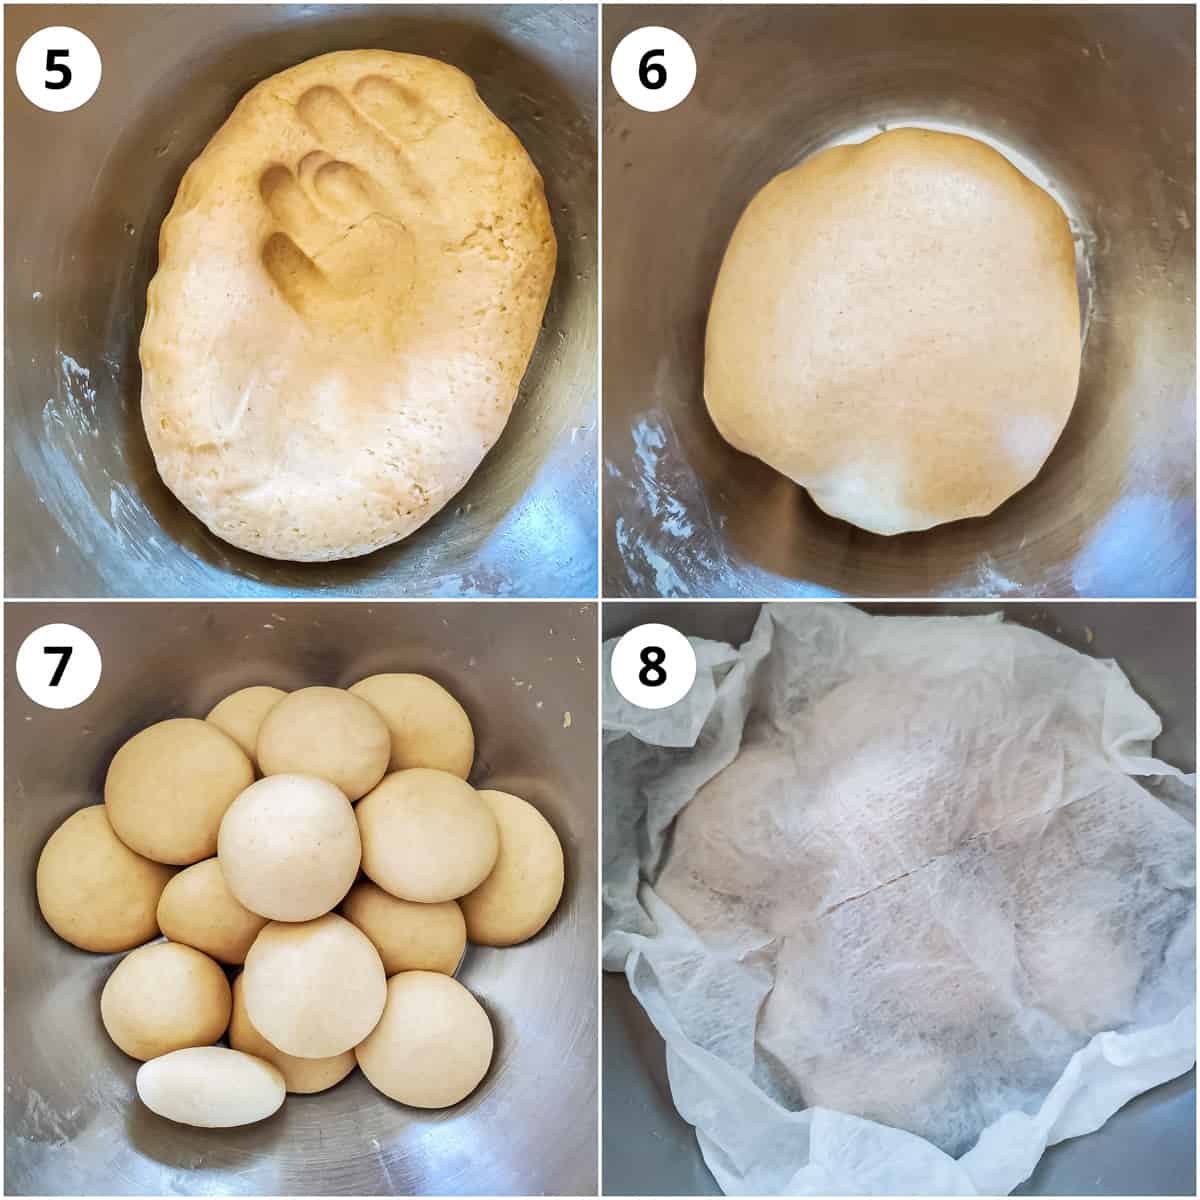
5 and 6 - After resting it should turn a little softer than before but still stiff, knead again to smooth dough.
7 - divide it into 15-16 equal balls and roll them to make smooth.
8 - Keep the balls covered with a wet cloth until ready to use to prevent them from drying.
To roll the Puri
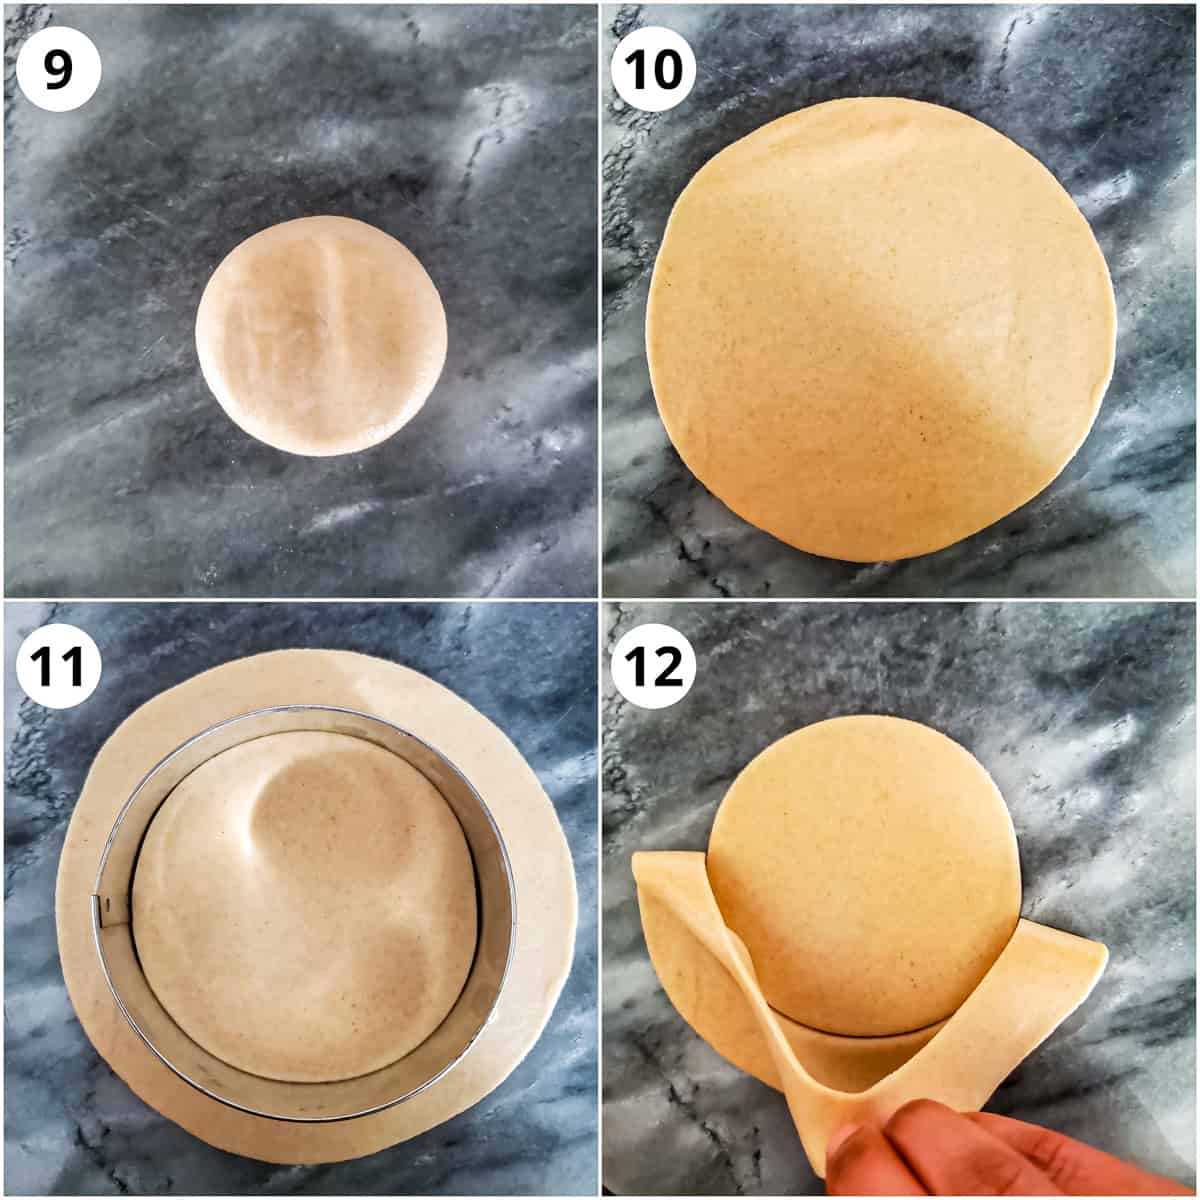
9 - grease your rolling pin and work surface with little oil. Work with one ball at a time, flatten the ball with your fingers on the work surface.
10 - Using a drop or two of oil, roll into an even circle not too thin and not too thick. It needs to be a bit thick else the puri will not puff up evenly. (Avoid using flour)
11 and 12 - Easy hack: For those perfect round pooris, after you roll (doesn't have to be a circle can be any shape just make sure it's not thin), use a round cutter, and cut the perfect round poori.
You can either roll one ball and then cut it or combine multiple to make a big chapati size thick roti and cut multiple pooris at a time.
Remove the extra dough and this can be combined with more dough to make poori.
You can make one poori and fry it immediately or I prefer to make a batch of 3-4 pooris before frying.
If you are not frying the poori immediately, spread them on to a plate (optional you can line with parchment paper).
Do not stack or overlap the pooris to prevent them from sticking. Keep them covered with a wet cloth to prevent from drying.
To Fry the Puri:
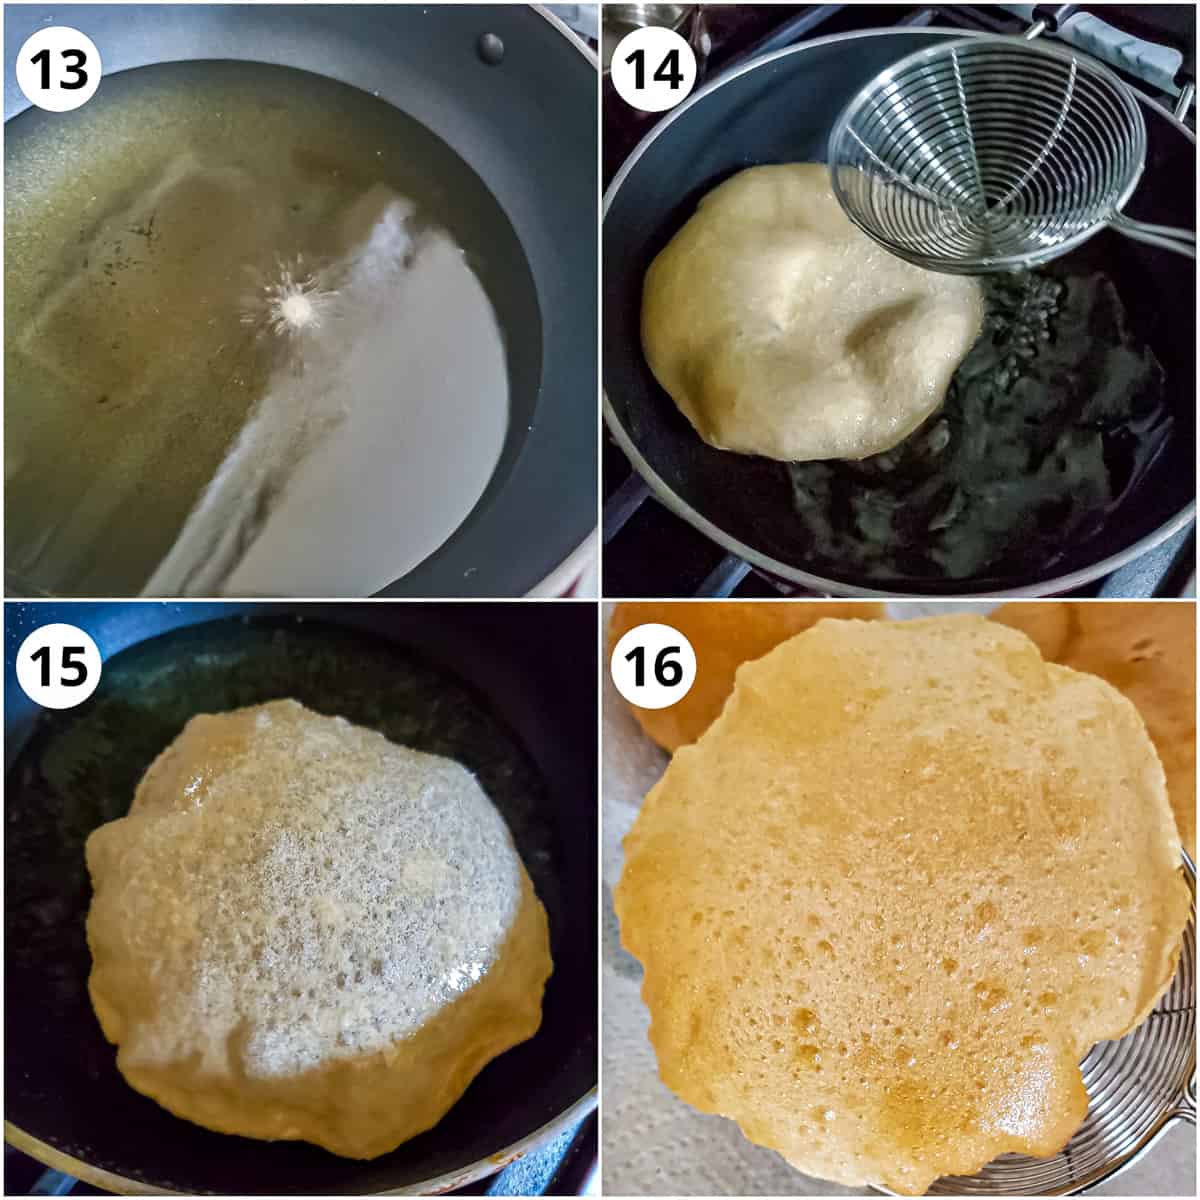
13 - Heat oil in a wok (Kadai) on medium heat. Test if the oil is ready by adding a small portion of dough. It should sizzle right back up but not brown quickly.
14 - Once oil hot, slide the poori. Now you want to make sure that the oil is hot enough for the pooris to fluff up immediately but not too hot to burn them.
Press down gently using back of a slotted spoon. This helps release any trapped air and puff up the poori.
15 - Once the poori is puffed, flip it carefully and cook until the other side is golden too.
16 - Remove using a slotted spatula to drain off the oil. Transfer onto tissue paper to absorb excess oil.
Keep frying the remaining poori in a similar manner. Always check for oil temperature before frying the next puri.
Serving Suggestions
Poori is best served fresh and hot. They will deflate as they sit and although they will still taste delicious, it is always much more fun to eat a puffy poori.
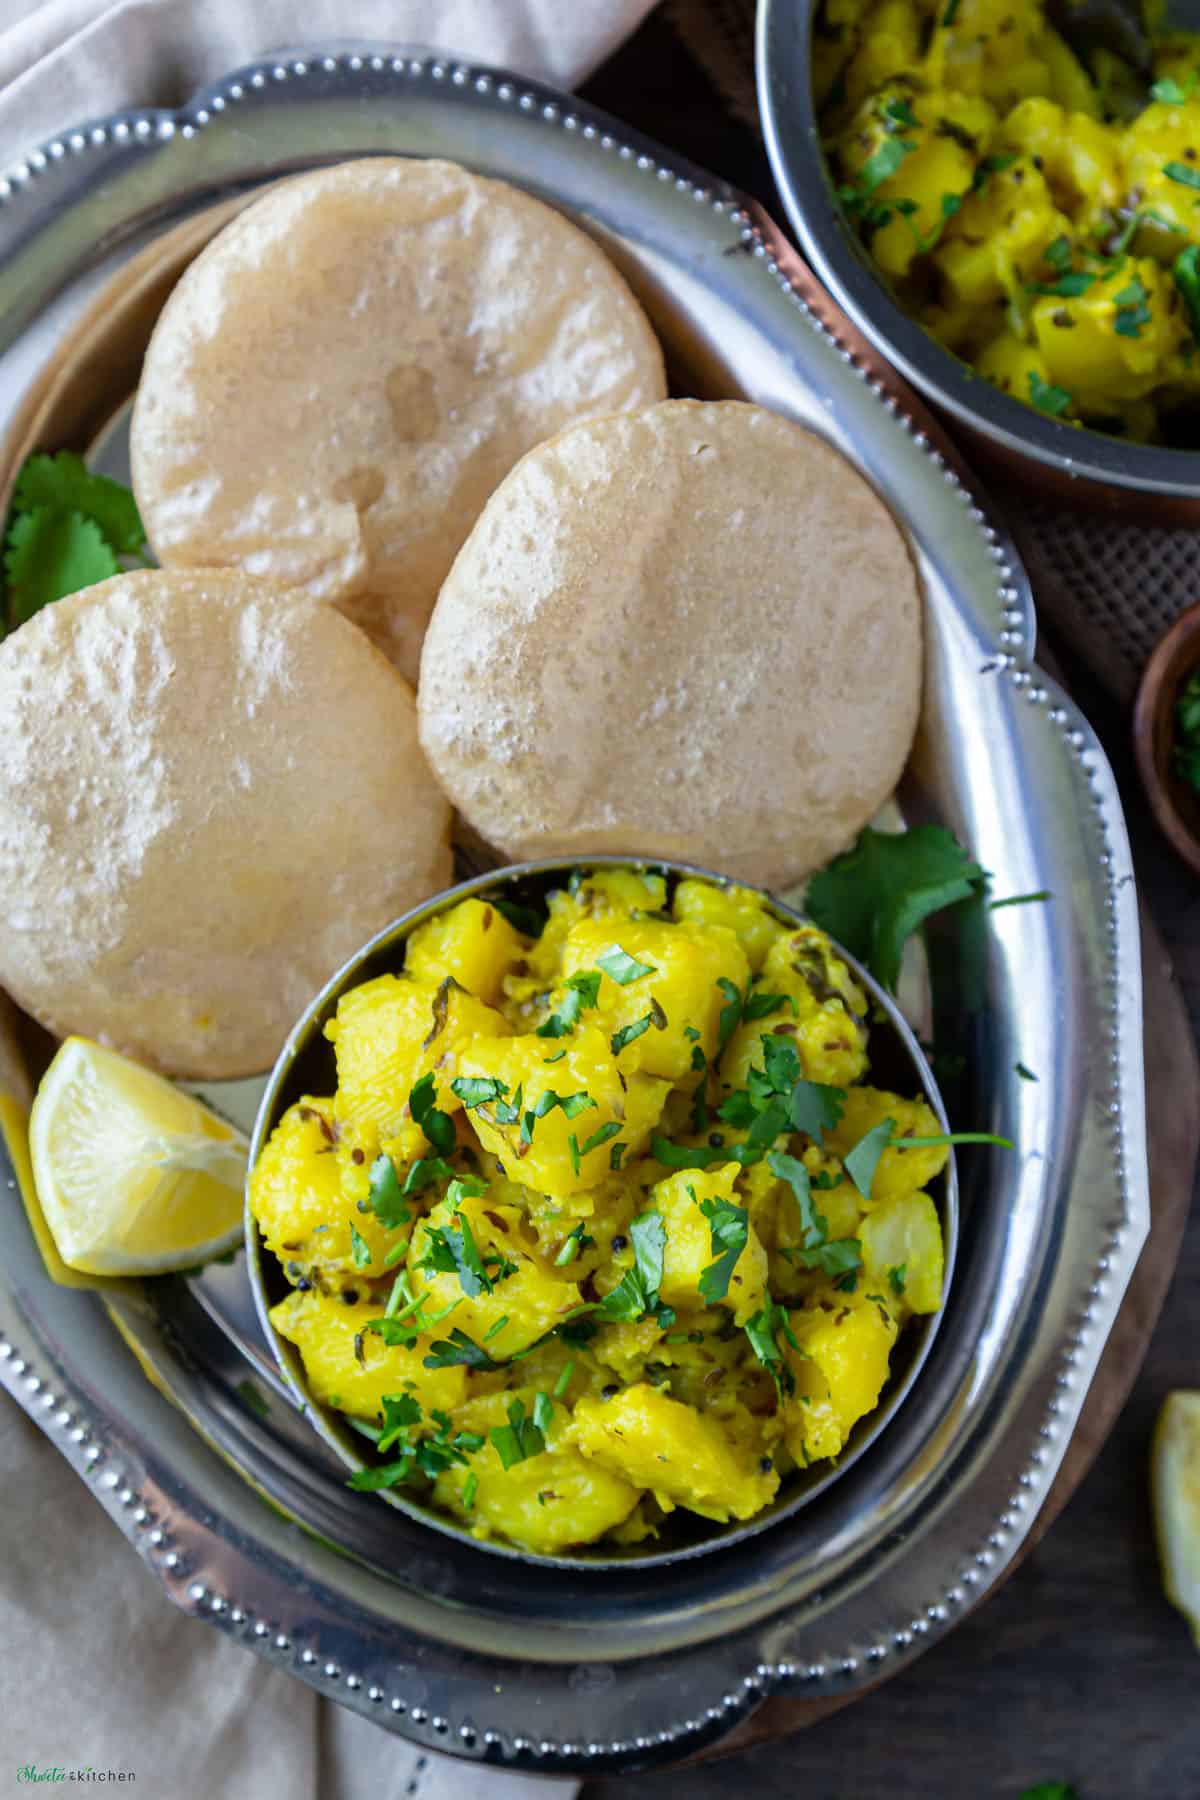
Puri is served for breakfast or as a meal with your favorite curry.
Poori bhaji is one such popular breakfast that is made at home as well available in many restaurants.
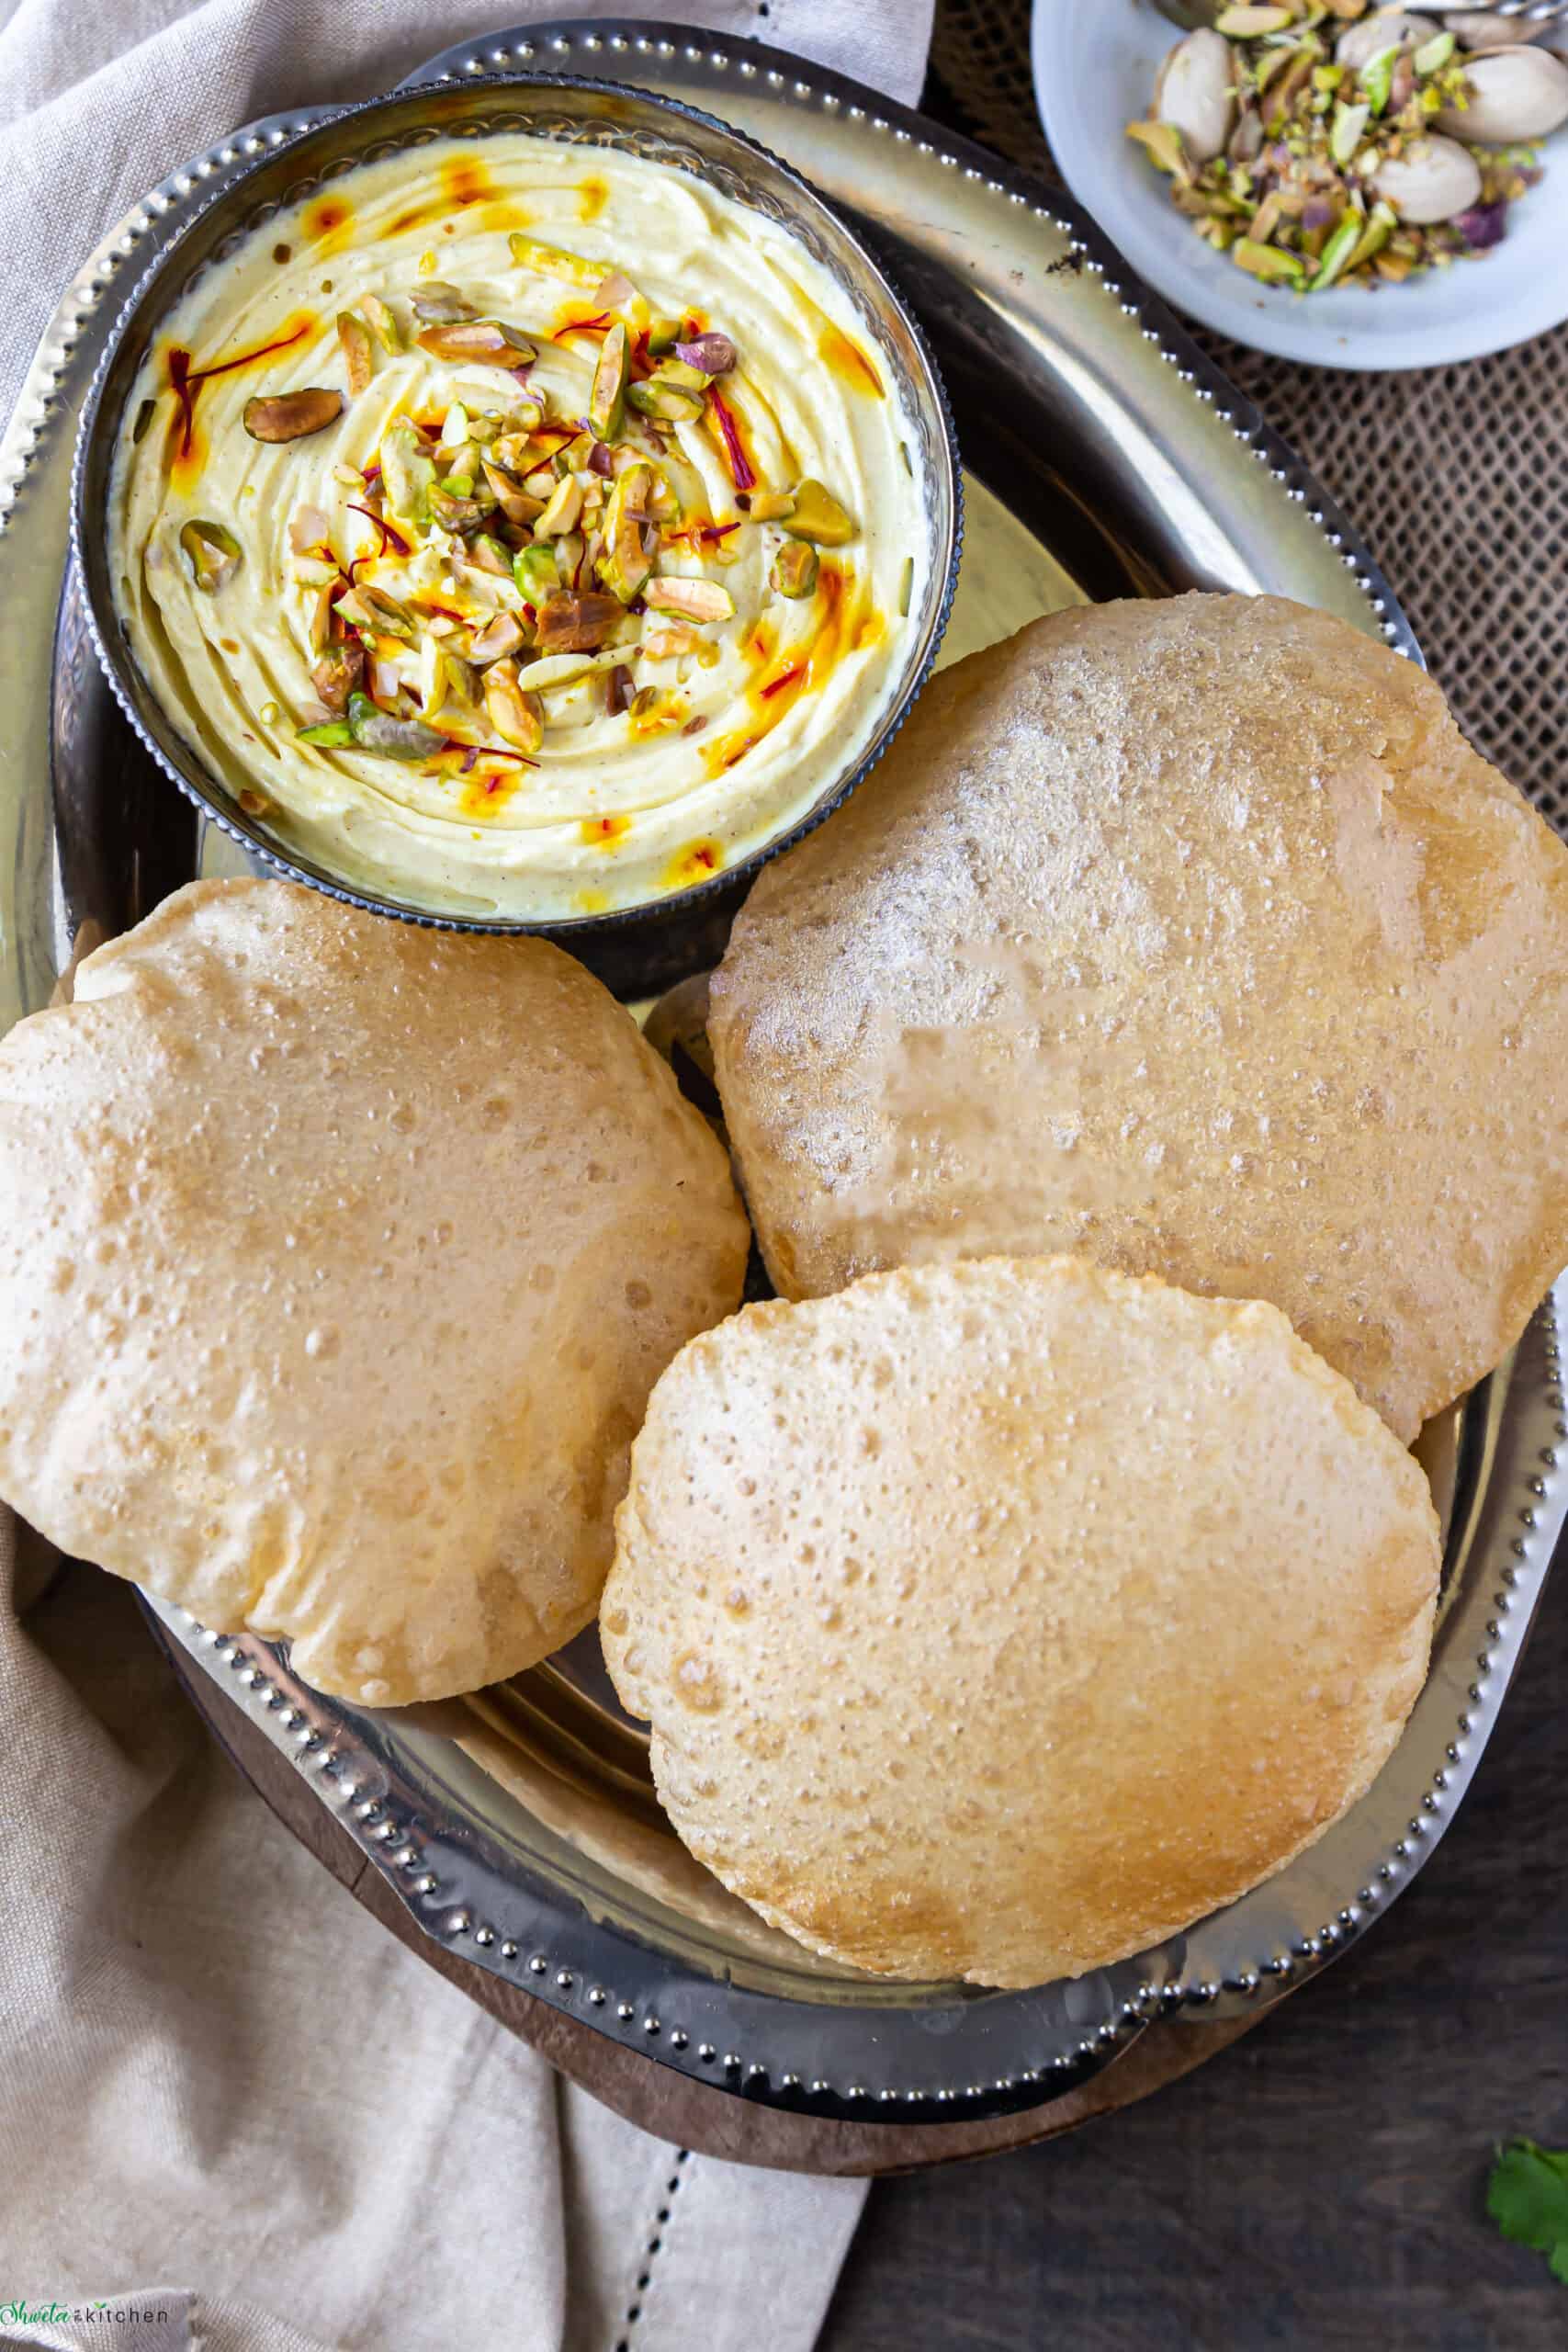
In Maharastra, poori is also served with desserts. To name a few Shrikhand Puri, Aamras puri. Basundi puri are few popular delicacies.
You will also find poori being part of prasad, food that is offered to God as part of prayers and religious ceremonies or special occasions and celebrations like Gudi Padwa (new year) and as Kanjak Prasad of Halwa Poori Chana
In India, Poori is also popular as food packed for traveling or for a picnic since it stays good without getting spoilt at room temperature.
Just make sure to store the drained puri in casserole so that way the warmth will help keep it soft.
Variations
This is the basic poori recipe and you can play with it to create multiple variations few of the popular ones are
- Palak puri - add cooked spinach puree or chopped spinach to the dough while kneading. Similarly, you can make beetroot poori or tomato poori by adding their purees.
- Masala poori - add spices like turmeric, red chili powder, ajwain, Kasuri methi, and garam masala to the flour and make the dough.
- Methi puri - add chopped methi leaves to the flour.
Recipe Tips, tricks and notes
- Poori dough consistency is very important so knead it right. It should be firm but not dry or crumbly and neither soft.
- A soft dough will absorb more oil and make the pooris greasy and a dry and crumbly dough will result in hard pooris.
- The addition of sugar helps give a nice golden color to the poori. Little goes a long way.
- Similarly, Rava (semolina) is another optional ingredient that may be added as it helps make poori crisper and hold shape longer. Use fine Rava.
- Make a smooth ball of each portion before rolling the puri.
- Roll the puri evenly and slightly thick (not too thick or thin). Thin puris don't puff up and may turn hard.
- Easy hack: use a round cutter for those perfect round pooris. Or use a tortilla press, comes in handy if you are making for a large gathering.
- Use oil instead of flour to roll puris as the flour can make the oil muddy while frying.
- Fry on medium heat and adjust the temperature between medium, medium-low, as needed while frying the puris. The low temperature will cause more oil to be absorbed and pooris won't fluff up.
FAQ's
There are two main reasons why puris turn hard. One, if the dough is not kneaded well and is dry that may result in hard and flat puris. Second, if the oil temperature is too low and you fried the puri for too long. Pooris should fluff up in seconds when slipped in oil.
Both poori and chapati technically use the same main ingredients, whole wheat flour, salt, and water to make dough but the main difference is poori dough is firmer, stiffer compared to chapati dough which is more on the softer side. Also, sugar and Rava (semolina) sometimes added to poori dough are not added for chapati.
I prefer making it fresh but yes you can make poori dough in advance 1-2 days ahead. For longer, freeze the dough as that way it won't get oxidized. Keep it airtight either in the refrigerator or freezer. Let it come to room temp before rolling.
Yes, you can roll the puris beforehand but best to fry them just before serving.
Roll them 1-2 hours ahead and lay them out spaced evenly on parchment paper so they don't stick to each other. Keep them covered so they don't dry out. Fry just when ready to serve.
You can also freeze the rolled puris. Just stack them between parchment paper squares that way they don't stick and store in a ziplock bag in the freezer.
When ready to fry, just thaw for 15-20 mins at room temperature or 20 seconds in the microwave and then just fry. Make sure to adjust the oil to the right temperature.
Puri is best served fresh but you can reheat leftover pooris in a preheated oven at 300°F for 10 minutes or air fry it at 300 for 3-5 mins.
You can also microwave (for soft puri) in 10-15 seconds interval until hot. Serve immediately. Do not overdo or else they will turn hard on cooling.
More Indian Bread recipes
Hope you enjoy this Poori recipe!! If you give this recipe a try, please rate by clicking stars ⭐️ in the recipe card. Thank you ❤️ ! You can also follow me on Facebook | Instagram to see what's cooking in my kitchen!!
Recipe Card
Poori Recipe (Puri recipe)
Ingredients
- 2 cup whole wheat flour Atta
- 1 tablespoon rava semolina, optional
- ½-¾ cup water approximately, for kneading, adjust as needed
- ¼ teaspoon salt
- ½ teaspoon sugar
- 2 tablespoon oil
- Oil for frying approximately 2-3 cups
Want to save this recipe?
Instructions
To make the dough:
- In a stand mixer bowl or regular mixing bowl, add the ingredients - whole wheat flour, sugar, salt, and oil (1 tbsp).
- Attach the dough attachment of the stand mixer and start on low speed to mix well and form a crumbly dough.
- Increase the speed to 4 and using ¼ cup water at a time (total of about ½ to ¾ cup, may vary depending on the flour brand) knead into a stiff dough. Add 1 tablespoon oil, increase the speed to 6 and knead it for 1-2 mins.
- Do not knead into a soft dough since it absorbs more oil and makes poor greasy. This dough has to be stiffer than regular chapati dough.
- Cover with a wet cloth and let the dough rest for 10 mins before making puri.
- After resting it should turn a little softer than before but still stiff, knead again to smooth dough.
- Divide it into 15-16 equal balls. Keep the balls covered with a wet cloth until ready to use to prevent them from drying.
To roll:
- Grease the rolling pin and working surface with some oil.
- Work with one ball at a time, place it on the rolling board and flatten it using your fingers.
- Add few drops of oil on it, roll it evenly into a circle not too thin and not too thick. It needs to be a bit thick else the puri will not puff up evenly.
- Use oil instead of flour to roll puris as the flour can make the oil muddy while frying.
- You can make one poori and fry it immediately or I prefer to make a batch of 3-4 pooris before frying.
- If you are not frying the poori immediately, place them on a plate (optional you can line with parchment paper), not stacked or overlapped to prevent them from sticking. Keep them covered with a wet cloth to prevent from drying.
To fry:
- Heat oil in a wok (Kadai) on medium heat. Test if the oil is ready by adding a small portion of dough. It should sizzle right back up but not brown quickly.
- Once oil hot, slide the poori. Now you want to make sure that the oil is hot enough for the pooris to fluff up immediately but not too hot to burn them.
- Press down gently using the back of a slotted spoon. This helps release any trapped air and puff up the poori.
- Once the poori is puffed, flip it carefully and cook until the other side is golden too.
- Remove using a slotted spatula to drain off the oil. Transfer onto tissue paper to absorb excess oil.
- Keep frying the remaining poori in a similar manner. Always check for oil temperature before frying the next puri.
- Poori is best served fresh and hot. Serve for breakfast or as a meal with your favorite curry or Indian sweet.
Notes
- Poori dough consistency is very important so knead it right. It should be firm but not dry or crumbly and neither soft.
- A soft dough will absorb more oil and make the pooris greasy and a dry and crumbly dough will result in hard pooris.
- The addition of sugar helps give a nice golden color to the poori. Little goes a long way.
- Similarly, Rava (semolina) is another optional ingredient that may be added as it helps make poori crisper and hold shape longer. Use fine Rava.
- Roll the puri evenly and slightly thick (not too thick or thin). Thin puris don't puff up and may turn hard.
- Easy hack: use a round cutter for those perfect round pooris. Or use a tortilla press, comes in handy if you are making for a large gathering.
- Use oil instead of flour to roll puris as the flour can make the oil muddy while frying.
- Fry on medium heat and adjust the temperature between medium, medium-low, as needed while frying the puris. The low temperature will cause more oil to be absorbed and pooris won't fluff up.


Leave a comment & rate the recipe