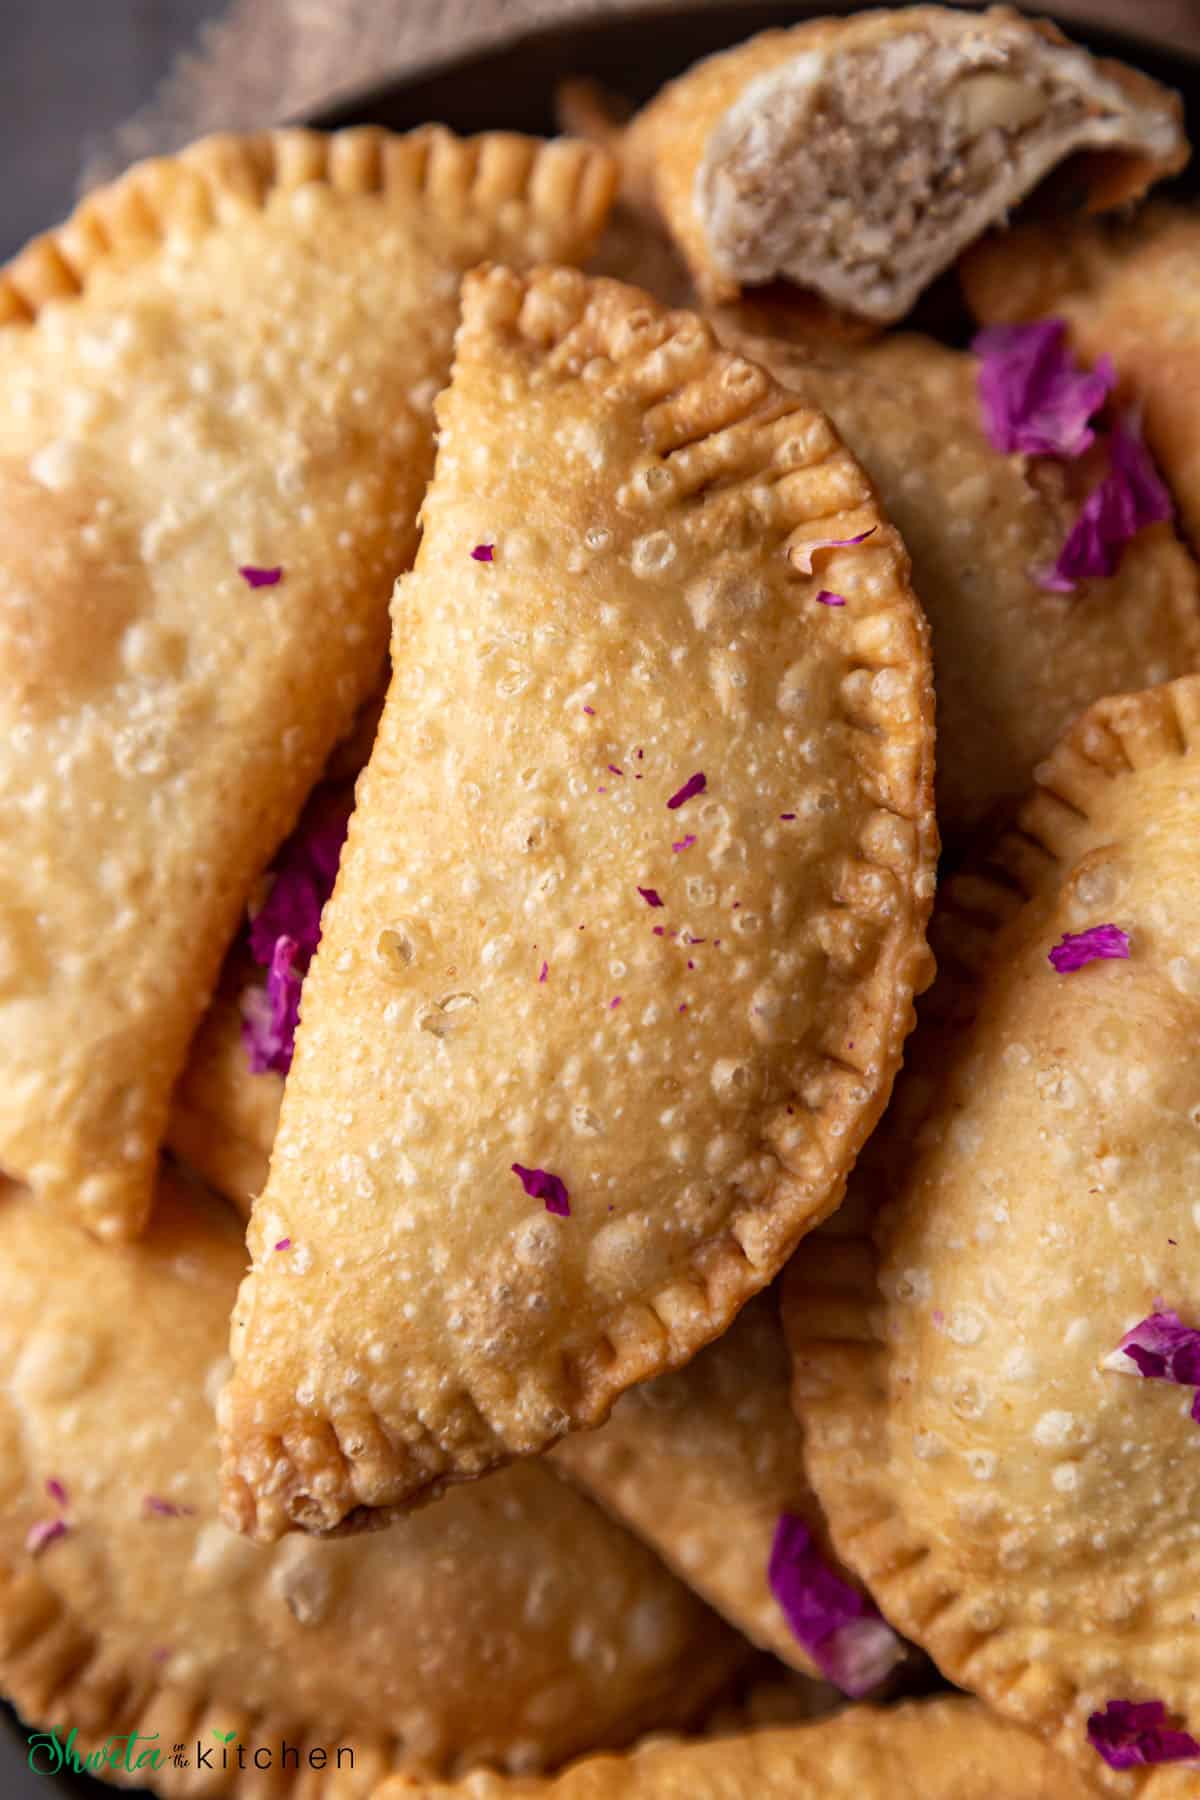
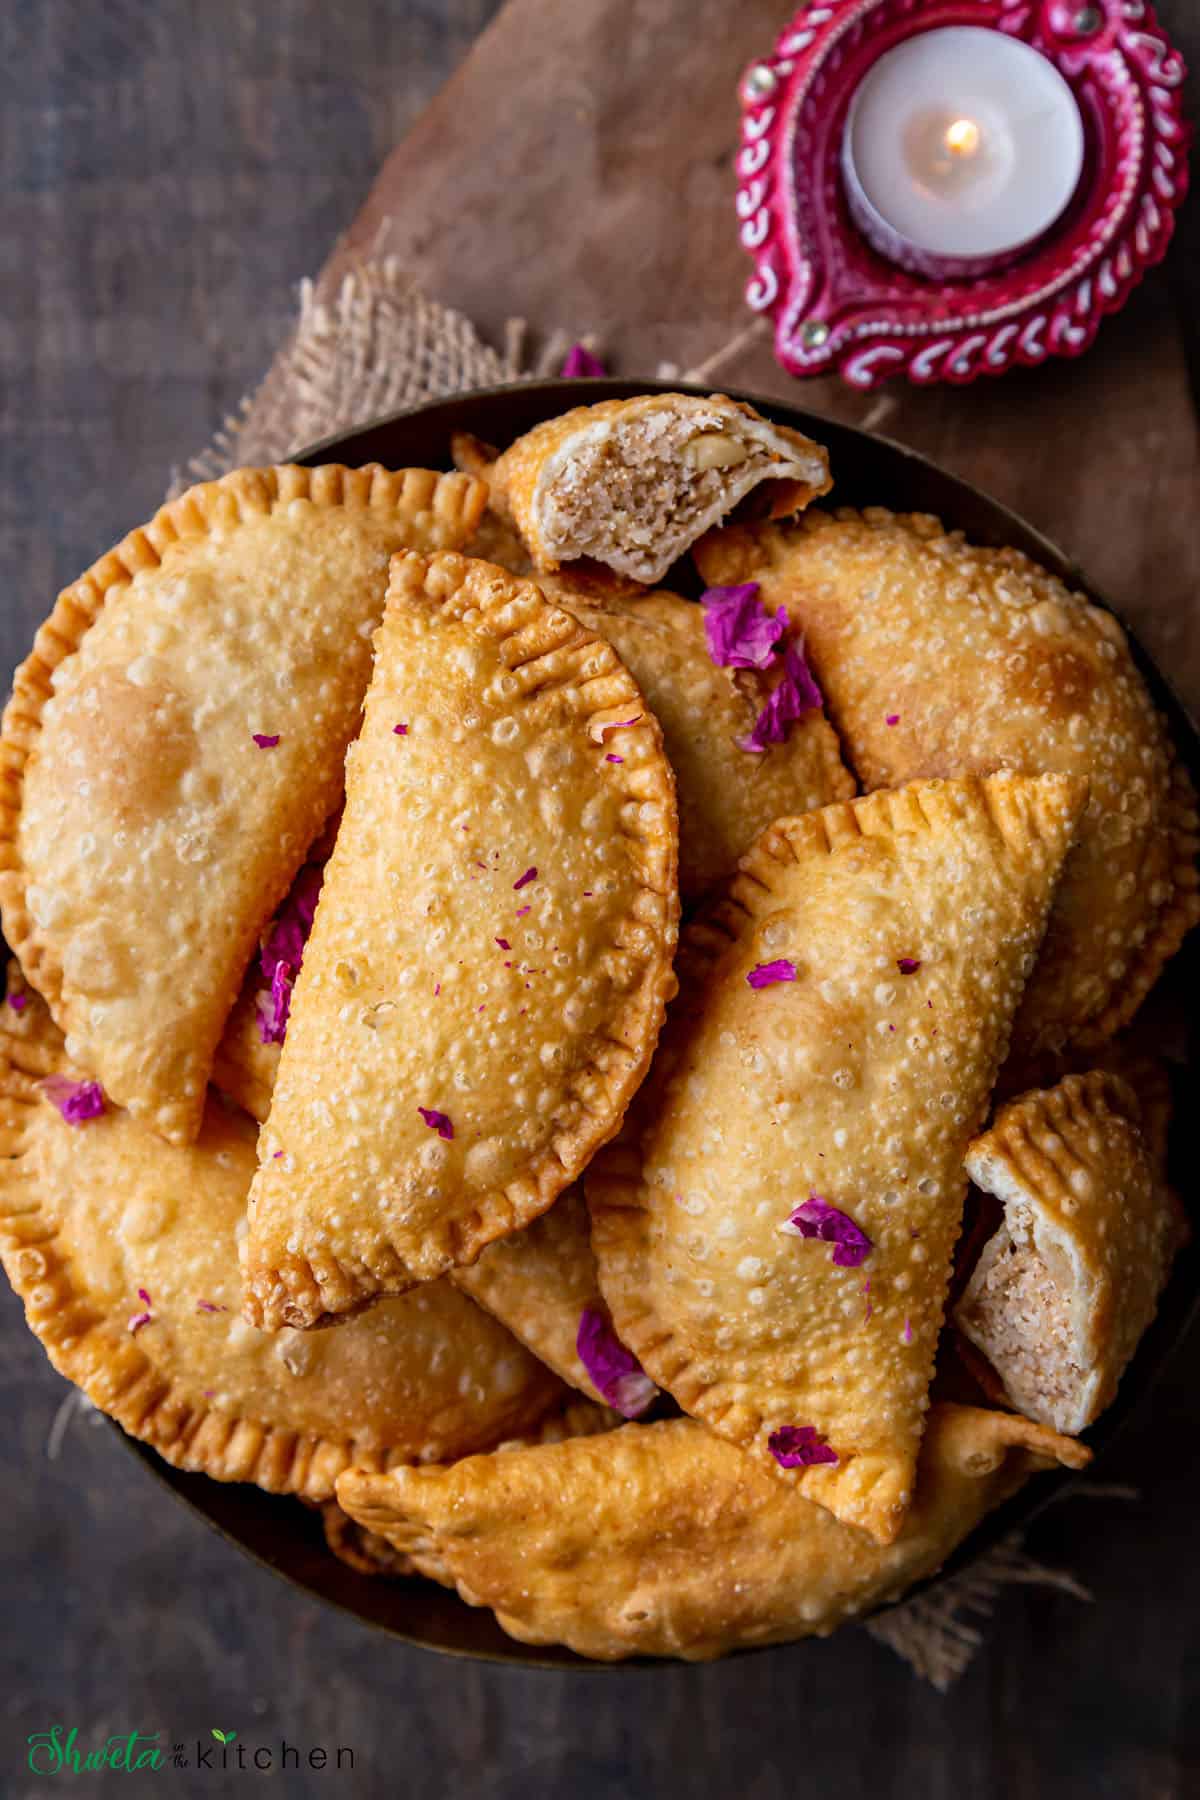
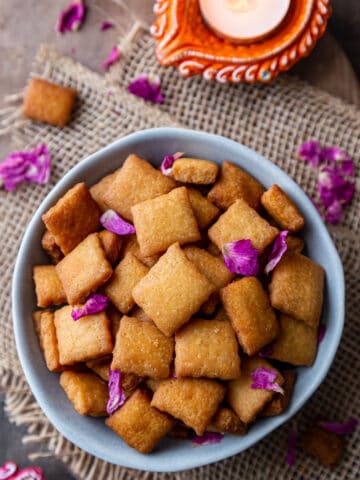
Karanji is a crispy, fried pastry stuffed with a sweet filling of coconut, wheat flour, poppy seeds, nuts, and cardamom. These Maharashtrian sweet snacks are usually made during the festivals like Diwali, Holi or Ganesh Chaturthi.
I am sharing my family recipe for making Maharashtrian Karanji with step-by-step instructions and a video.

Want to save this recipe?
My Diwali Faral always has Coconut Karanji, as they are a family favorite. We love eating fresh, hot karanji while I make them. There is something irresistible about that hot and crisp karanji-you can't stop munching them!
These traditional karanji have a great shelf life since they are made with dry coconut filling, so it's always a good idea to make them in bulk.
My mom says karanji should be khuskhushit, meaning the covering should be crispy, flaky, and melt in the mouth, which is a sign of well-made karanji. So I have shared all the tip and tricks learnt from her to make the best Karanji.
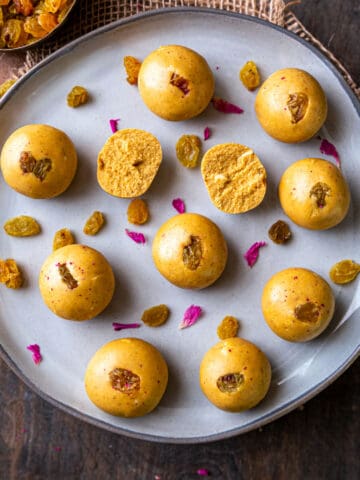
Here are some more Diwali Sweets and Savory Snacks for you to try.
Jump to:
What is Karanji?
Karanji is a traditional sweet snack from Maharashtrian cuisine often made during Diwali. It is crispy and flaky outside and has a sweet coconut filling inside.
The dough for karanji is made from all-purpose flour, semolina (rava), ghee, and water (or milk). It is then rolled into small, thin circles.
The Maharashtrian Karanji filling, called Saran, is a mixture of dry coconut, whole wheat flour (atta), poppy seeds (khuskhus), sugar, dry fruits (cashews and raisins), and flavored with cardamom.
You can make the filling (Saran) using either dry coconut powder (desiccated coconut) or fresh (or frozen) coconut. In Marathi, fresh coconut karanji is known as 'Olya Naralachi Karanji' and has a shorter shelf life than dry coconut ones.
This filling (Saran) is placed on the rolled circles, folded into a half-moon shape, sealed, and then deep-fried until golden and crispy.
Karanji is known by various names across different regions in India, with slight variations in ingredients and preparation - Gujiya (North India) and Ghughra (Gujarat).
Despite the different names, these sweets share a similar concept: a crispy pastry filled with a sweet mixture, often made with coconut or mawa, and then deep-fried to a golden finish.
Recipe Ingredients
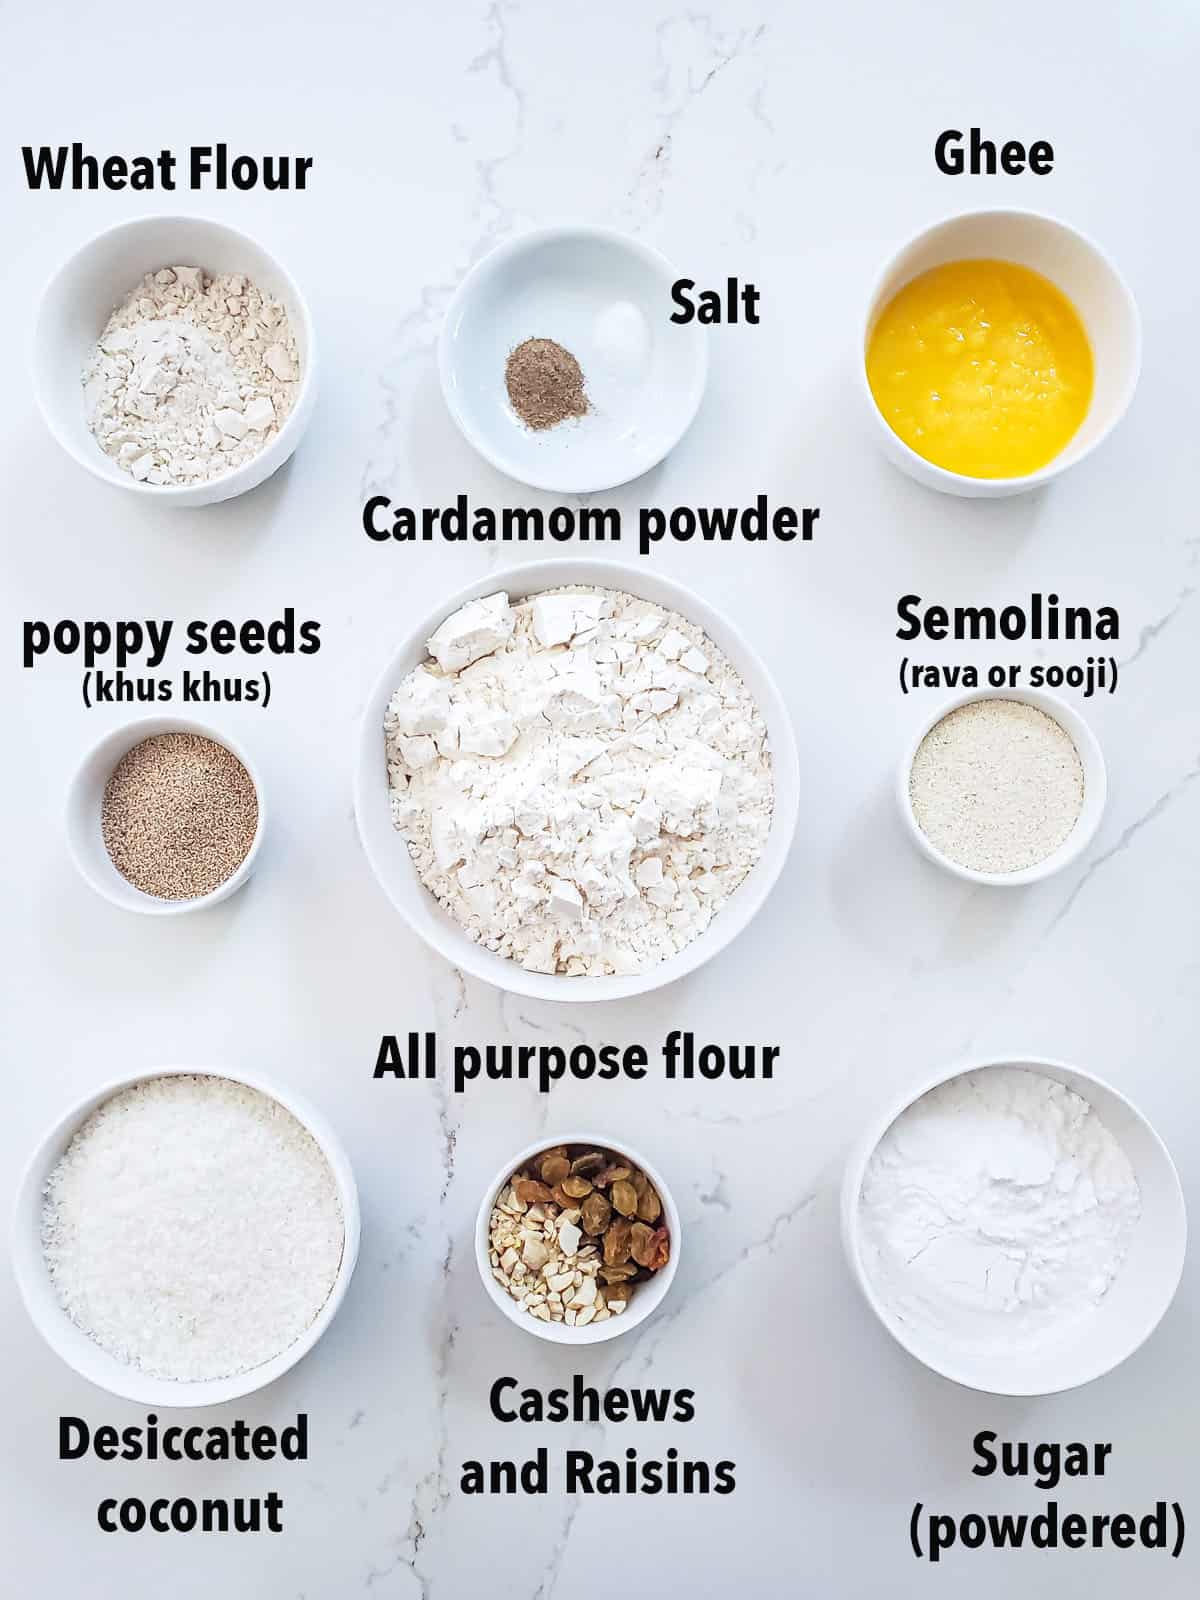
Karanji requires a few basic Indian ingredients, mostly pantry staples.
The Outer Shell - all-purpose flour (maida), ghee, salt, semolina (rava or sooji), and water (or milk) for kneading the dough.
Filling (Saran) - unsweetened dry desiccated coconut (powder) or fresh/frozen coconut, wheat flour, white granulated sugar (powdered), poppy seeds (khus khus), dry fruits (chopped cashews and golden raisins), and cardamom powder for flavor.
For frying - Oil or ghee (preferred) or mix both.
How to Make Karanji (Stepwise Photos)
Make the dough
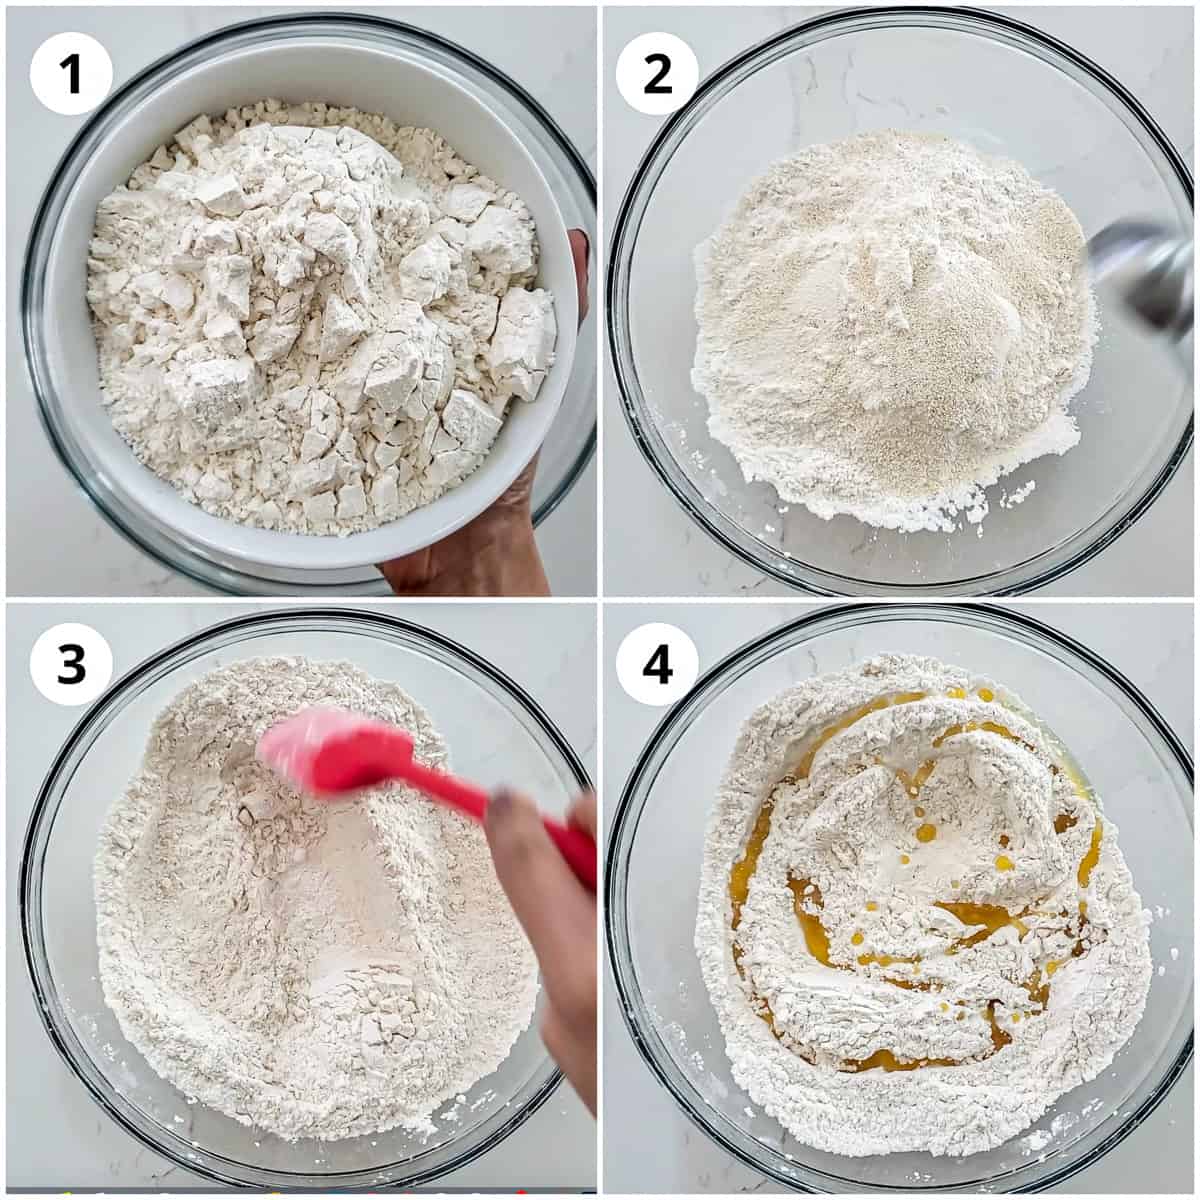
1 to 3 - In a mixing bowl, add all-purpose flour (maida), salt, and semolina (rava or sooji). Give it a quick stir.
4 - Heat ghee on the stovetop or microwave for 30 seconds. Add the hot ghee to the flour mixture and mix it so it's evenly distributed in the flour mixture.
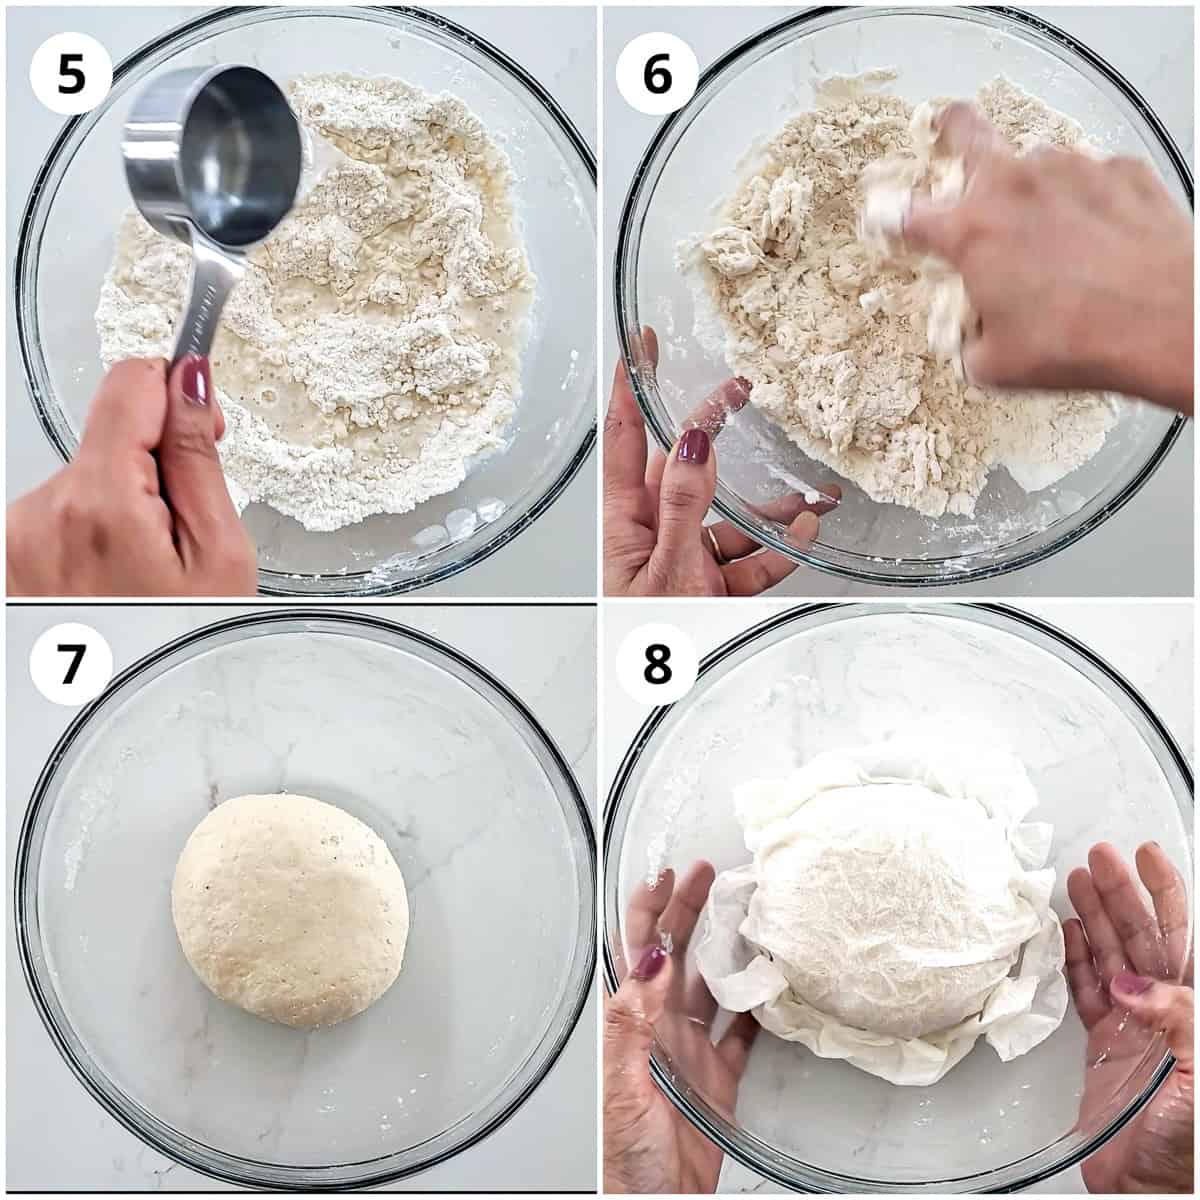
5 to 7 - Using water (or milk), knead into a firm (stiff) dough.
8 - Cover with wet cloth and keep aside for 15-20 mins.
While the dough is resting, make the filling.
Make the filling
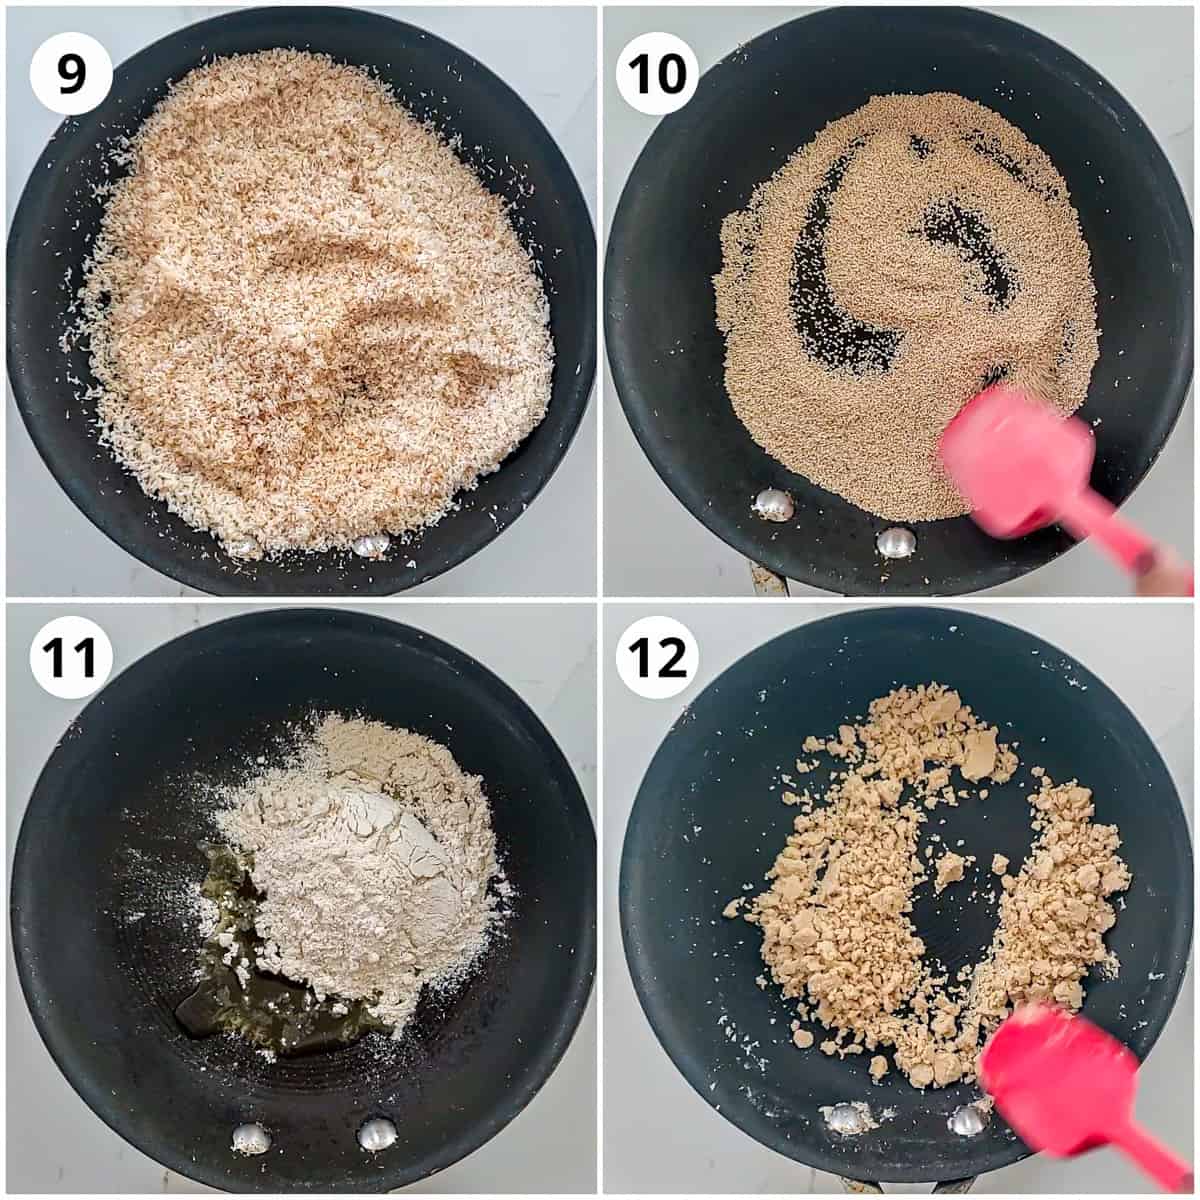
9 - Heat a frying pan on medium-low heat and roast the dry coconut powder until golden. Transfer to a bowl.
10 - Similarly, roast the khuskhus (poppy seeds) and transfer them to the bowl with coconut.
11 and 12 - Add ghee and wheat flour to the pan and roast until fragrant and golden. Keep stirring continuously to avoid burning the flour.
13 - Transfer the roasted wheat flour to the bowl, too.
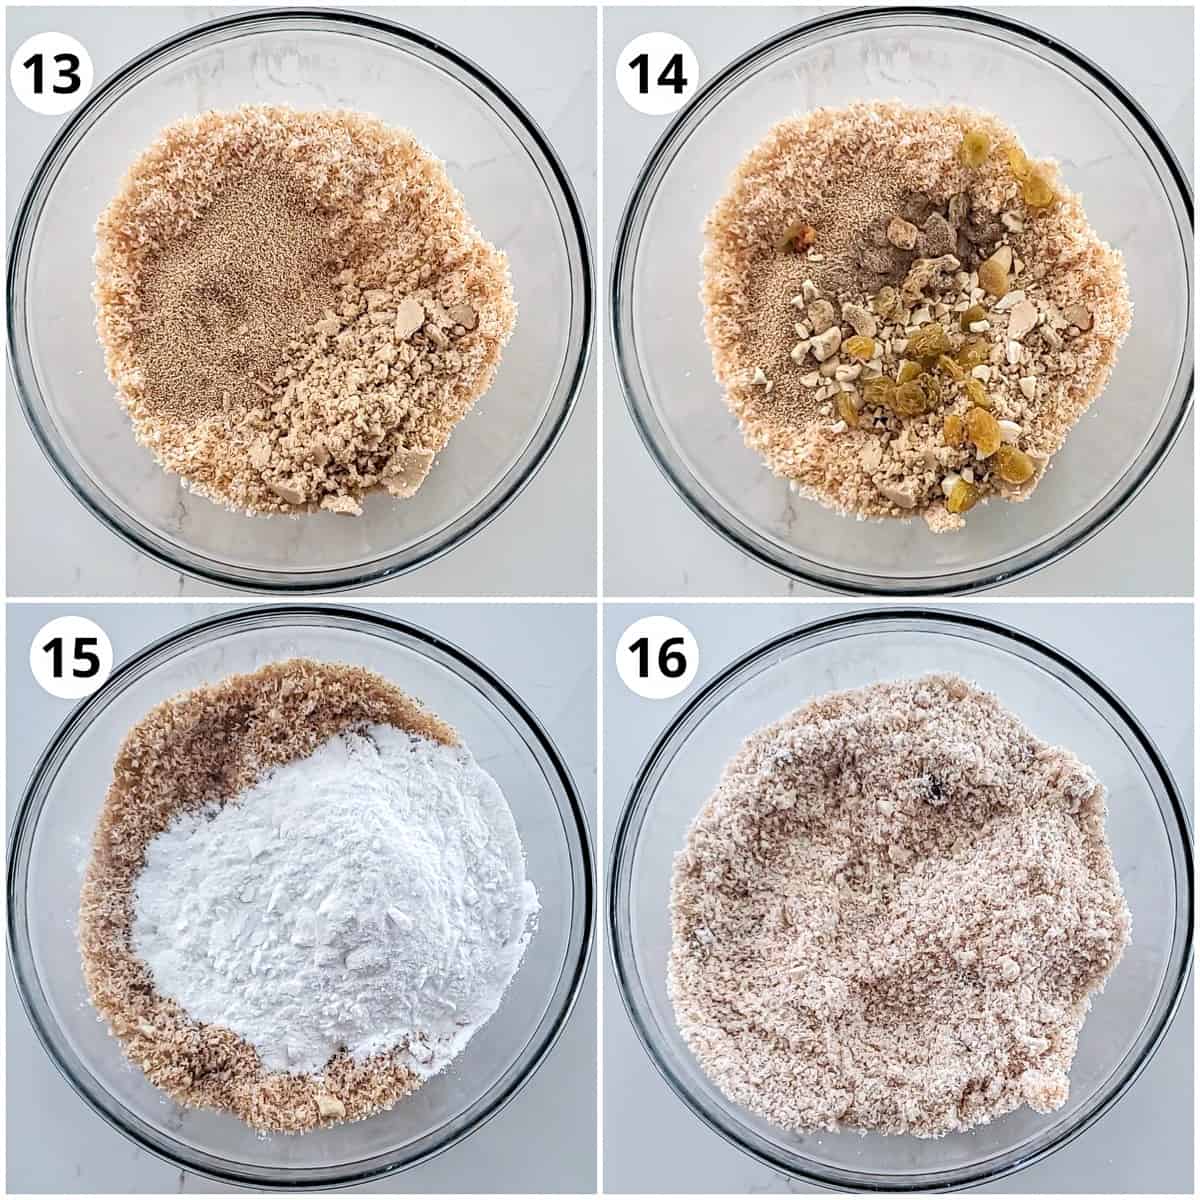
14 - Add cashews, raisins, and cardamom powder to the roasted coconut mixture. Allow to cool slightly.
15 and 16 - Grind the sugar in a blender to get a powdered texture, and add the powdered sugar to the mixture. Mix until well combined. The filling is ready. Keep aside. This filling can be made and stored (refrigerated) until ready to use.
To make karanji (without mold)
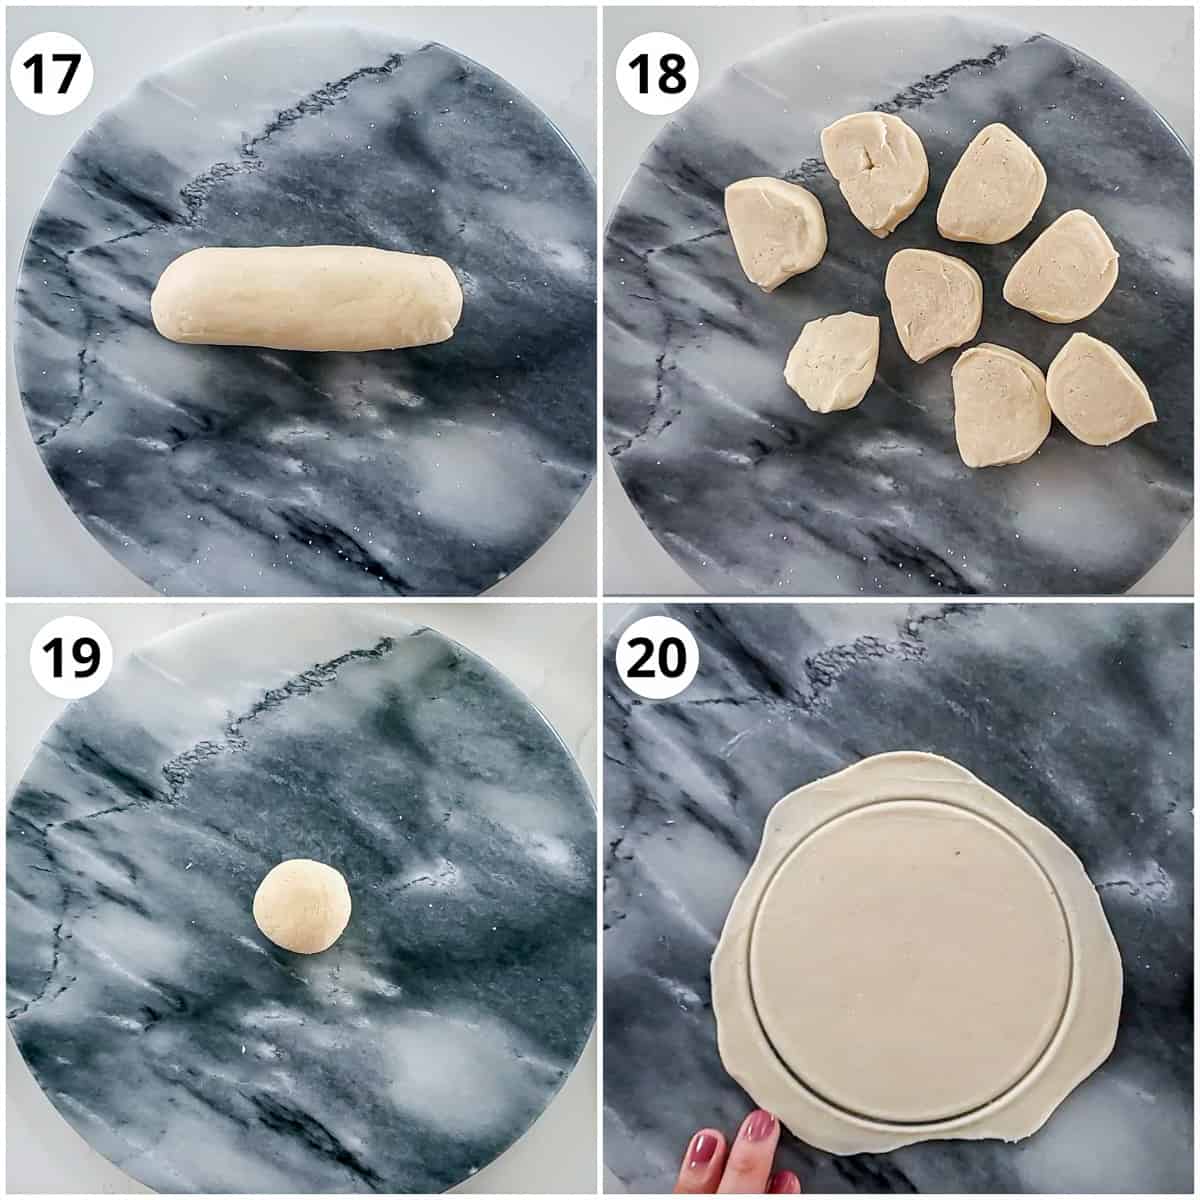
17 - Divide the rested dough into two parts. Roll each part into a log.
18 - Cut each log into 8 equal parts.
19 - Take one part and cover the remaining with a wet cloth. Roll it between your palms to make it smooth and round.
20 - Use a rolling pin to roll the dough into a circle (4 to 5 inches in diameter). For same-sized karanji, use a round pastry cutter, jar lid, or katori to cut the rolled dough round.
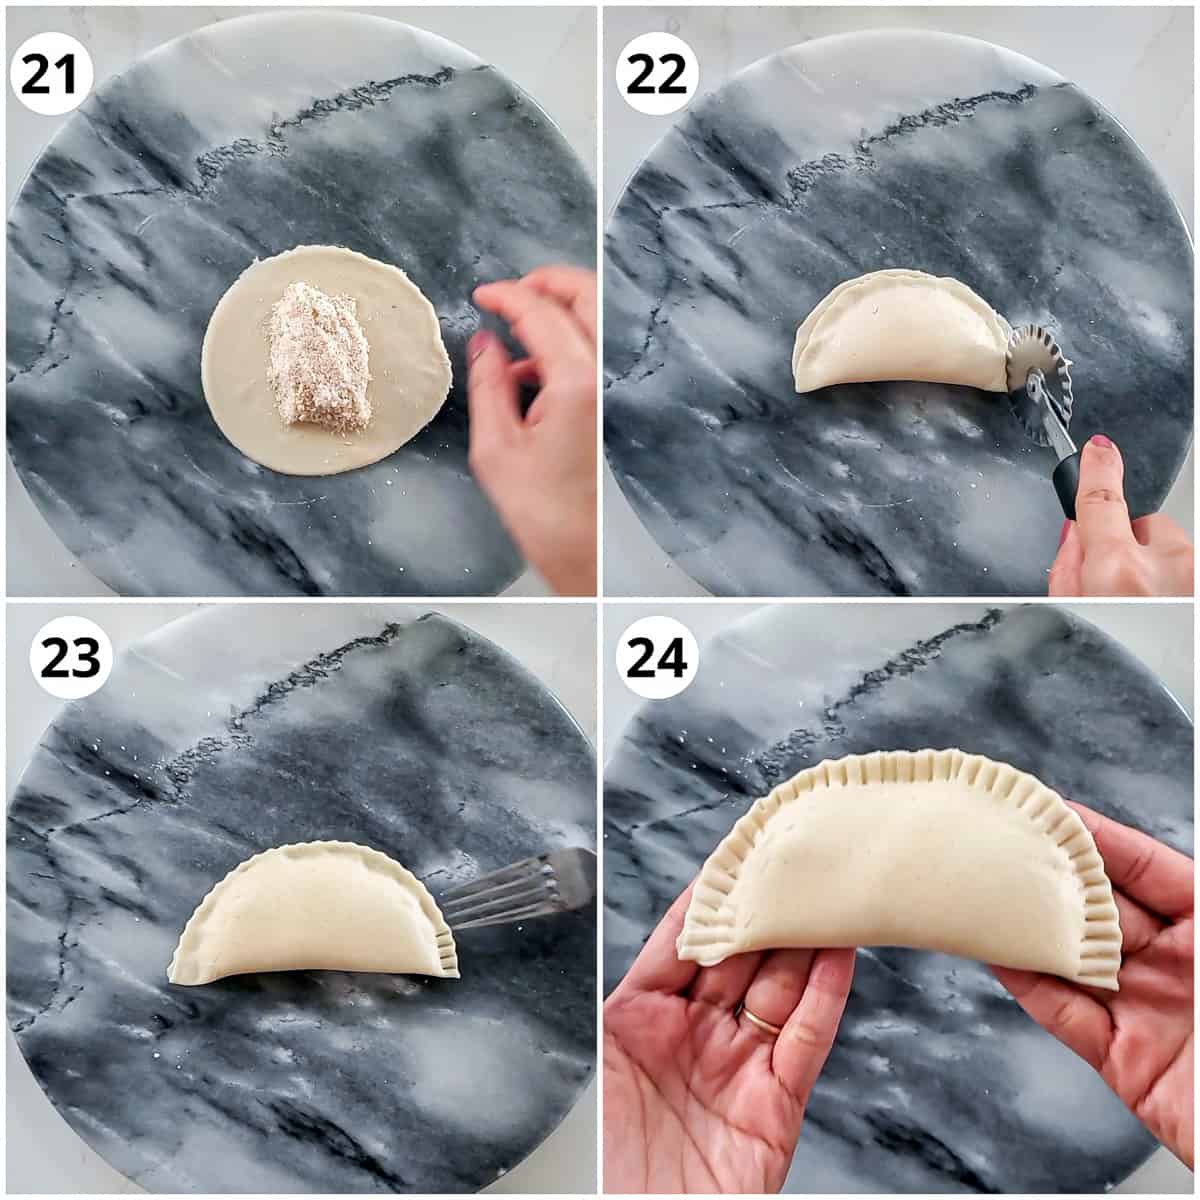
21 - Place 1-2 tablespoons of the filling in the circle's center, leaving the sides clear. Do not overfill. Apply a thin layer of water around the circumference of this rolled dough.
22 - Close and form a half-moon (semicircle) shape. Press the edges to seal. If not sealed properly, the karanji will open up while frying, making the oil messy.
Using a karanji cutter, cut around the sealed dough area to form an even shape. These can be fried as is, or to make a pattern, do the next step.
23 - To make a pattern, press the edges using a fork.
24 - Place the karanji on a plate and cover it with a wet cloth to prevent it from drying. Make all karanjis this way and then fry them.
Please see the video (in the recipe card) to make karanji using a mold. I got mine from India, but I was able to find the mold online.
Deep Fry the Karanji
Line a plate or baking tray with tissue paper and keep it ready.
Heat oil (or ghee or a mix of both) in a frypan on medium heat.
Test the oil by dropping a small portion of the dough. It should sizzle right back up without quickly browning.
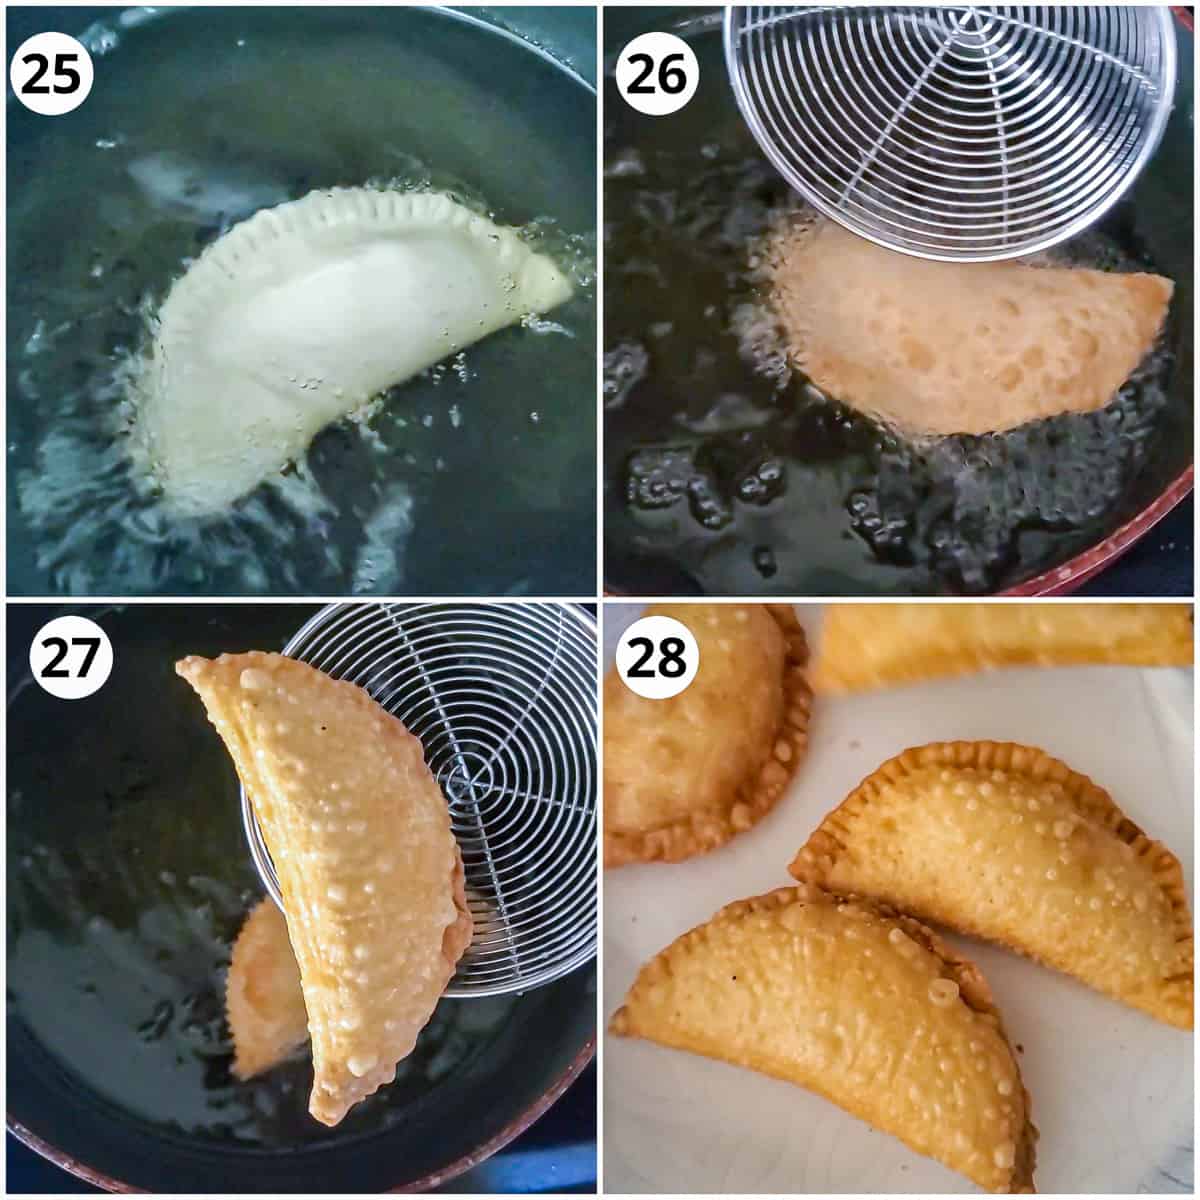
25 - Once the oil is hot, slide 1-2 karanji into it (may vary depending on pan size). Do not overcrowd the frying pan.
2 - Fry one side and then flip when golden. Similarly, fry the other side until golden and crisp. The karanji will puff while frying. If, they start to brown sooner, lower the heat.
27 and 28 - Drain using a slotted spatula and then transfer to the lined plate to drain excess oil.
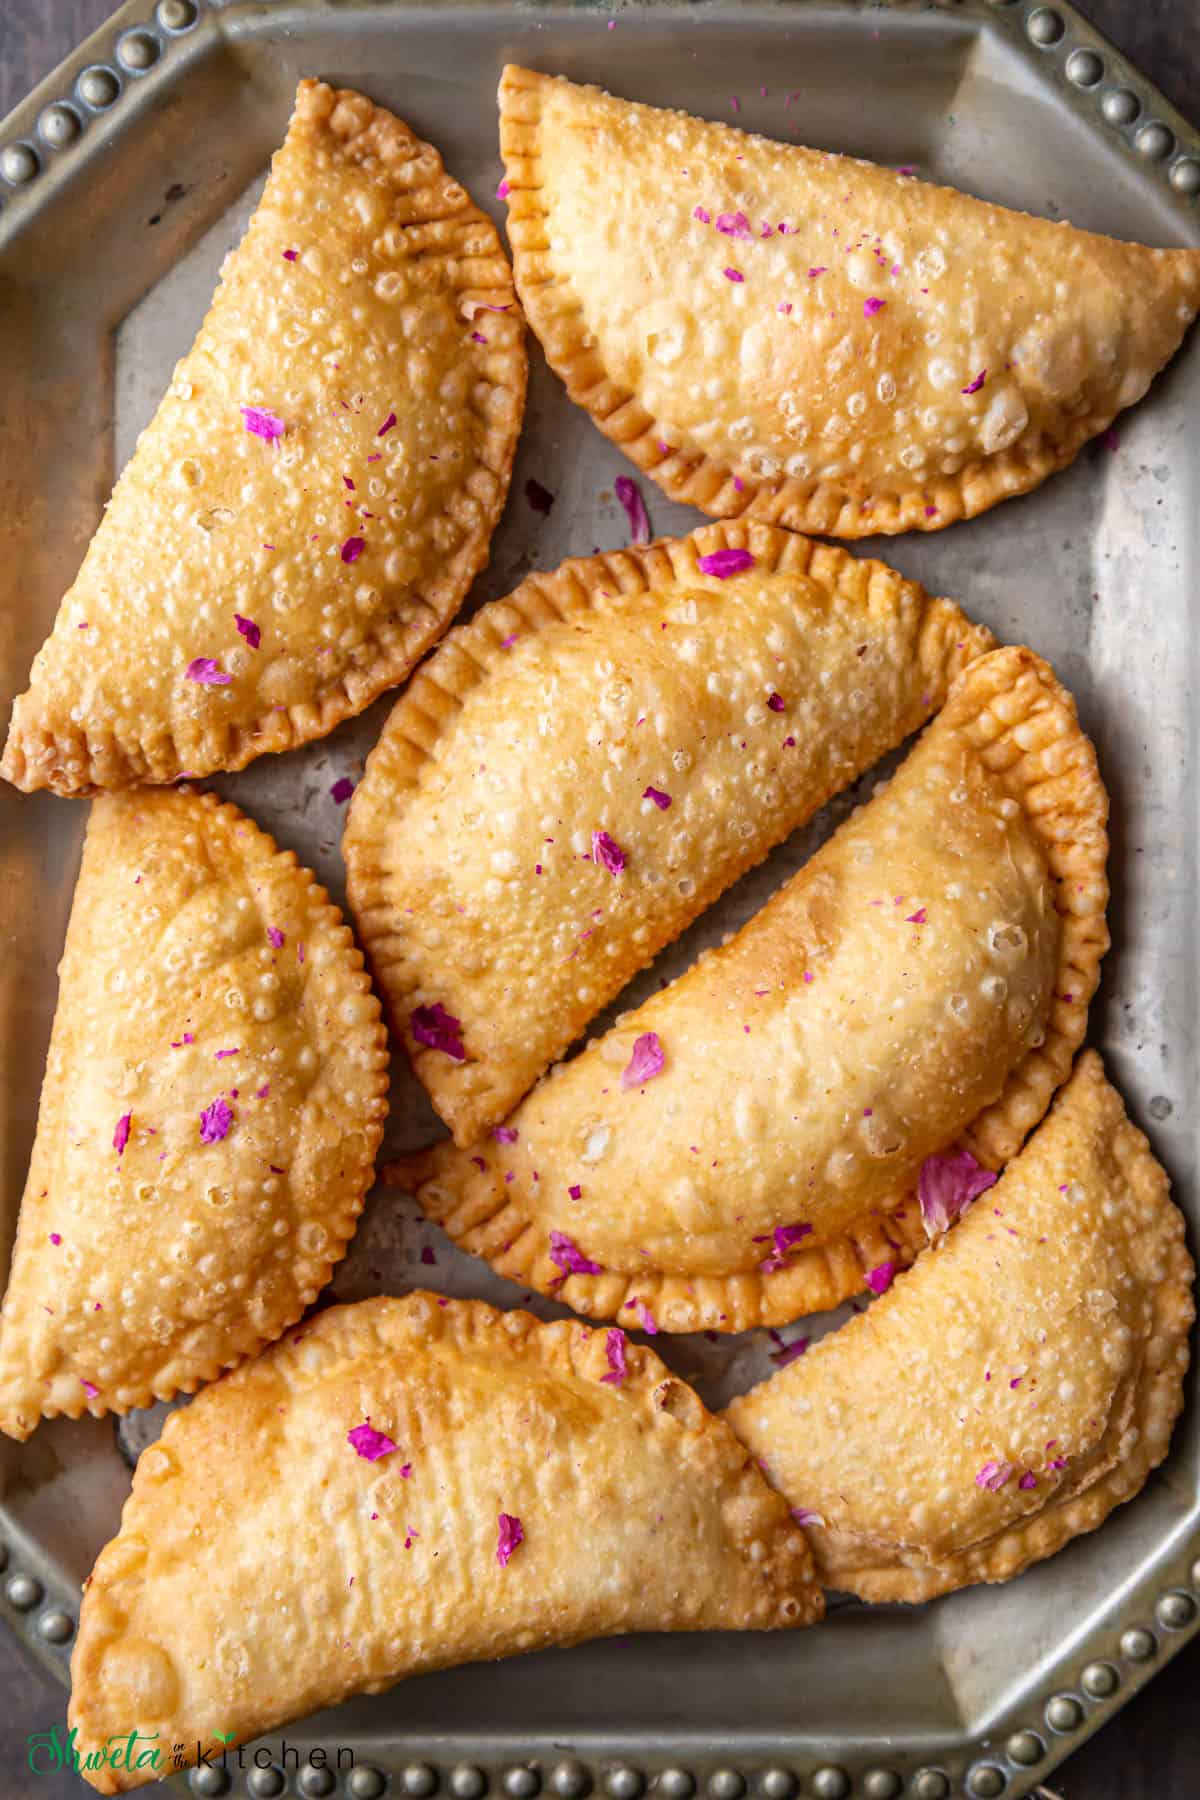
Serve warm or at room temperature. Cool completely and store airtight.
Crispy, flaky & sweet coconut Karanji is ready; enjoy them as dessert or snacks with your tea!
How to Store Karanji
Allow the karanji to cool completely, then store them in an airtight container at room temperature for up to 2 weeks.
Recipe Tips
Here are some of my tried and tested tips to ensure your karanji turns out perfectly crispy and delicious:
Add hot ghee to the flour: incorporate ghee in the flour before adding water. This helps helps create a flaky texture (khuskhushit Karanji).
Dough Consistency: Make sure the dough is firm yet pliable. If it's too soft, the karanji will absorb more oil while frying. Adding enough ghee to the dough
Rest the Dough: After kneading, let the dough rest for at least 15-20 minutes. This helps relax the gluten, makes rolling easier, and gives the karanji a better texture.
Thin Rolling: Roll out the dough into thin circles. If the rolled dough is too thick, the karanji will be less crisp.
Roast the Filling: roast the coconut, poppy seeds, and wheat flour to bring out their flavors and remove any excess moisture. This helps prevent the filling from becoming soggy.
Seal Properly: Ensure the edges are sealed tightly to prevent the filling from spilling out during frying, making the oil muddy. If this is to happen, filter the oil to remove the particles and then start frying again. Be careful while handling hot oil.
Frying Temperature: Fry the karanji on medium to medium-low heat. If the oil is too hot, the outer layer will cook too quickly, leaving the inside raw. Frying them on very low heat will cause them to turn soft. Frying on medium-low heat ensures even cooking and a golden-brown color.
Frequently Asked Questions
Yes, you can make the dough using all-wheat flour or a 50:50 ratio of wheat flour and all-purpose flour. Note that you will need more water when kneading the dough using wheat flour, and the texture of karanji, when fried, will differ from that of all-purpose flour. For the best texture, use all-purpose flour.
Yes, you can bake the karanji in the oven. Place them on a parchment-lined baking sheet, spray with oil, and bake in a preheated oven at 400°F for 15-20 minutes or until golden and crispy. Let them cool on the sheet for 5 minutes before serving.
Yes, place the uncooked karanji in the fryer basket, spray some oil, and bake at 370°F for 10-12 mins, rotating halfway through. Serve immediately.
More Diwali Faral Recipes

I hope you enjoy this Karanji Recipe!! If you try it, please rate it by clicking stars ⭐️ on the recipe card. Thank you ❤️! You can also follow me on Facebook and Instagram to see what's cooking in my kitchen!!
Recipe Card

Karanji Recipe
Equipment
Ingredients
For the outer covering:
For the Filling (Saran)
- 1 cup dry coconut powder
- 2 tablespoons poppy seeds khuskhus
- ½ tablespoon ghee
- ¼ cup wheat flour
- ¾ cup white granulated sugar (powdered) pithi sakhar, adjust to taste
- ¼ teaspoon cardamom powder
- 10 cashews roughly chopped
- 2 tablespoons golden raisins
Want to save this recipe?
Instructions
Make dough for the outer covering:
- In a mixing bowl, add all-purpose flour (maida), salt, and semolina (rava or sooji). Give it a quick stir.
- Heat ghee on stovetop or microwave for 30 secs. Add the hot ghee to the flour mixture and mix so it's evenly distributed in the flour mixture.
- Using water (or milk), knead into a firm (stiff) dough. Cover with a wet cloth and keep aside for 15-20 mins. While the dough is resting make the saran (coconut filling)
Make the filling :
- Heat a frying pan on medium-low heat and roast the dry coconut powder until golden. Transfer to a bowl.
- Similarly, roast the khuskhus (poppy seeds) and transfer to the bowl with coconut.
- Add ghee and wheat flour to the pan and fry until fragrant and golden. Keep stirring continuously to avoid burning the flour. Transfer the roasted wheat flour to the bowl too.
- Add cashews, raisins, and cardamom powder to the roasted coconut mixture. Allow too cool slightly.
- Add the powdered sugar and mix well. The filling (saran) is ready. Keep aside. This filling can be made ahead and stored refrigerated until ready to use.
Roll, stuff and shape Karanji :
- Divide the rested dough into two parts. Roll each part into a log. Cut each log into 8 equal parts.
- Take one part and keep the remaining covered with a wet cloth. Roll it between your palms to make it smooth and round.
- With a rolling pin, roll the dough round in a 4 to 5 inches diameter circle. For those same sized karanjis, use a round pastry cutter or jar lid or Katori to cut the rolled dough round.
- Place a 1-2 tablespoons of the filling in the center of the circle leaving the sides clear. Do not over stuff.
- Apply a thin layer of water around the circumference of this rolled dough.
- Close & form a half-moon (semicircle) shape. Press the edges to seal completely. If not sealed properly, it will open up while frying and make the oil messy.
- Using a karanji cutter cut around the sealed dough area to form an even shape. To make a pattern, press the edges using a fork.
- Place the karanji on a plate and cover with a wet cloth to prevent from drying. Make all karanjis this way before frying them.
Deep fry the Karanji:
- Line a plate or baking tray with tissue paper and keep it ready.
- Heat oil (or ghee or a mix of both) in a frypan on medium to medium low heat. Test the oil by dropping a small portion of the dough. It should sizzle right back up without quickly browning.
- Once the oil is hot, slide 1-2 karanji into the oil. Do not overcrowd.
- Fry one side and then flip when golden. Similarly, fry the other side too until golden and crisp. The karanji will puff while frying. If they start to brown, lower the heat.
- Drain using a slotted spatula and then transfer to the lined plate to drain excess oil.
- Crispy, flaky, sweet coconut Karanji is ready, enjoy them as dessert or snacks with your tea! Serve warm or room temperature. Cool completely and store airtight.

Nayana Shetti says
Perfectly shaped karanjis..perfect sweet snack on every occasion..!:)
Sailaja Angara says
really looks so tempting
Mina Joshi says
We call these ghughara!! Usually make them for Diwali. I love these but never got round to making them this year.
Kavi | Foodomania says
looks so beautiful Shweta! 🙂 Perfect Diwali snack!
Priya says
Prefect gujiyas, beautifully done.
Kathleen Richardson says
Hmm, I like the look and the smell of it. (Yes, I can imagine the smell!)
Swathi Iyer says
Karanji looks delicious and crispy. Love it.
Julie says
wow..very nicely done,love it too:)
Join my ongoing EP events-Asafoetida OR Fennel seeds @ Divya's Culinary Journey
Sireesha Puppala says
came out perfect:)
Grand Giveaway at sirisfood.com-Win exciting prizes
Priti S says
Looks so yum ...nicely done
PT says
gujiyas are my fav.. i like all kind of stuffings..
srividhya Ravikumar says
yummy looking karanji...
divya says
Looks so tempting and mouthwatering....